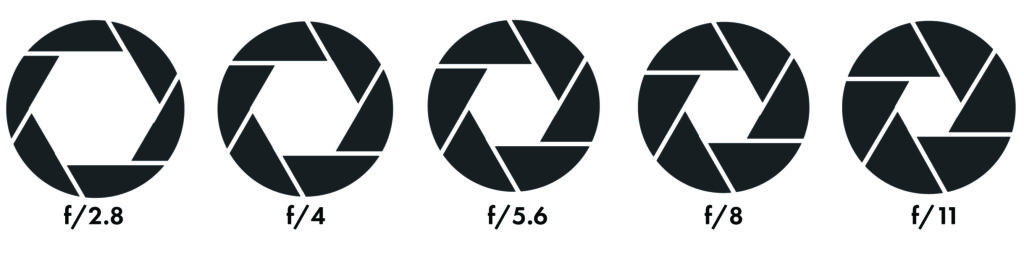
The f-stop scale is a sequence of numbers that represents the aperture settings of a camera lens. Aperture refers to the size of the opening in the lens that allows light to pass through to the camera sensor or film. The f-stop scale helps photographers control how much light enters the camera and also influences depth of field (how much of the image is in focus from front to back).
Understanding the f-stop numbers:
The f-stop values are written as f/n, where n is a number like 1.4, 2, 2.8, 4, 5.6, 8, 11, 16, 22, etc. These numbers represent the ratio of the lens’s focal length to the diameter of the aperture opening. Here’s a breakdown:
- Larger f-stop numbers (e.g., f/16, f/22):
- Smaller aperture opening.
- Less light enters the camera.
- Greater depth of field (more of the scene is in focus, good for landscapes).
- Smaller f-stop numbers (e.g., f/1.4, f/2.8):
- Larger aperture opening.
- More light enters the camera.
- Shallower depth of field (less of the scene is in focus, good for portraits or isolating a subject).
How the f-stop scale works:
Each step in the f-stop scale either doubles or halves the amount of light entering the camera. For example:
- Moving from f/2.8 to f/4 reduces the light by half (because the aperture is smaller).
- Moving from f/8 to f/5.6 doubles the light (because the aperture is larger).
Why it matters:
- Exposure: The f-stop is one part of the exposure triangle, along with shutter speed and ISO. Changing the f-stop affects the overall brightness of your image.
- Creative control: You can use the f-stop to achieve specific visual effects, like blurring the background in portraits or keeping everything sharp in a landscape.
A quick tip:
If you’re struggling to remember the sequence, here’s a simple guide:
- The scale progresses in powers of √2 (about 1.4), so each f-stop multiplies or divides the area of the aperture by 2.
- Common full stops are: f/1.4, f/2, f/2.8, f/4, f/5.6, f/8, f/11, f/16, f/22.
Interacting with the Exposure Triangle
Let’s dive into how the f-stop interacts with the exposure triangle, which includes aperture (f-stop), shutter speed, and ISO. Together, these settings control the brightness of an image (exposure) and influence its creative look.
- Aperture (f-stop)
- What it does:
- Controls the size of the lens opening, which determines how much light reaches the sensor.
- Affects depth of field (area in focus in front of and behind your subject).
- Interaction with the triangle:
- If you use a wide aperture (e.g., f/2.8), more light enters, so you might need a faster shutter speed or lower ISO to avoid overexposing the image.
- Conversely, a small aperture (e.g., f/16) lets in less light, so you may need a slower shutter speed or higher ISO to compensate.
- Shutter Speed
- What it does:
- Determines how long the camera’s sensor is exposed to light.
- Measured in seconds or fractions of a second (e.g., 1/1000, 1/250, 1/60, etc.).
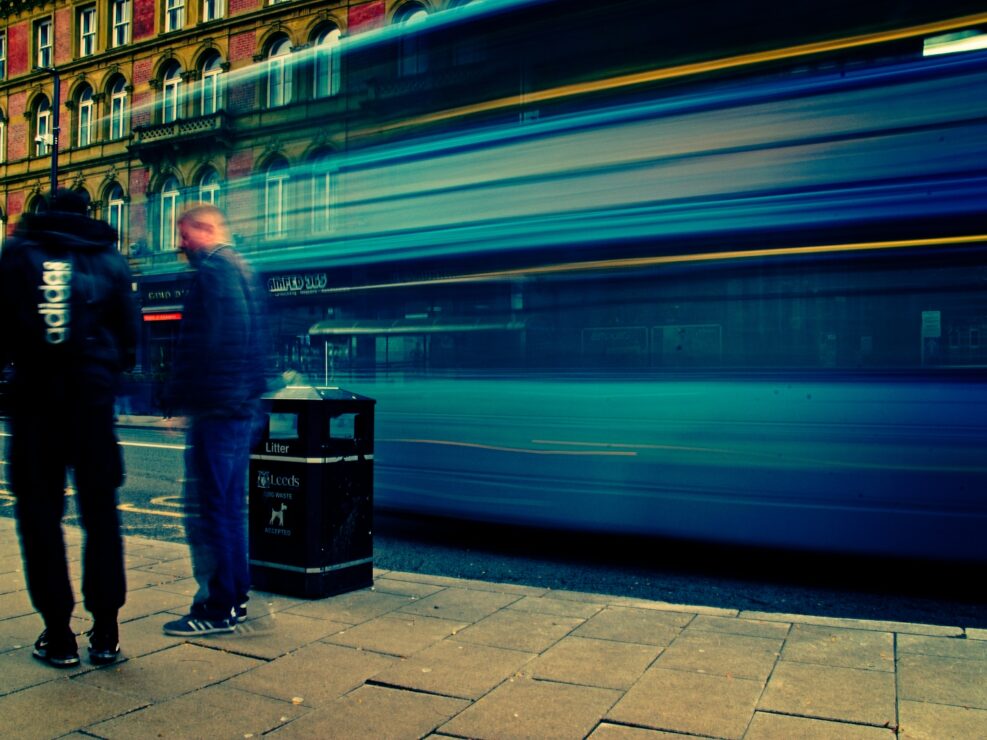
- Affects motion blur—faster shutter speeds freeze action, while slower speeds blur motion.
- Interaction with aperture:
- If you use a small f-stop number (wide aperture, e.g., f/2.8) and let in a lot of light, you’ll often need a fast shutter speed to avoid overexposure.
- If you use a large f-stop number (small aperture, e.g., f/16), you may need a slower shutter speed to let in enough light for proper exposure.
- ISO
- What it does:
- Determines how sensitive your camera’s sensor is to light.
- Low ISO (e.g., 100): Less sensitive to light, produces cleaner images with less noise.
- High ISO (e.g., 1600 or more): More sensitive to light, useful in low-light conditions but increases noise (graininess).
- Interaction with aperture:
- If you’re shooting with a small aperture (e.g., f/16) in dim light, you might need to increase ISO to achieve a good exposure without using an extremely slow shutter speed.
- Wide apertures (e.g., f/2.8) often allow you to use lower ISO settings, reducing noise.
Balancing the Triangle
Here’s how changes to one setting affect the others:
Scenario 1: Bright environment (e.g., sunny day)
- You might use:
- A smaller aperture (e.g., f/11) to avoid too much light.
- A faster shutter speed (e.g., 1/1000) to freeze motion.
- A low ISO (e.g., 100) to maintain image quality.
Scenario 2: Low light (e.g., indoors or at dusk)
- You might use:
- A wide aperture (e.g., f/2.8) to let in more light.
- A slower shutter speed (e.g., 1/60) to allow more light onto the sensor (but beware of motion blur).
- A higher ISO (e.g., 800 or 1600) to brighten the image, accepting some noise as a trade-off.
Creative Control
- Portraits: Use a wide aperture (e.g., f/1.8 or f/2.8) to isolate your subject with a blurry background (shallow depth of field).
- Landscapes: Use a small aperture (e.g., f/11 or f/16) to keep everything in focus, from foreground to background (deep depth of field).
- Action shots: Use a fast shutter speed (e.g., 1/1000) to freeze movement, paired with a wider aperture if light is limited.
- Night photography: Use a slower shutter speed (e.g., 10 seconds), a wide aperture (e.g., f/2.8), and possibly a tripod to stabilize the camera.
Putting it All Together
Let’s say you want to take a portrait with a blurry background:
- Set aperture first: Choose a wide aperture, e.g., f/2.8.
- Adjust shutter speed: Use a fast enough speed to avoid motion blur but still expose the subject properly (e.g., 1/200).
- Adjust ISO if needed: If the image is too dark, raise the ISO to brighten it (e.g., ISO 400 or 800).
Would you like specific examples, or maybe tips for practicing with these settings?
Example Using the Exposure Scale
Here are some specific examples and practice tips to help you understand how to balance the exposure triangle while taking creative control of your photos.
Example Scenarios
- Portrait with a Blurry Background (Shallow Depth of Field)
- Goal: Isolate the subject with a blurry background.
- Settings:
- Aperture (f-stop): Set to a wide aperture like f/1.8 or f/2.8.
- Shutter Speed: Adjust to around 1/200 or faster to avoid motion blur.
- ISO: Start with a low ISO (100-400) for better image quality. If it’s too dark, increase ISO.
- Why it works: A wide aperture creates a shallow depth of field, making the subject pop while blurring the background.
- Landscape with Everything in Focus (Deep Depth of Field)
- Goal: Capture a sharp foreground and background.
- Settings:
- Aperture (f-stop): Set to a small aperture like f/11 or f/16.
- Shutter Speed: Use a slower speed like 1/30 or even longer if on a tripod.
- ISO: Keep ISO low (e.g., 100) to maintain quality.
- Why it works: A small aperture increases depth of field, ensuring the entire scene is in focus. A tripod is helpful for longer exposures to avoid blur.
- Action Shot (Freezing Motion)
- Goal: Freeze a fast-moving subject (e.g., sports or wildlife).
- Settings:
- Aperture (f-stop): Use a moderately wide aperture like f/4 or f/5.6 to let in more light.
- Shutter Speed: Set a fast speed, e.g., 1/1000 or faster.
- ISO: Increase ISO if needed to maintain brightness (e.g., ISO 800 or higher).
- Why it works: A fast shutter speed prevents motion blur, while a moderate aperture and higher ISO ensure enough light.
- Night Photography (Low Light)
- Goal: Capture a bright image without using flash.
- Settings:
- Aperture (f-stop): Use a wide aperture like f/2.8.
- Shutter Speed: Use a long exposure, e.g., 10-30 seconds (requires a tripod).
- ISO: Start with ISO 800 and increase only if necessary to minimize noise.
- Why it works: A wide aperture and long shutter speed maximize light, while a tripod keeps the camera steady during the long exposure.
Tips for Practicing the Exposure Triangle
- Start in Aperture Priority Mode:
- Set your camera to Aperture Priority (A or Av) mode.
- Adjust the aperture, and the camera will automatically set the shutter speed.
- Practice with different f-stops to observe how they affect light and depth of field.
- Experiment with Manual Mode:
- In Manual (M) mode, choose a starting aperture, shutter speed, and ISO, then adjust based on your results.
- Example practice settings:
- Bright Day: Start with f/8, 1/250, ISO 100.
- Low Light Indoors: Start with f/2.8, 1/60, ISO 800.
- Use Exposure Compensation (+/-):
- If your image looks too dark or bright in semi-automatic modes, use the exposure compensation dial to adjust.
- Shoot the Same Scene with Different Settings:
- Pick a subject (e.g., a flower, building, or person).
- Shoot it with multiple aperture settings (e.g., f/2.8, f/8, f/16).
- Compare how depth of field and brightness change.
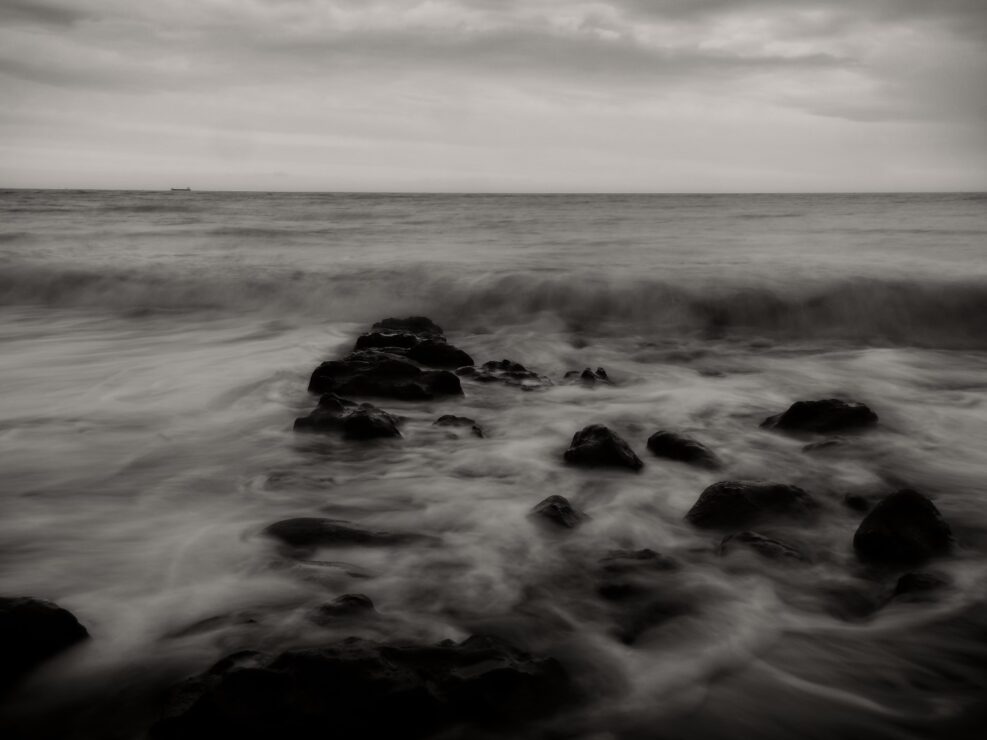
- Play with Motion:
- Photograph moving water (e.g., a waterfall or fountain).
- Use a fast shutter speed (e.g., 1/1000) to freeze the water.
- Use a slow shutter speed (e.g., 1 second) to create a silky effect. Use a tripod for slower speeds.
- Low-Light Challenge:
- Try shooting indoors or at night without a flash.
- Practice balancing wide apertures, higher ISOs, and slower shutter speeds to get a well-exposed shot.
Apps and Tools to Help
- Photography Cheat Sheets: Download printable guides or apps like “PhotoPills” or “Exposure Calculator” for on-the-go help.
- Histogram Use: Enable the histogram on your camera to check exposure. Aim for an even spread, avoiding peaks on the far left (underexposed) or far right (overexposed).