Here’s a short video courtesy of PhotoPills with the best ‘sky’ and ‘astro’ elements to photograph in June 2024.
Here’s a short video courtesy of PhotoPills with the best ‘sky’ and ‘astro’ elements to photograph in June 2024.
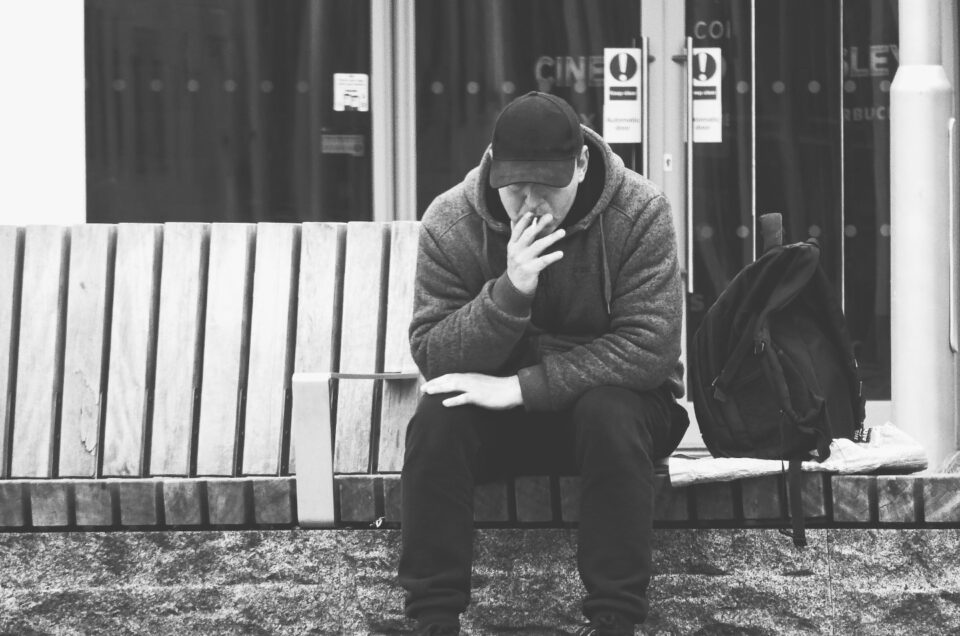
Street photography is an exciting and dynamic genre that captures candid moments in public spaces. It requires a blend of technical skill, creativity, and the right equipment to capture those fleeting instances of human life. While the photographer’s eye and approach are paramount, having the right gear can significantly enhance your ability to capture compelling images. Here’s an extensive guide on the essential gear for street photography.
1. Cameras
a. Compact Cameras
Compact cameras are a favorite among street photographers due to their small size and inconspicuous nature. They are easy to carry, quick to deploy, and less intimidating to subjects.
b. Mirrorless Cameras
Mirrorless cameras strike a balance between performance and portability. They offer interchangeable lenses and advanced features while remaining relatively compact.
Rangefinders offer a different shooting experience with their unique focusing mechanism. They are often preferred for their compact size and unobtrusive nature.
2. Lenses
Choosing the right lens is crucial for street photography. Generally, prime lenses are preferred for their compact size, speed, and superior image quality. Here are some popular focal lengths and why they are favored:
a. 35mm
The 35mm lens is considered a classic choice for street photography. It offers a natural perspective that closely mimics human vision.
b. 50mm
The 50mm lens provides a tighter field of view, allowing for more selective compositions and a more intimate feel.
c. 28mm
A 28mm lens offers a wider field of view, allowing you to capture more of the scene without stepping back.
3. Accessories
a. Bags
A good camera bag is essential for carrying your gear comfortably and securely.
b. Straps
A comfortable and secure strap can make a significant difference, especially during long shooting sessions.
c. Extra Batteries and Memory Cards
Running out of power or storage space can be frustrating. Always carry extra batteries and memory cards.
d. Lens Cleaning Kits
Dust and smudges on your lens can ruin your shots. Keep a cleaning kit handy.
4. Clothing and Footwear
Comfortable clothing and footwear are crucial for street photographers who spend long hours walking and standing.
a. Clothing
Dress comfortably and appropriately for the weather. Consider layers that you can add or remove as needed.
b. Footwear
Invest in good shoes that provide support and comfort for long periods of walking.
5. Ethics and Legal Considerations
While not gear per se, understanding the ethics and legalities of street photography is crucial.
a. Ethics
Respect the privacy and dignity of your subjects. Be mindful of how your presence and actions might affect them.
b. Legalities
Laws regarding photography in public spaces vary by country and region. Familiarize yourself with local regulations.
6. Techniques and Tips
a. Zone Focusing
Pre-focus your lens to a specific distance (the “zone”) and use a small aperture to ensure a wide depth of field. This allows you to capture spontaneous moments without worrying about autofocus.
b. Shooting from the Hip
This technique involves shooting without looking through the viewfinder, allowing for more candid and less intrusive shots. It requires practice to get the framing right.
c. Lighting
Street photography often relies on natural light. Learn to use different lighting conditions to your advantage.
7. Post-Processing
While street photography often strives to capture the essence of a moment, post-processing can enhance your images and help convey your vision.
a. Software
Invest in good editing software to fine-tune your images.
b. Editing Tips
8. Backup and Storage
Keeping your photos safe is crucial. Here are some tips for backing up and storing your images.
a. External Hard Drives
Use reliable external drives to store your photos.
b. Cloud Storage
Cloud services provide an additional layer of security and convenience.
9. Inspiration and Continuous Learning
a. Books
Reading books by renowned street photographers can provide inspiration and insight.
b. Online Resources
There are numerous online resources to help you learn and improve your street photography skills.
c. Street Photography Communities
Joining communities can provide support, feedback, and inspiration.
10. Developing Your Style
Street photography is not just about the gear; it’s about developing your unique style and voice.
a. Consistency
Stick to a certain style or theme to create a coherent body of work. This could be in terms of subject matter, color palette, or composition style.
b. Experimentation
Don’t be afraid to experiment with different techniques, angles, and approaches. Sometimes, breaking the rules can lead to unexpected and striking results.
c. Patience and Persistence
Street photography often involves waiting for the perfect moment. Be patient and keep shooting. The more you practice, the better your timing and intuition will become.
Conclusion
Street photography is a captivating and challenging genre that offers endless opportunities to document the world around us. While having the right gear can enhance your ability to capture compelling images, it’s ultimately your vision, creativity, and approach that will make your photographs stand out. Equip yourself with a camera and lenses that suit your style, dress comfortably, respect the people you photograph, and continuously seek inspiration and knowledge. With dedication and practice, you can capture the extraordinary within the ordinary and tell powerful stories through your images.
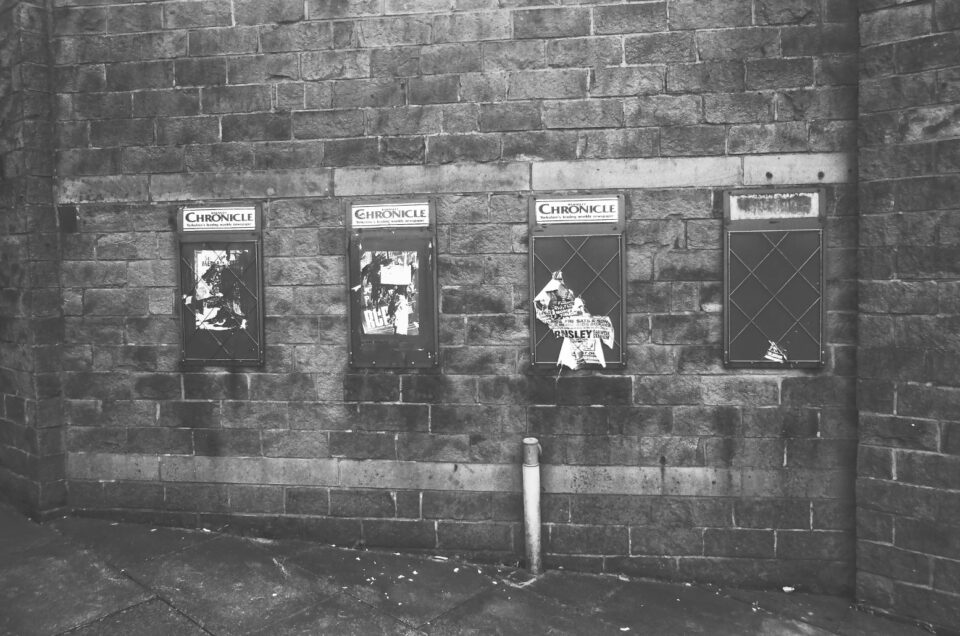
Street photography is an art form that captures candid moments of daily life in public spaces. It’s a genre that thrives on spontaneity, observation, and the ability to recognize and seize fleeting moments that often go unnoticed by the casual observer. At its core, street photography aims to document the human experience within the context of the urban environment, offering a glimpse into the diverse tapestry of life that unfolds on the streets.
Defining street photography can be tricky and multi-dimensional, as it encompasses a wide range of styles, approaches, and interpretations. However, several key elements help to delineate this genre from others within the realm of photography.
First and foremost, street photography is characterized by its unobtrusive nature. Its output should appear to be observational, as if the viewer of the image is viewing the scene in reality without any impact on the people or place.
Unlike traditional portrait or studio photography, where subjects are often posed and aware of the camera’s presence, street photographers seek to blend into their surroundings, becoming invisible observers of everyday life. This approach allows them to capture authentic moments and genuine expressions without disrupting the natural flow of events.
Another defining feature of street photography is its focus on the urban landscape. Whether capturing bustling city streets, quiet alleyways, or vibrant marketplaces, street photographers are drawn to the energy and diversity found in urban environments. Through their lens, they explore the interactions between people and their surroundings, highlighting the juxtapositions, contrasts, and serendipitous encounters that occur within the bustling metropolis.
Furthermore, street photography is characterized by its emphasis on storytelling. Each image serves as a visual narrative, offering viewers a glimpse into a specific moment in time. Whether conveying a sense of joy, sorrow, humor, or intrigue, street photographs have the power to evoke a wide range of emotions and spark meaningful connections with viewers.
In addition to its documentary aspects, street photography is also a form of artistic expression. Photographers often employ creative techniques such as composition, framing, and lighting to imbue their images with a distinct aesthetic quality. From stark black and white compositions to vibrant color palettes, the visual language of street photography is as diverse as the cities it seeks to portray.
It’s important to note that street photography is not limited to the traditional definition of “the street” as a physical space. While urban environments are a common setting, street photographers can also capture compelling images in rural areas, suburban neighborhoods, and even indoor spaces such as train stations, cafes, and shopping malls. What unites these disparate settings is the photographer’s ability to observe and interpret the world around them in a unique and compelling way.
The rise of digital technology has expanded the possibilities of street photography, allowing photographers to instantly review and share their images with a global audience. Platforms such as Instagram, Flickr, and Tumblr have become virtual galleries where photographers can showcase their work and connect with fellow enthusiasts from around the world.
Despite its broad appeal and accessibility, street photography is not without its challenges. Photographers must navigate ethical considerations surrounding issues of privacy, consent, and representation, particularly when photographing strangers in public spaces. Additionally, they must contend with technical constraints such as lighting conditions, weather, and the unpredictable nature of street life.
In summary, street photography is a dynamic and multifaceted genre that celebrates the beauty, complexity, and diversity of human and urban life. By capturing candid moments of humanity in all its forms, street photographers offer viewers a window into the world around them, inviting them to see the extraordinary in the ordinary and find beauty in the everyday.
This hyperlapse was taken using my DSLR – a Nikon D7100 and to ensure stability and consistency of shots, etc. was mounted on a tripod. I used an external remote to time each shot and control the overall number of shots for the length of video I wanted.
There’s nothing that exciting about this video clip – no big reveals, no UFOs flashing across the sky or anything like that. What I was trying to capture was a simple scene from home (this is from the dormer window in my attic) and show the graceful movement of the clouds on a reasonably well lit day over a long period of time. Hopefully I managed that.
When I came to working out how many shots I needed, I was working on the following:
This clip is 4 mins and 24 seconds long so the actual number of images =
There was 3 seconds between each frame which makes the elapsed time something like 5 1/2 hours condensed into those 4 1/2 minutes (or thereabouts) if my maths is correct.
Definition: a mesmerizing fusion of time, motion, and creativity that transports viewers into a dynamic journey through space.
Hyperlapse photography, sometimes referred to as moving timelapse, is an advanced technique that involves capturing a series of still images over an extended period while simultaneously moving the camera between shots. The result is a seamless, accelerated video sequence that compresses time and showcases fluid motion through a scene. Unlike traditional timelapse, where the camera remains stationary, hyperlapse adds an additional layer of complexity by introducing movement, thereby enhancing the sense of dynamism and immersion.
The origins of hyperlapse photography can be traced back to the early experiments of artists and photographers who sought to push the boundaries of traditional timelapse techniques. One of the earliest documented examples dates back to the mid-20th century when filmmaker and photographer Jacques-Henri Lartigue pioneered a form of “walking picture” in which he captured sequential images while moving through a scene. These early experiments laid the groundwork for the development of hyperlapse as we know it today.
In recent years, advances in technology have democratized hyperlapse photography, making it accessible to enthusiasts and professionals alike. Modern digital cameras, equipped with high-resolution sensors and advanced stabilization features, empower photographers to capture stunning hyperlapse sequences with ease. Additionally, the proliferation of smartphone apps and software solutions has simplified the process of creating hyperlapse videos, allowing users to achieve professional-looking results with minimal effort.
The key to creating compelling hyperlapse sequences lies in mastering the art of motion control and timing. Unlike traditional video recording, where smooth movement is achieved through continuous panning or tracking shots, hyperlapse requires meticulous planning and precision. Photographers must carefully plot their route through the scene, taking into account factors such as distance, speed, and composition. By strategically adjusting the camera position between each frame, they can create a seamless illusion of motion that captivates the viewer’s imagination.
While hyperlapse photography can be technically challenging, the rewards are well worth the effort. The ability to compress time and space allows photographers to reveal the hidden rhythms and patterns of the world around them, transforming mundane landscapes into mesmerizing tapestries of movement and light. From bustling city streets to tranquil natural vistas, hyperlapse opens up a world of creative possibilities, inviting viewers to experience familiar surroundings in a new and exhilarating way.
To achieve stunning hyperlapse sequences, photographers often employ a variety of specialized equipment and techniques. Motorized gimbal stabilizers, such as the DJI Ronin or Zhiyun Crane, provide smooth and steady camera movement, ensuring that each frame aligns perfectly with the next. Additionally, intervalometers and remote triggers enable precise control over exposure and timing, allowing photographers to capture the perfect shot in any lighting conditions.
In addition to technical proficiency, successful hyperlapse photography requires a keen eye for composition and storytelling. By carefully selecting their vantage points and framing their shots with intention, photographers can guide viewers on a visual journey through space and time. Whether highlighting the architectural marvels of a bustling metropolis or capturing the fleeting beauty of a natural landscape, hyperlapse offers endless opportunities for creative expression and experimentation.
One of the most fascinating aspects of hyperlapse photography is its ability to reveal the hidden choreography of everyday life. By condensing hours, days, or even weeks of real-time footage into a matter of seconds, hyperlapse allows us to perceive the world in a new and unexpected light. Whether capturing the frenetic energy of a busy intersection or the serene tranquility of a sunrise, hyperlapse invites us to pause, reflect, and appreciate the fleeting moments that shape our lives.
In conclusion, hyperlapse photography is a captivating artistic medium that combines technical precision with creative vision to produce breathtaking visual experiences. From its humble beginnings as a niche experimental technique to its current status as a mainstream art form, hyperlapse continues to inspire and enchant audiences around the world. Whether you’re an aspiring photographer looking to push the boundaries of your craft or simply a curious observer seeking to explore new perspectives, hyperlapse offers a limitless canvas for expression and discovery.
Drone hyperlapse photography can be both exhilarating and challenging. Hyperlapse photography, in general, involves capturing a series of still images or video frames over a long period while moving the camera slightly between each shot. When done with a drone, it adds an extra layer of complexity but also opens up incredible creative possibilities.
Here are some factors that contribute to the difficulty of drone hyperlapse photography:
Despite the challenges, drone hyperlapse photography offers stunning perspectives and the opportunity to capture breathtaking scenery like never before. With practice, patience, and attention to detail, you can master the art of drone hyperlapse photography and create truly mesmerizing visuals.
Almost every modern DSLR camera and lens will have an auto focus mode which allows you to half press the shutter button to allow the camera to select the focus itself. How much of the image is in pin-sharp focus is up to you depending on a number of settings and other factors (like using a tripod).
When you half press the shutter button you will hear the motor in the lens shifting backwards / forwards as it seeks out that sweet point to give the best focus on the chosen part of the image. What the camera actually puts into focus in the final image is under your control even with auto-focus selected.
Your camera should have something like the following modes for focus:
Many cameras will also have a combination of the number of points of focus they use to determine the perfect focus for an image. This is known as SINGLE POINT (one point, normally the centre of the image) or MULTI-POINT (many points arranged in a pattern across the image). See the image below as an illustration:
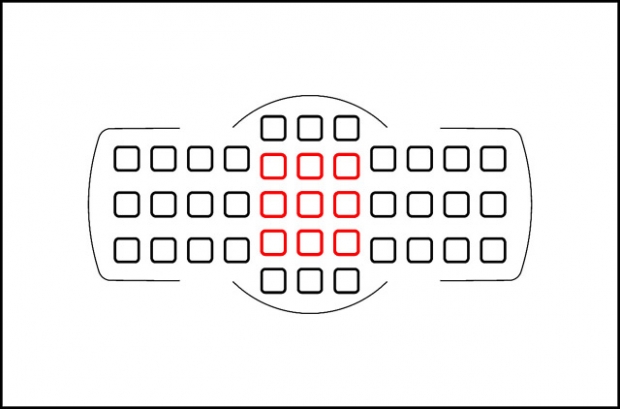
You can see here that there are many points of focus available but the camera is in SINGLE point mode as only the middle focal point is active, indicated by it turning red. As you press the shutter button half-way to lock in the focus and exposure, etc. the set number of focal points will light up (normally red) to show they are active.
When there are this many possible focal points available there is normally a varying number of points that can be set from SINGLE to all of them and a number of combinations in between.
As an advanced technique some photographs will benefit from the focal point not being at the centre of the image. This can be achieved by putting the main element in the centre of the image, pressing the shutter button half-way to lock in the focus (with a SINGLE point of focus) and then reframing the image before pressing the shutter button all the way to capture the image.
Autofocus is great and makes a brilliant job of finding the right level of focus for the chosen focal points. However, it does have its restrictions:
The alternative to AUTO FOCUS (AF) is MANUAL FOCUS (MF) where you have complete control over the focus of the image. This is achieved by twisting a slider control around the lens and by looking through the viewfinder you can see when the image comes into focus. There is often also a visual indicator of when the camera judges the images focal point to be in clear focus, normally shown as a circle that lights up when in focus.
However, sometimes a perfectly focussed image is not the intention! Consider the following image:
This night time street scene was deliberately taken out of focus to capture dots and circles of light. The subjects here are either street lights or car headlights and you can just about make out the edges of the road and a couple of the vehicles.
I have all sorts of gear and accessories that I have collected over the years along with allsorts of useful bits and pieces in my camera back. Browsing Amazon and other camera websites, spotting stuff in sales, seeing what other photographers use and recommend has resulted in all manner of things I have tried – some I use all the time whereas others I bring out when I have a particular idea or need or am taking a particular type of picture. In fact, I’ve just downsized my camera bag as I was carrying too much around with me all the time and moved most of my gear to another carry box that’s also easy to throw into the car boot when I go out and about.
In my camera bag now I just keep the essentials:
And that’s about it! I have deliberately cut that down to the absolute essentials to make sure that I am focussed and don’t spend too much time overthinking what I else I could be using and I’m certainly no longer carrying gear around for the sake of it. Often now this makes me think about what I’m intending to go out and shoot and it makes me plan better. There are times when I get out and find I’ve left something at home but that’s where the ‘spare box’ comes in:
My next most important stuff is kept in a big plastic container that, having said that above, tends to find its way into the car most times! There is all manner of things in there:
At some point or another all of this comes in handy and gear comes / goes into this box over time.
The next element that can control the exposure of an image is SHUTTER SPEED. This is an easy one – it means how fast or slow the shutter in the camera opens and closes again and is a measure of time – seconds, fractions of seconds or sometimes minutes when taking some pictures at night and for astrophotography (forget that for now!).
Light enters the camera lens, comes down the tube of the lens, through the aperture (big or small hole depending on the aperture setting) and then the shutter has to open / close again to expose the camera sensor to the light to form the image. Think of the shutter as a curtain or a set of blinds over the sensor that has to be opened for a specified period of time to get the image (light) to the sensor to record it on your memory card.
Some images don’t need a long time – fractions of a second – to capture enough light to record the image, for example a stationary object during the day; a small amount of light is needed with a quick shutter speed. Others might need several seconds or longer – images taken at night, especially those that capture movement (day or night); lots of light is needed with a longer shutter speed.
Controlling how fast or slow that shutter opens / closes is the shutter speed. On the display of your camera you would see seconds noted as 1″ (1 second), 5″ (5 seconds), etc. Fractions of a second are shown as fractions – 1/2 is half a second, 1/125 is a hundred and twenty fifth of a second, etc. You get the idea.
Easy.
Let’s link this to the aperture though … think of that aperture hole in the lens – if the aperture is wide (small f-stop) it will let in loads of light anyway so you can have a faster shutter speed. But, there is a correlation between the two settings. You can adjust the aperture and the shutter speed in conjunction to achieve the same exposure with different settings…open the aperture and speed up the shutter speed to get the same exposure.
Now, let’s add a third setting into the mix…
When most people purchase their first DSLR camera they may feel overwhelmed with all the buttons, dials and settings so most will start on the AUTO mode – and there is absolutely nothing wrong with that. I still use it – sometimes I want to see what settings the camera will use for an image. Other times something might be happening really fast and I want to make sure I capture a half decent image before the moment passes. This stops me messing up and losing the opportunity for ever.
I might say that this way, effects that are created using other modes might possibly be created afterwards using software such as LIGHTROOM, LUMINAR or PHOTOSHOP… but I’ll never admit it …
With this mode the camera takes care of everything. All you have to do is point and press – well press half-way to allow the camera to focus and then all the way to take the image. The image below was captured on full AUTO mode (camera derived settings shown underneath:
Aperture and shutter speed are calculated and depending on the focus mode the camera will work out some depth of field details.
With PROGRAMMED AUTO (P) mode the camera will work in exactly the same manner and choose (what it thinks is) the best aperture and shutter settings. However, different combinations of these can be selected to give a different effect to the final image – alter the depth of field for example and all combinations will produce the same exposure.
Select Date & Time
Your Reservation
Location
{location_name}Clients
Photographer
{employee_name}Price
{reservation_price}Total: €0