I’ve been struggling with a block recently, constantly turning from one direction to another, not knowing what I wanted to do, photograph, learn or research. I’ve got my website to a good place (finally!) so its time to push on and build on that solid base.
But, where do I go next and what should I learn?
I’ve got a stack of photography books waiting for me to read but I’ve been picking them up, casually leafing through the pages and putting them down again. There’s loads I want to dig deeper on, loads of eMails I’ve received from subscriber lists I’m on but everything is building up. I’ve spent a couple of weeks not really getting anywhere…
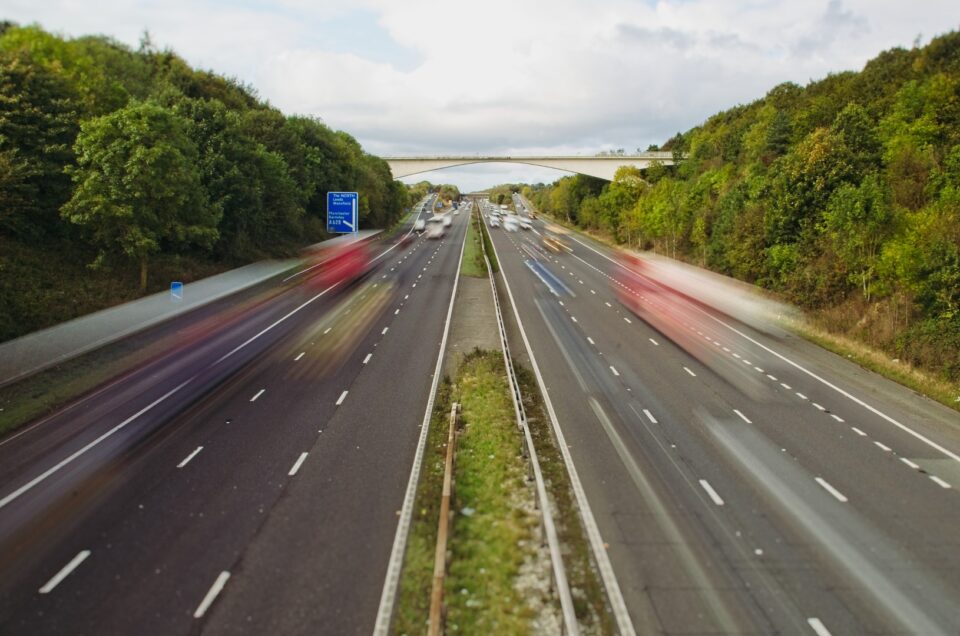
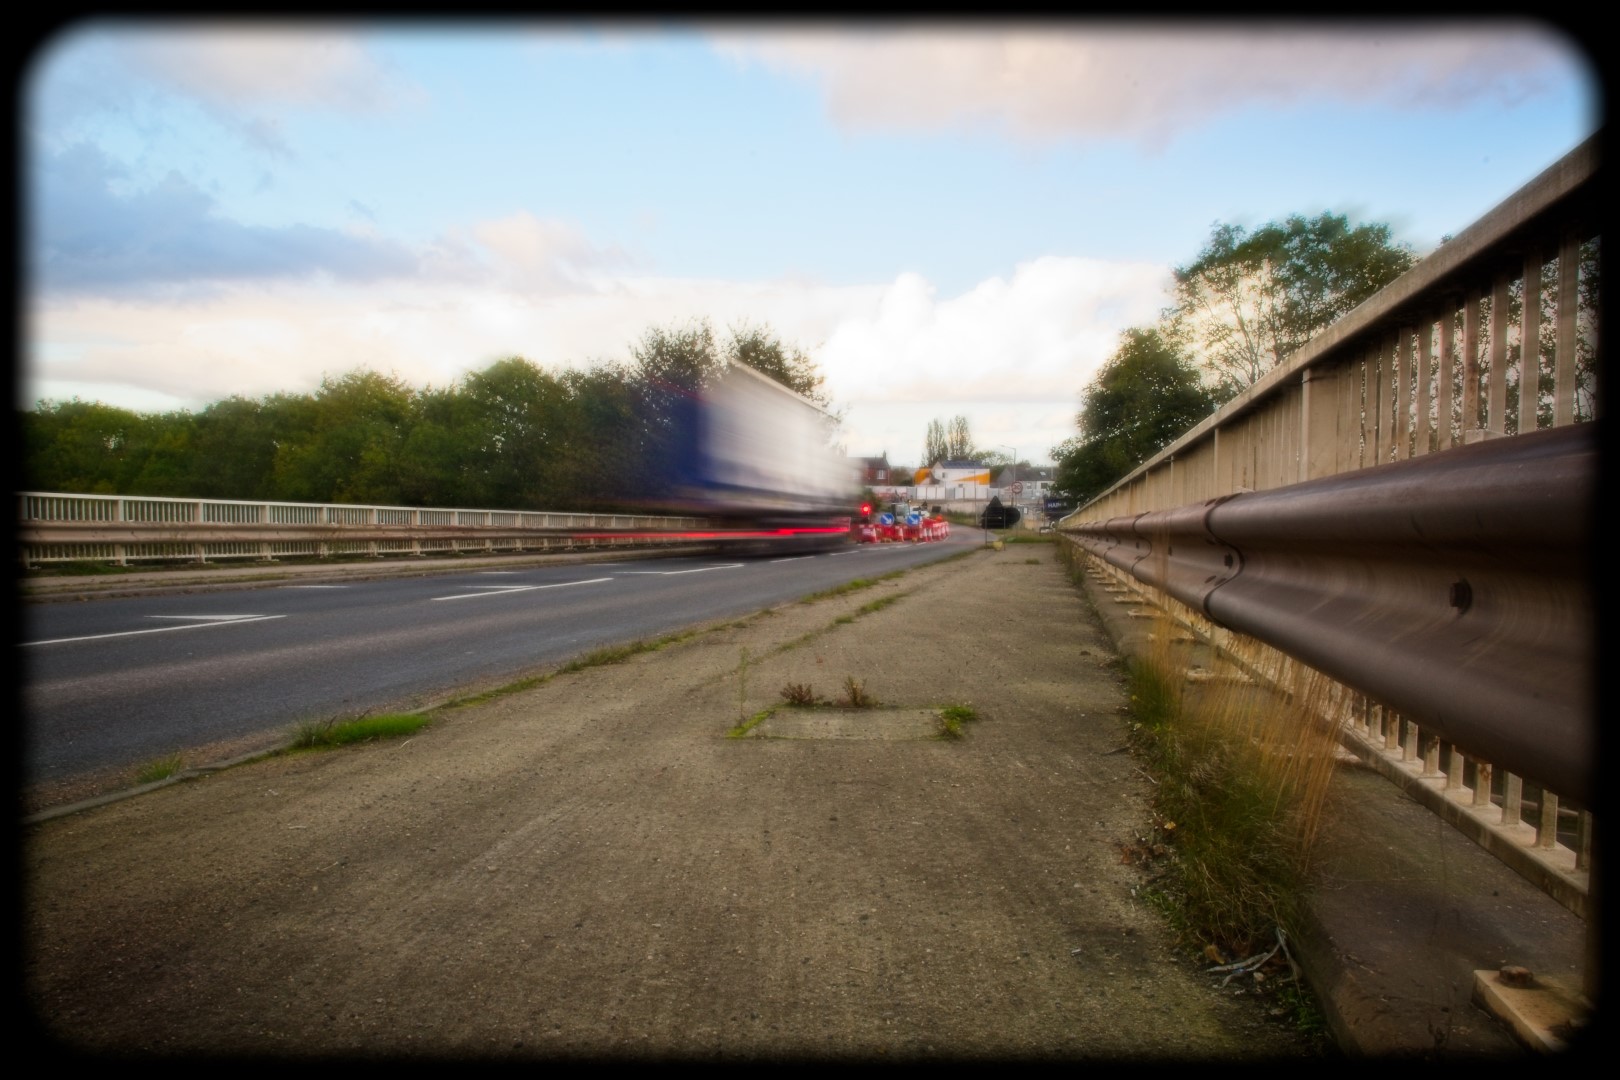
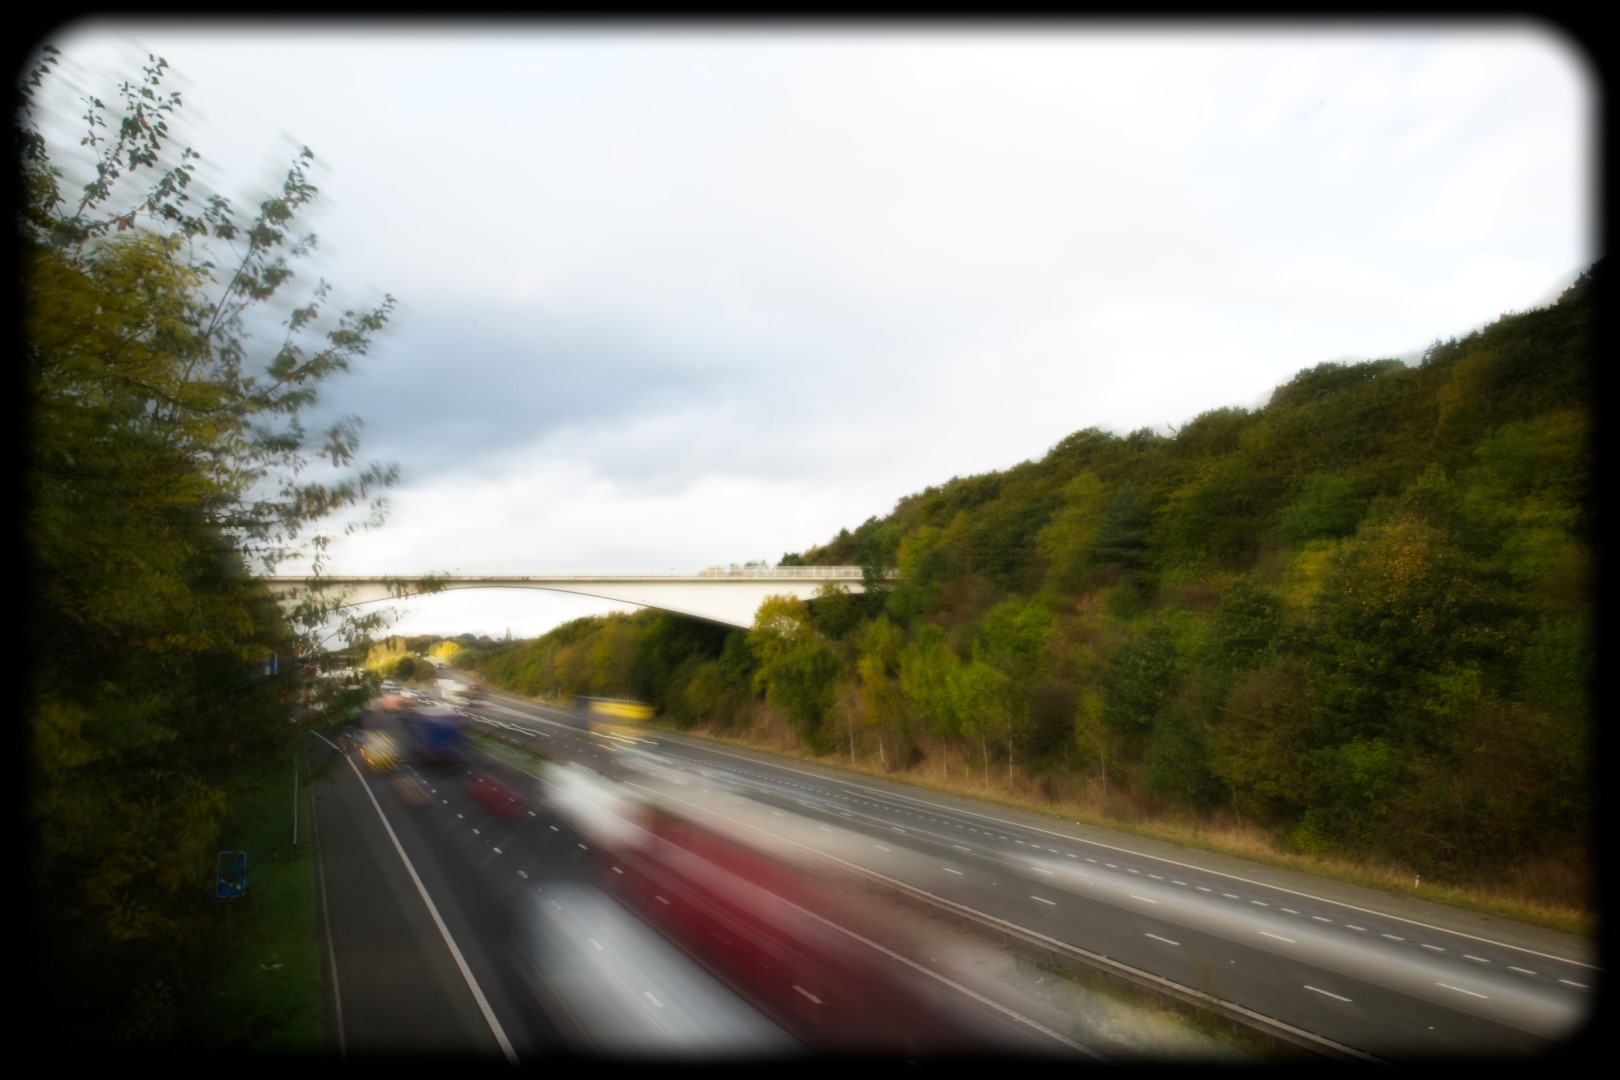
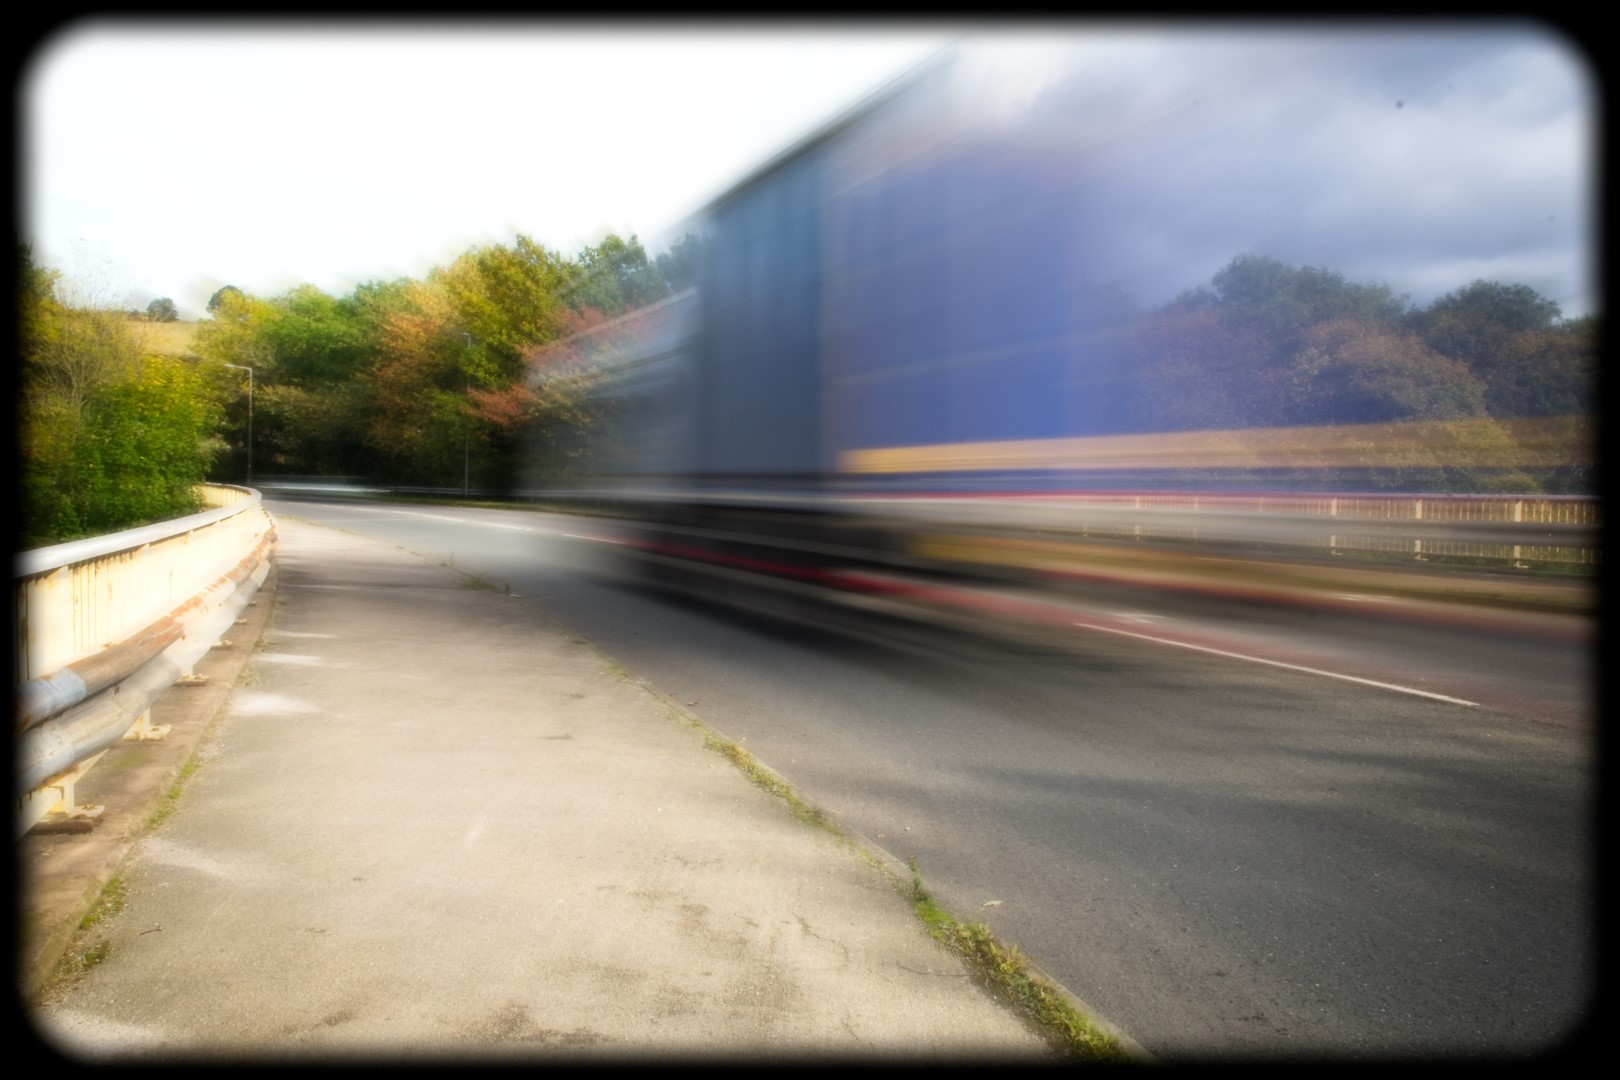
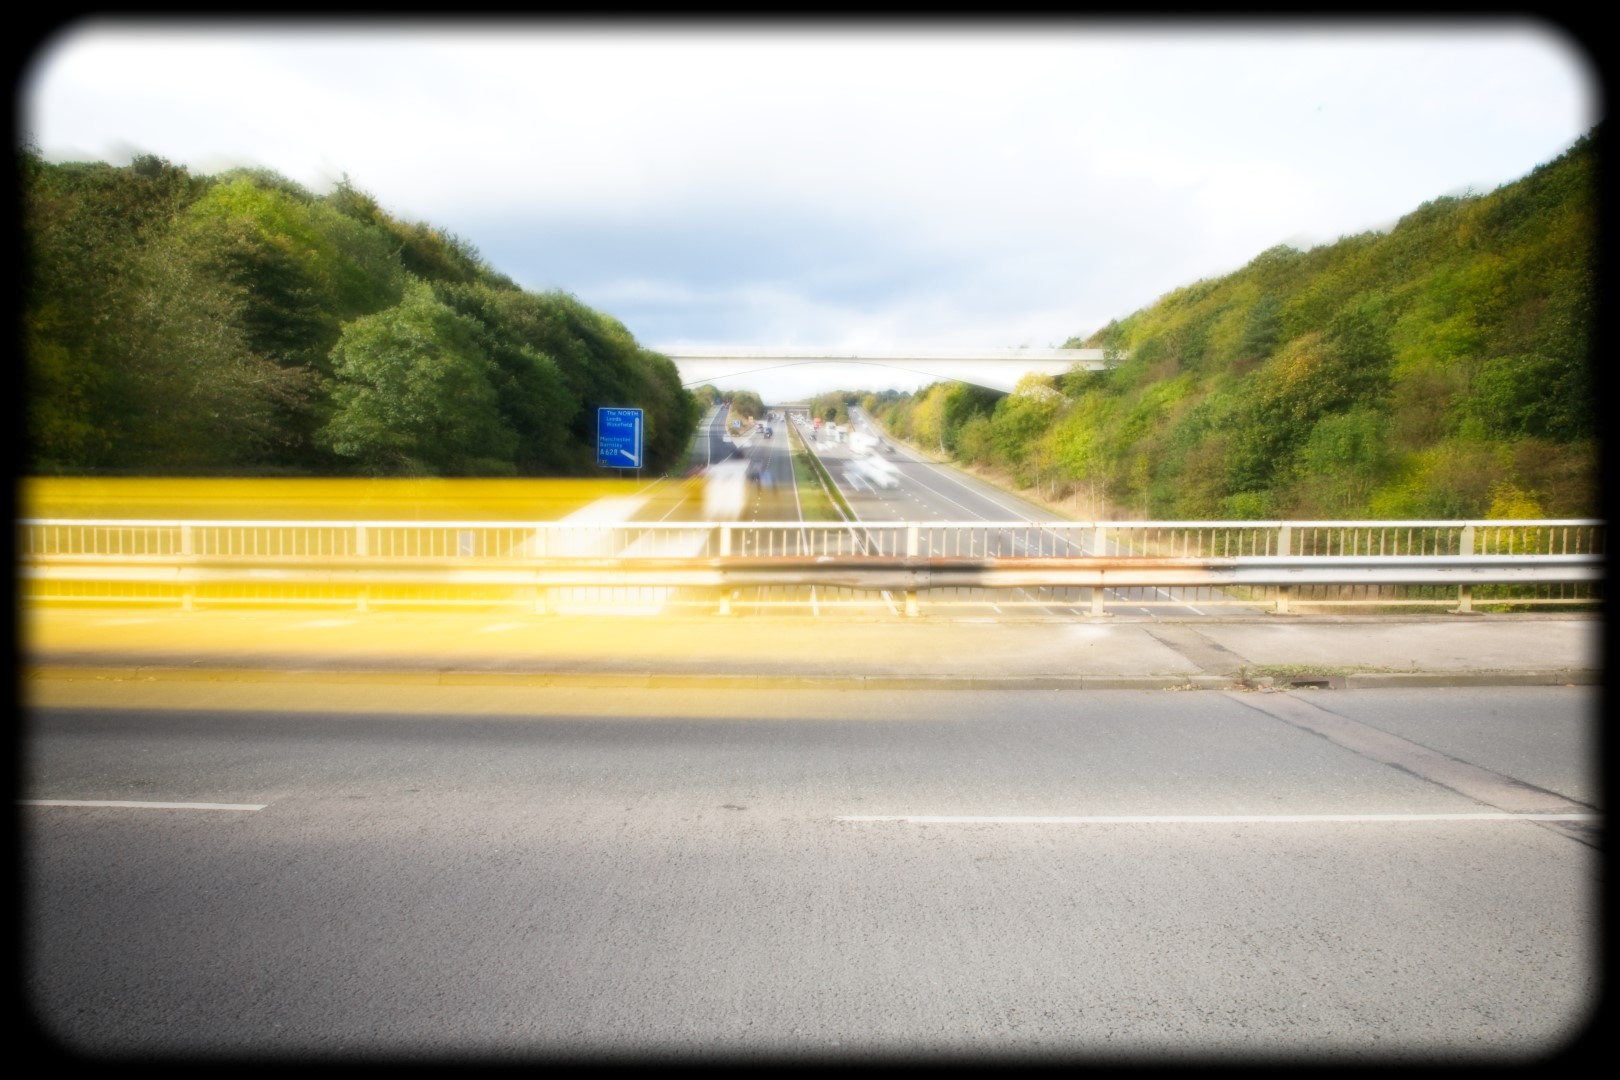
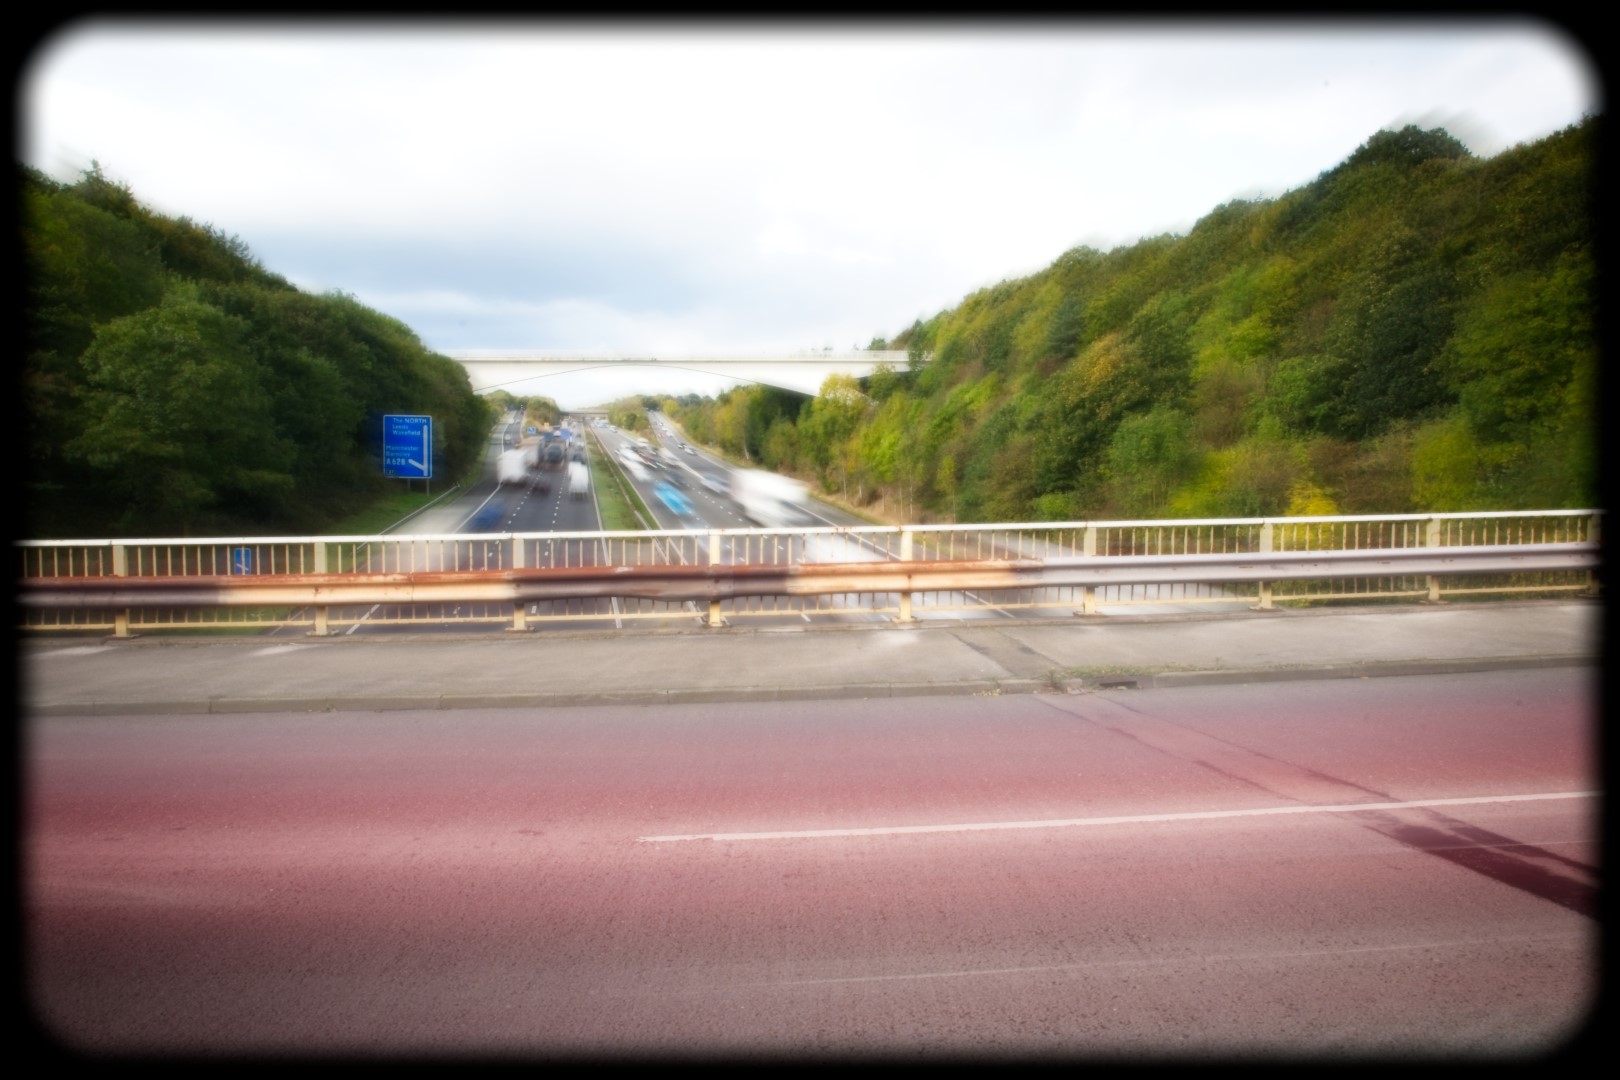
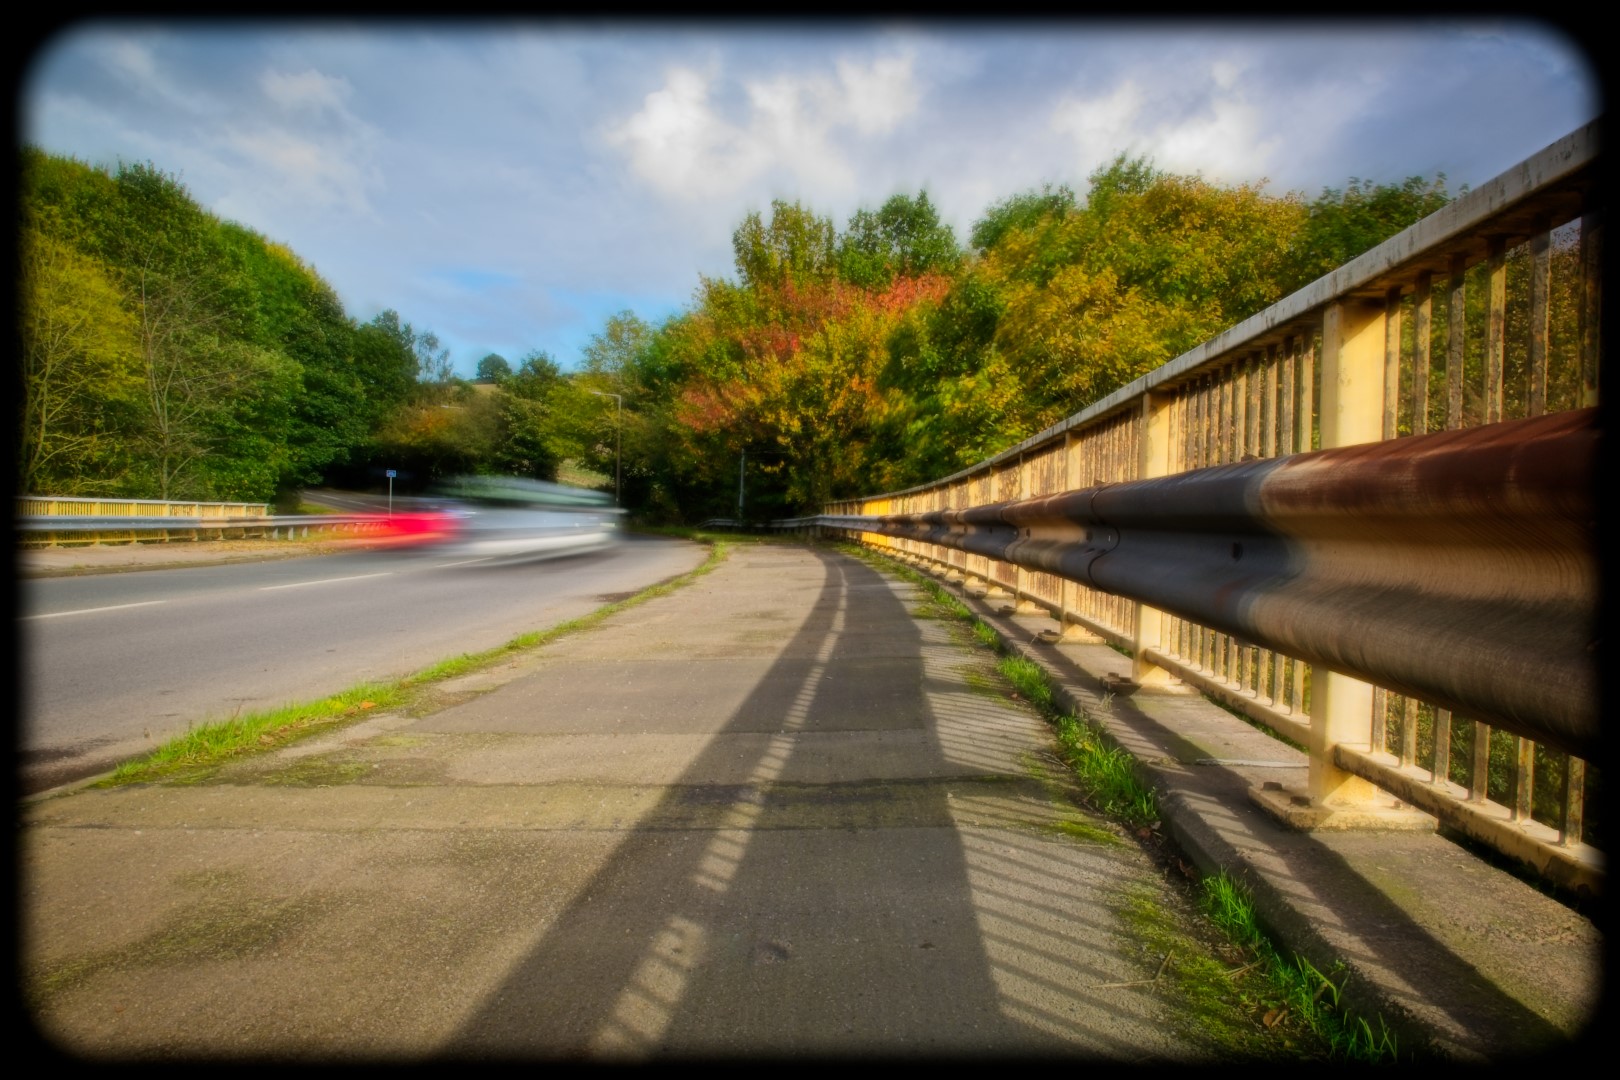
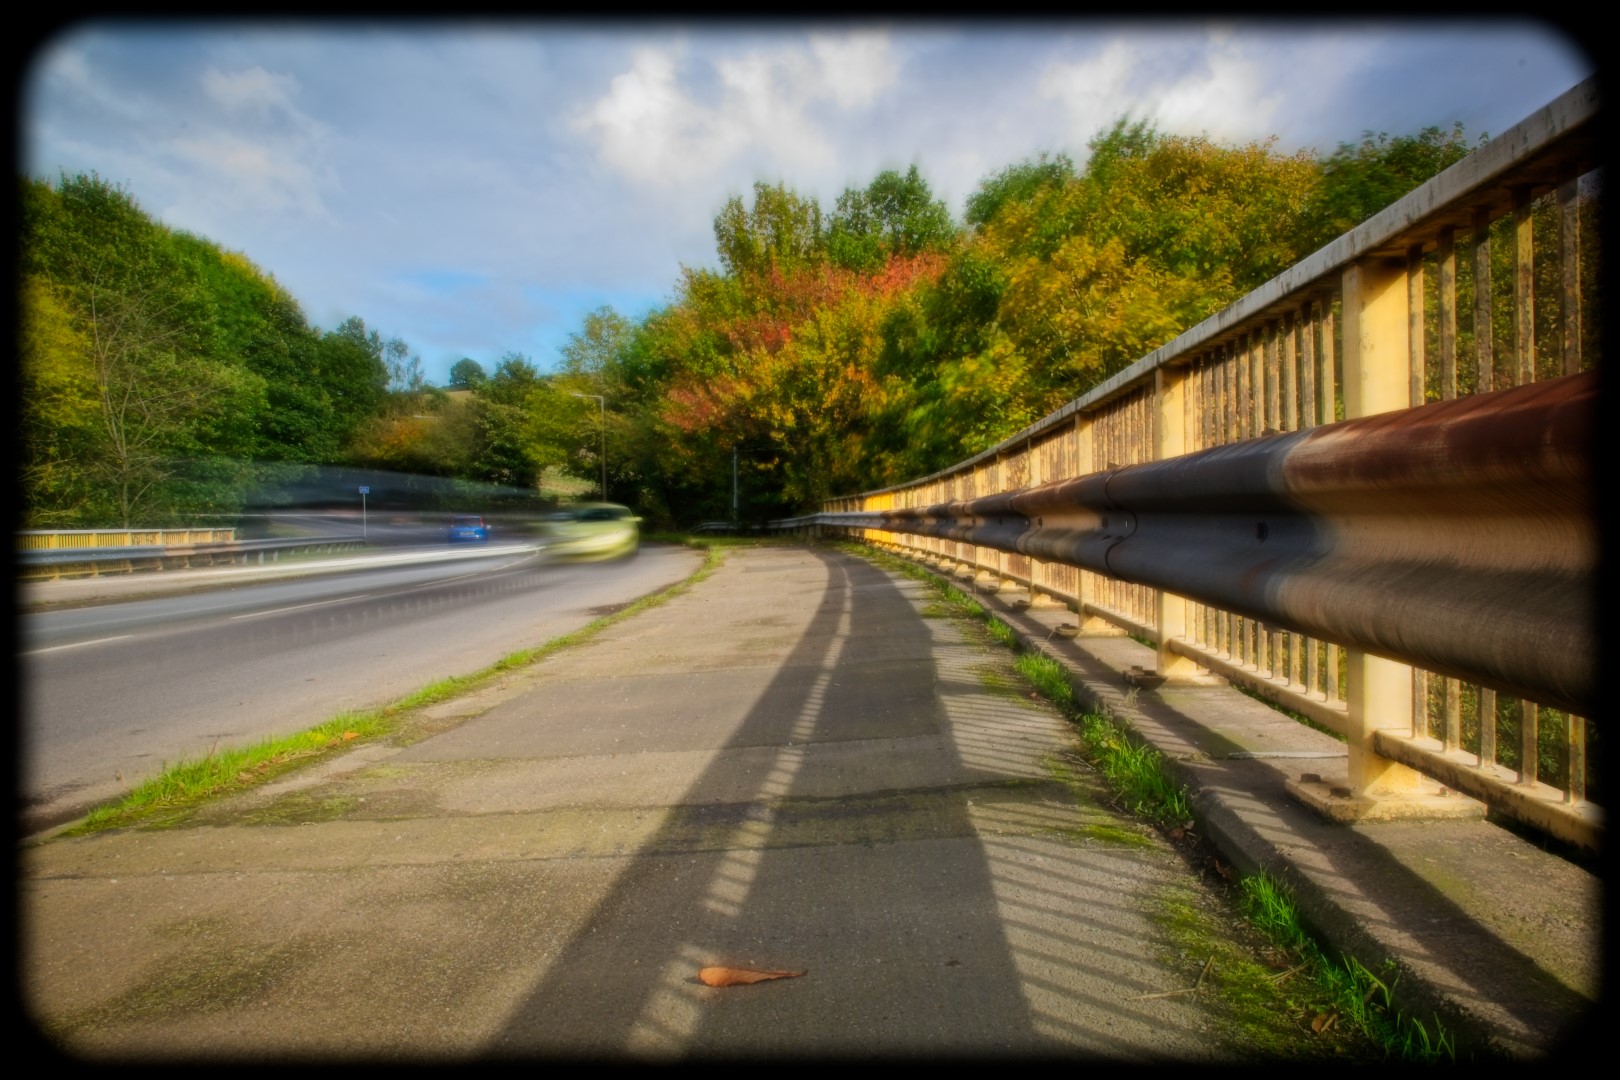
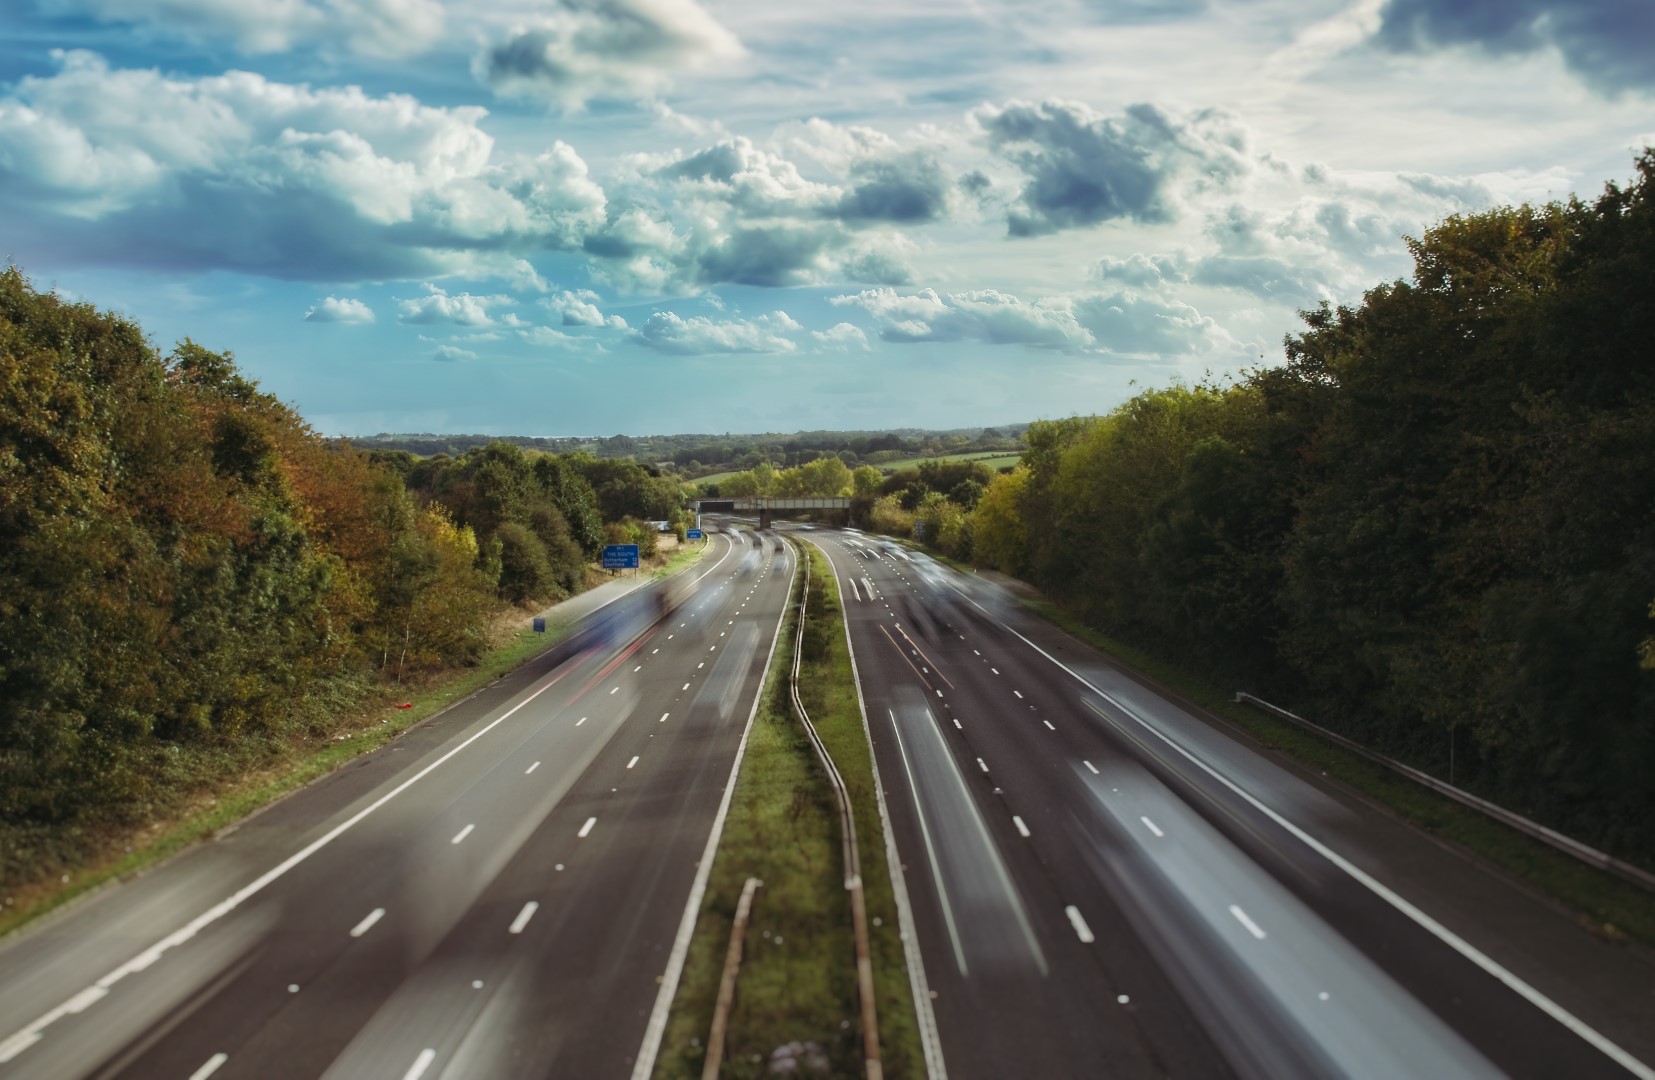
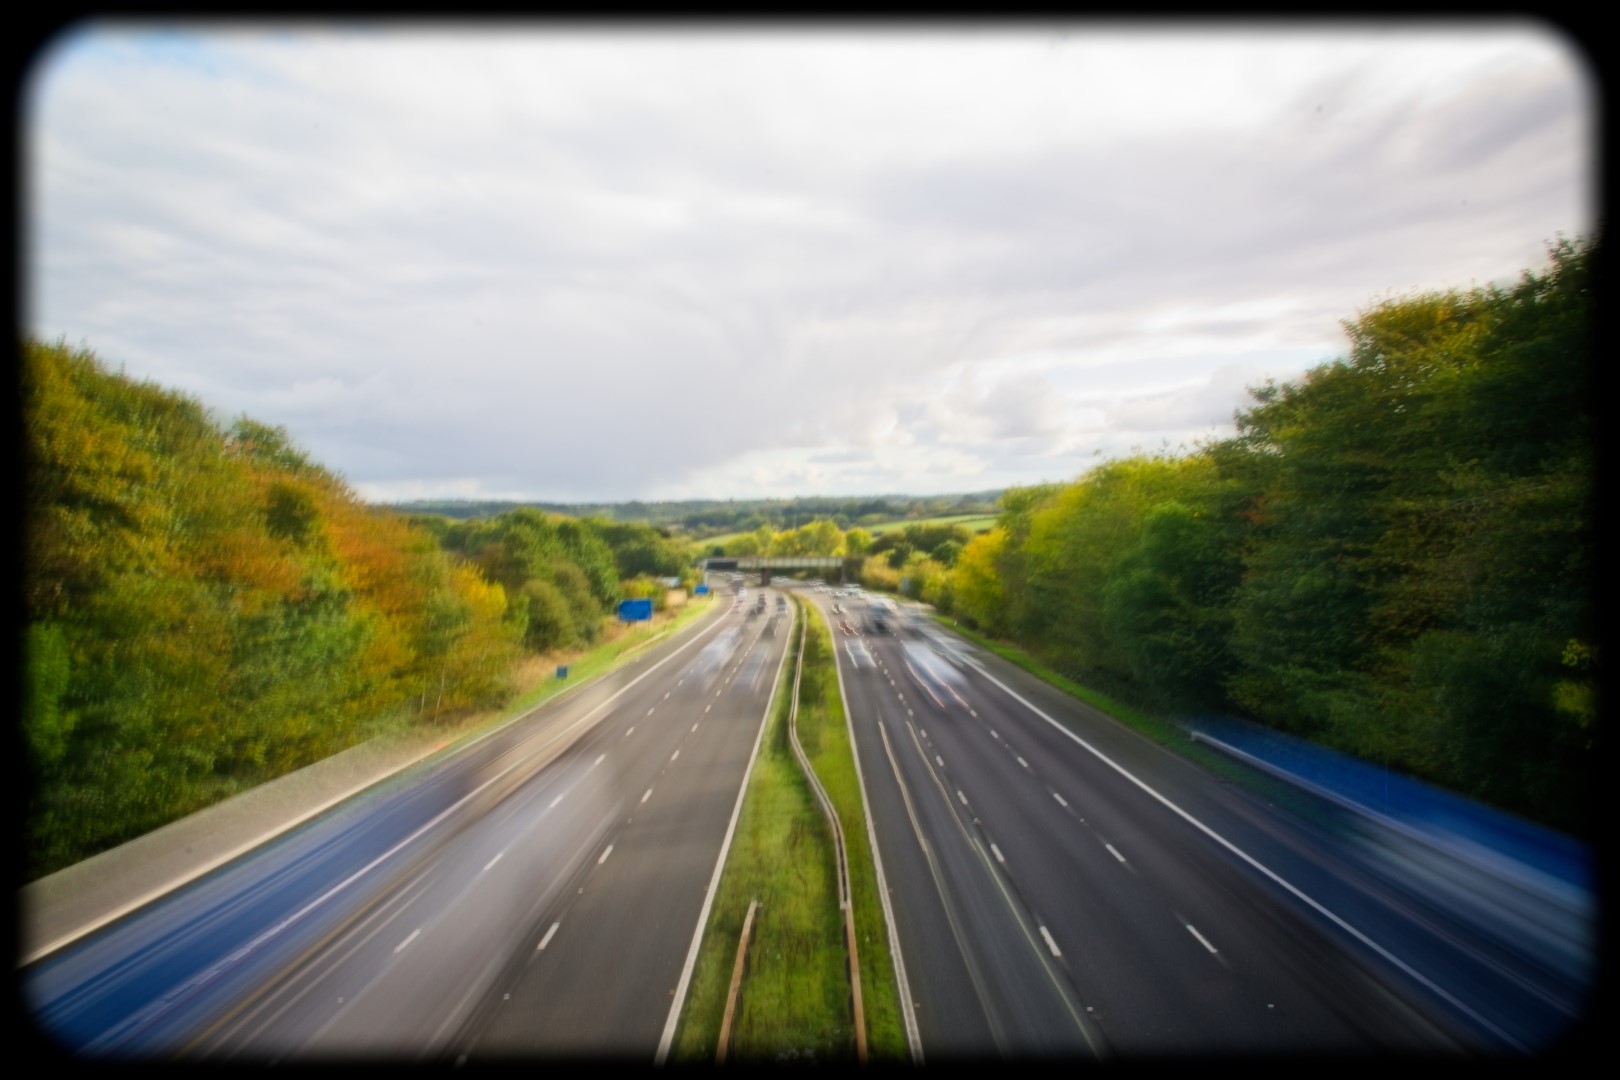
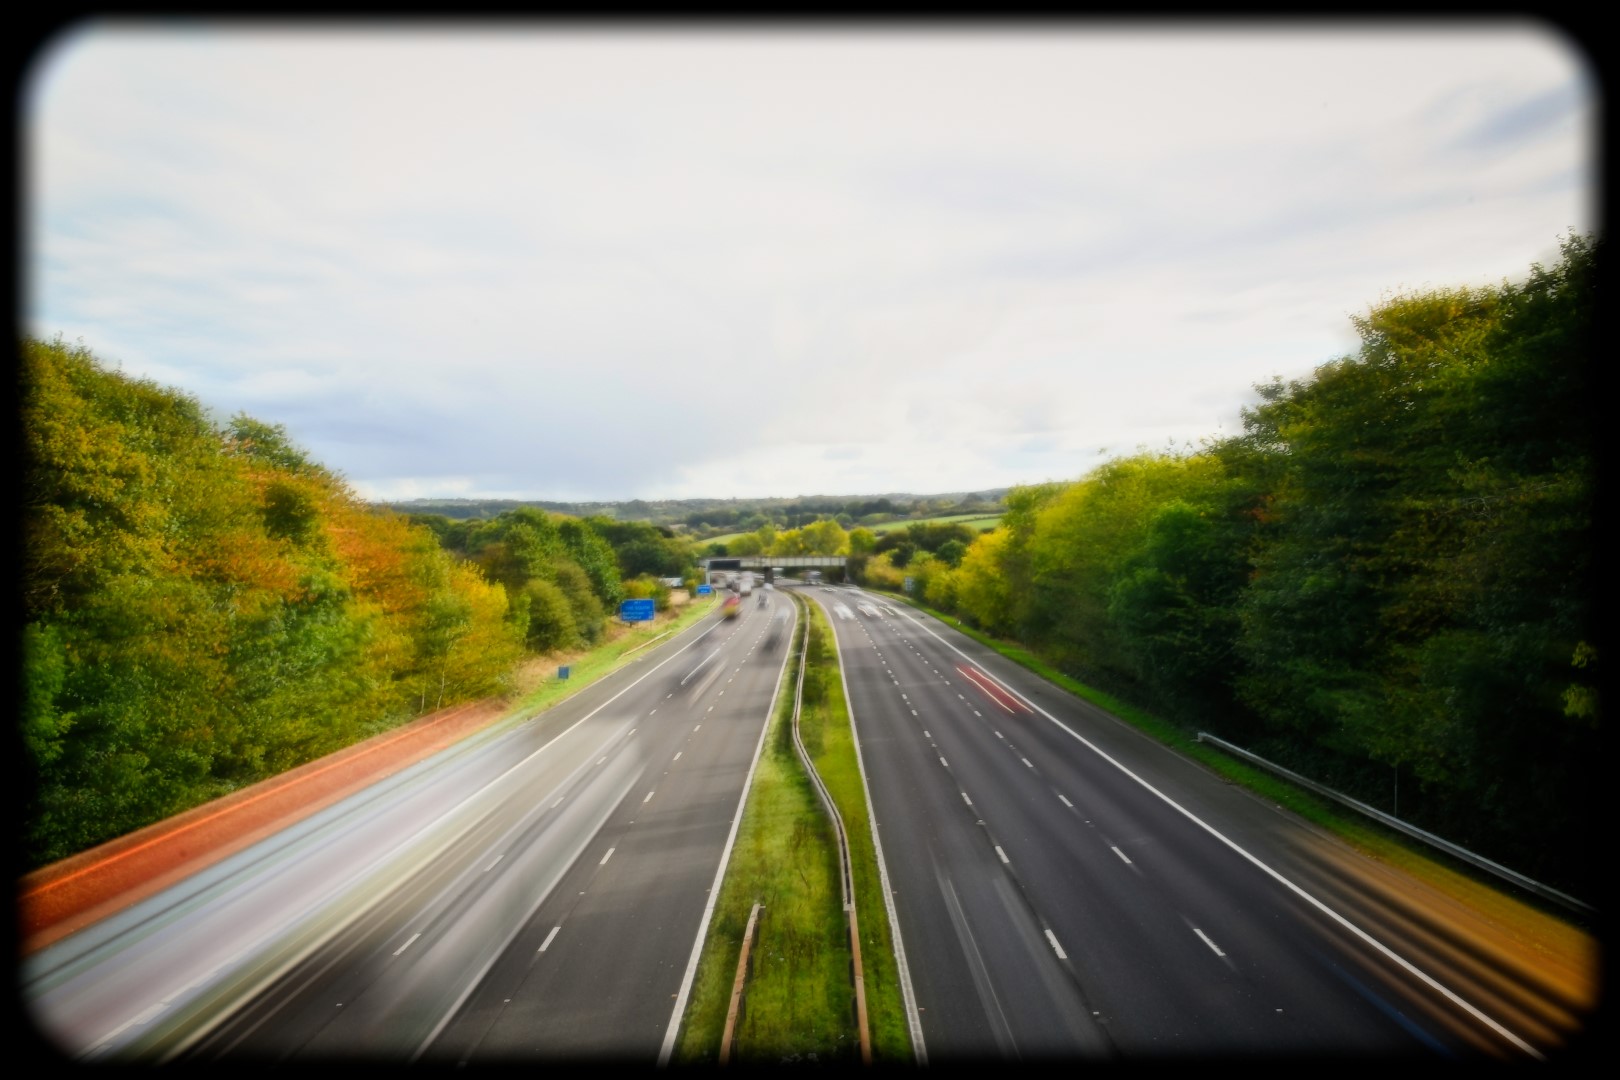
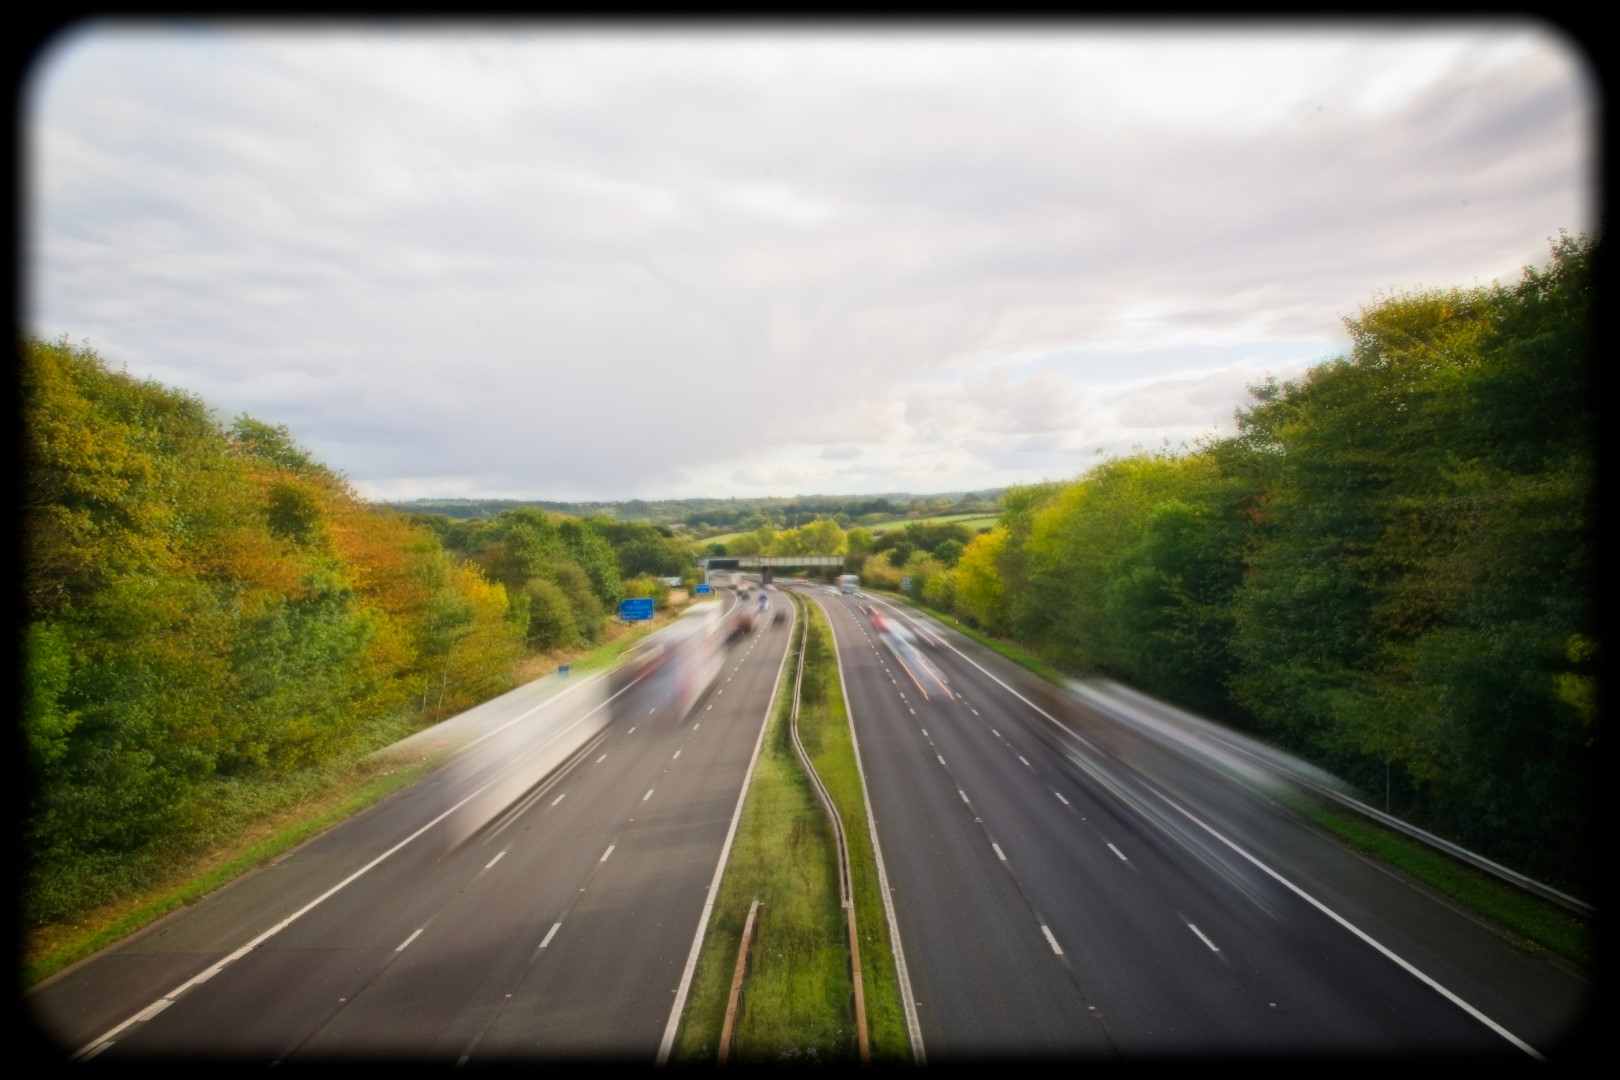
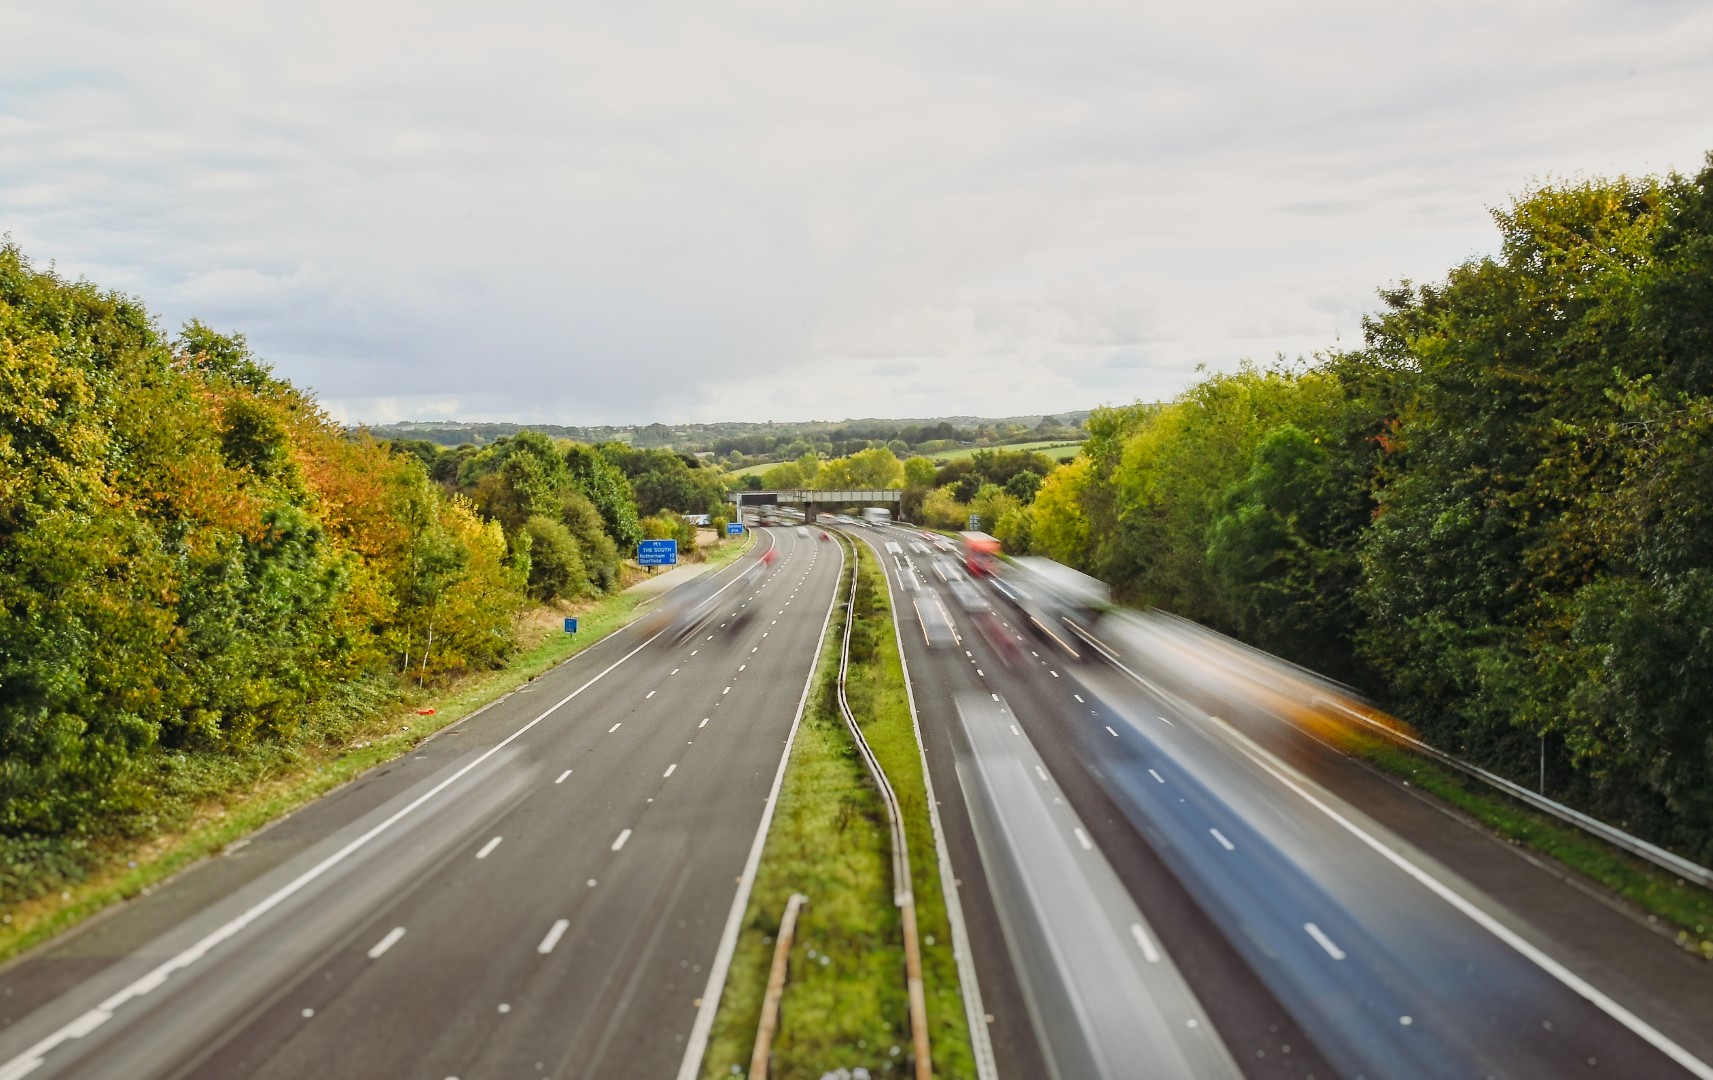
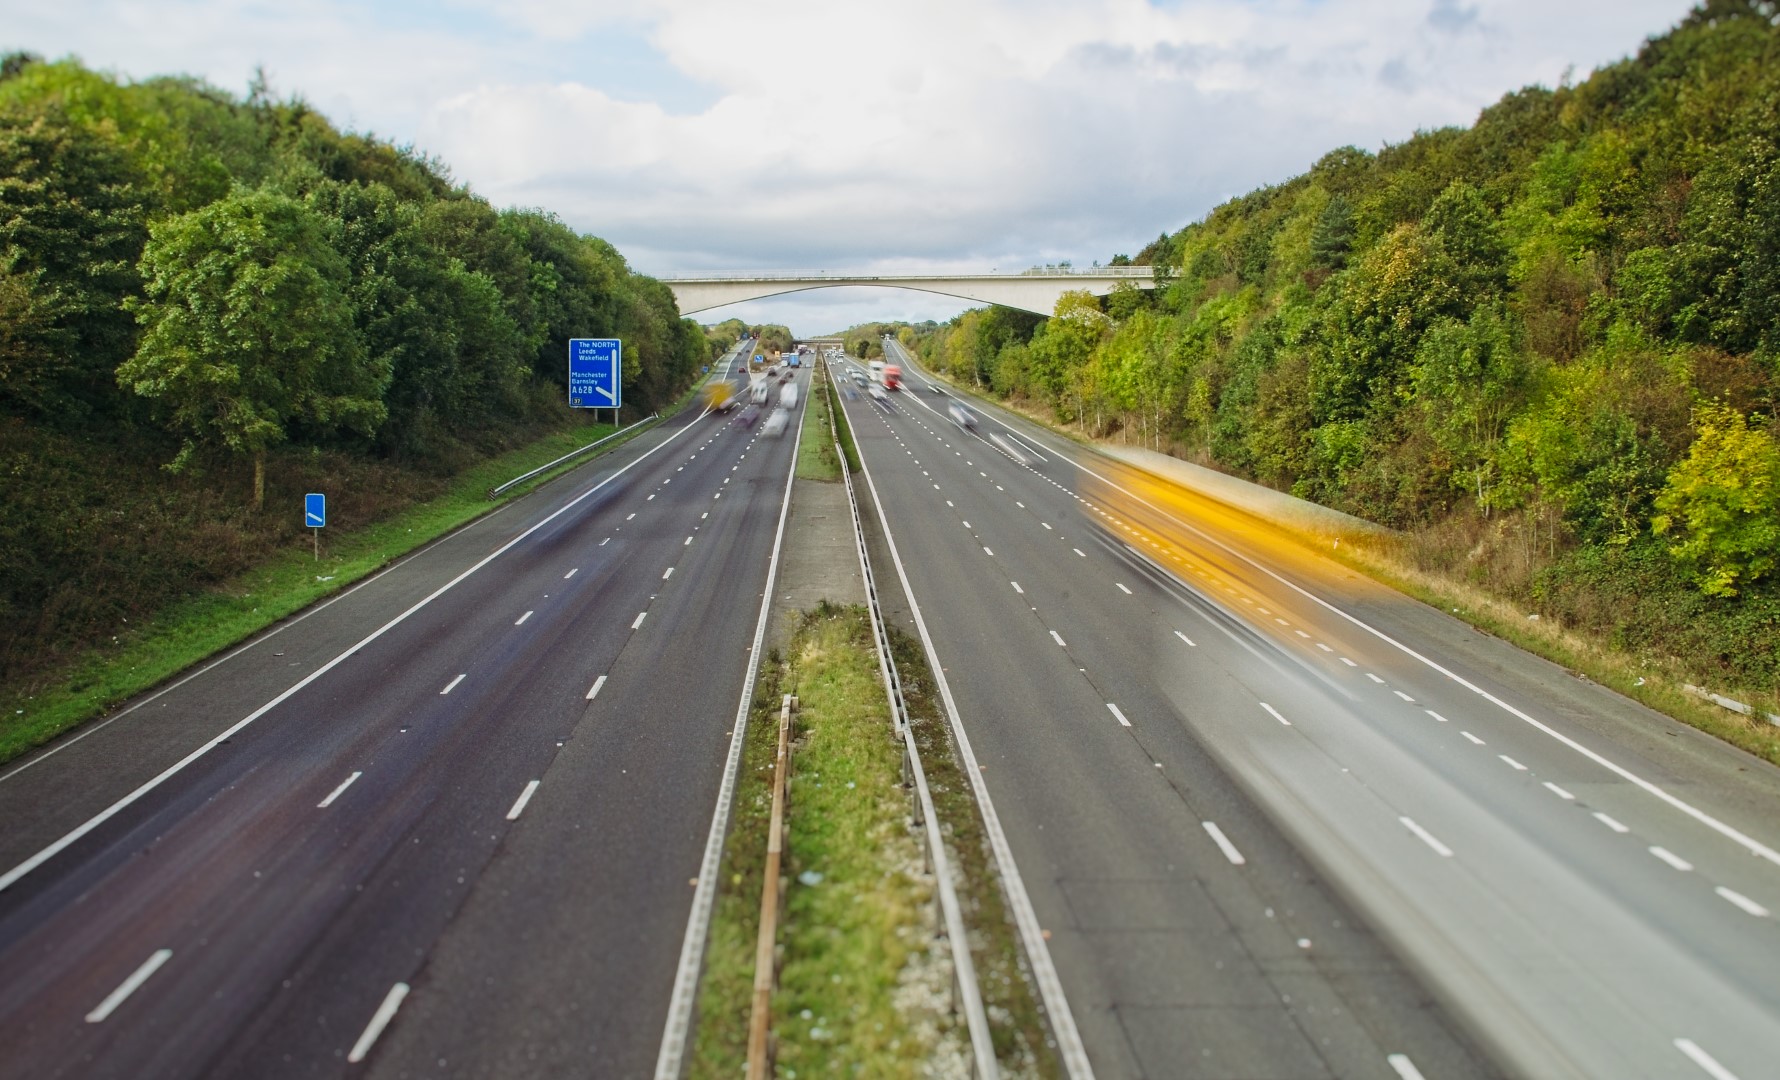
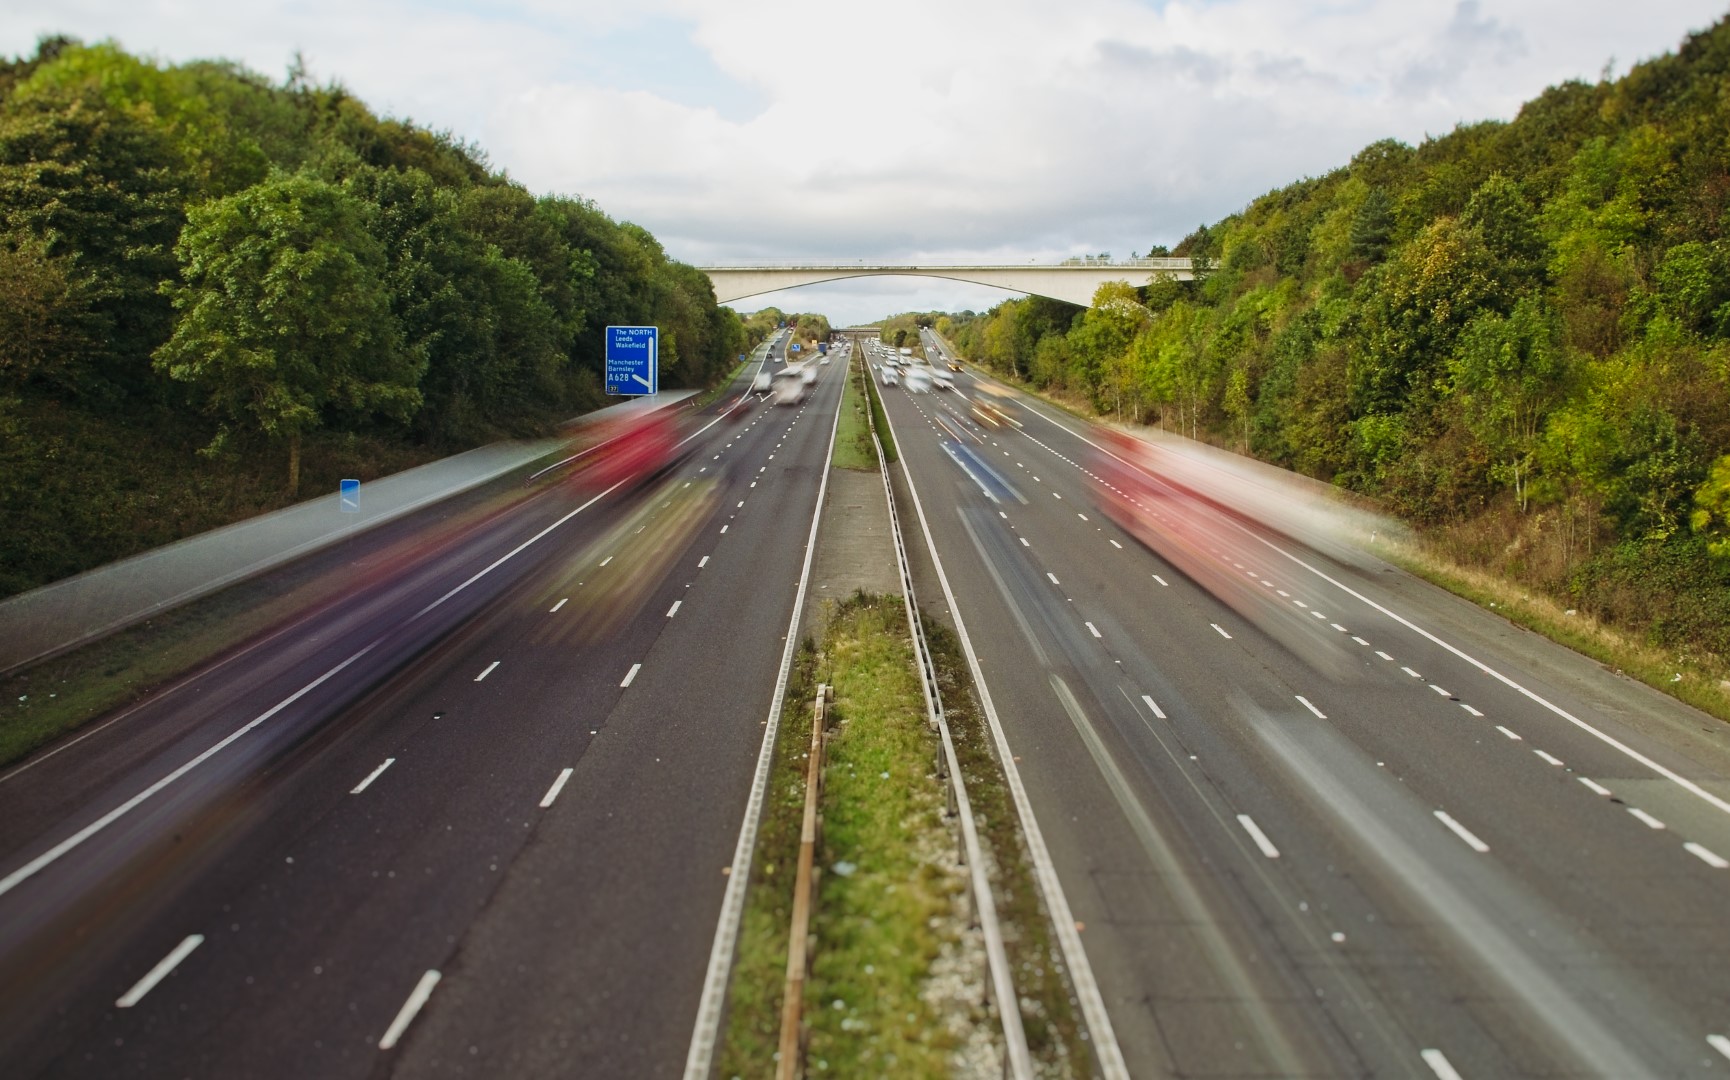
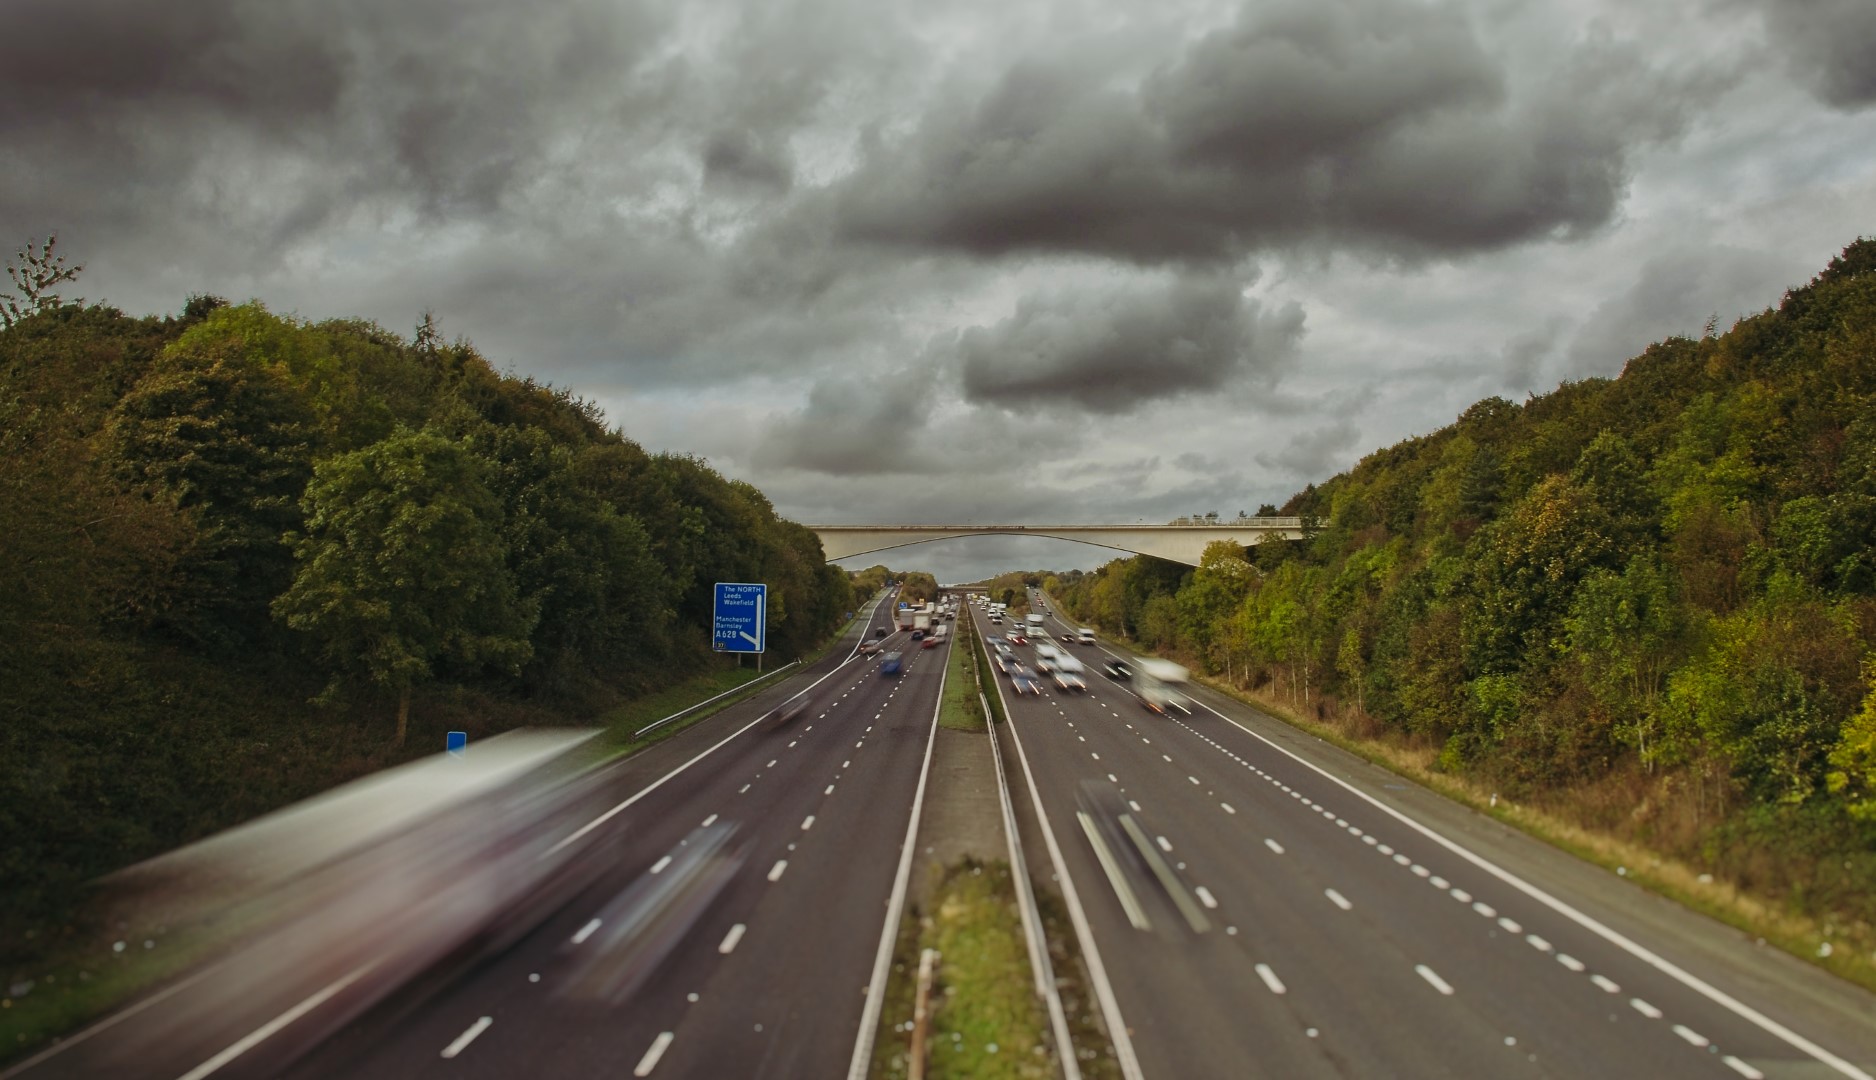
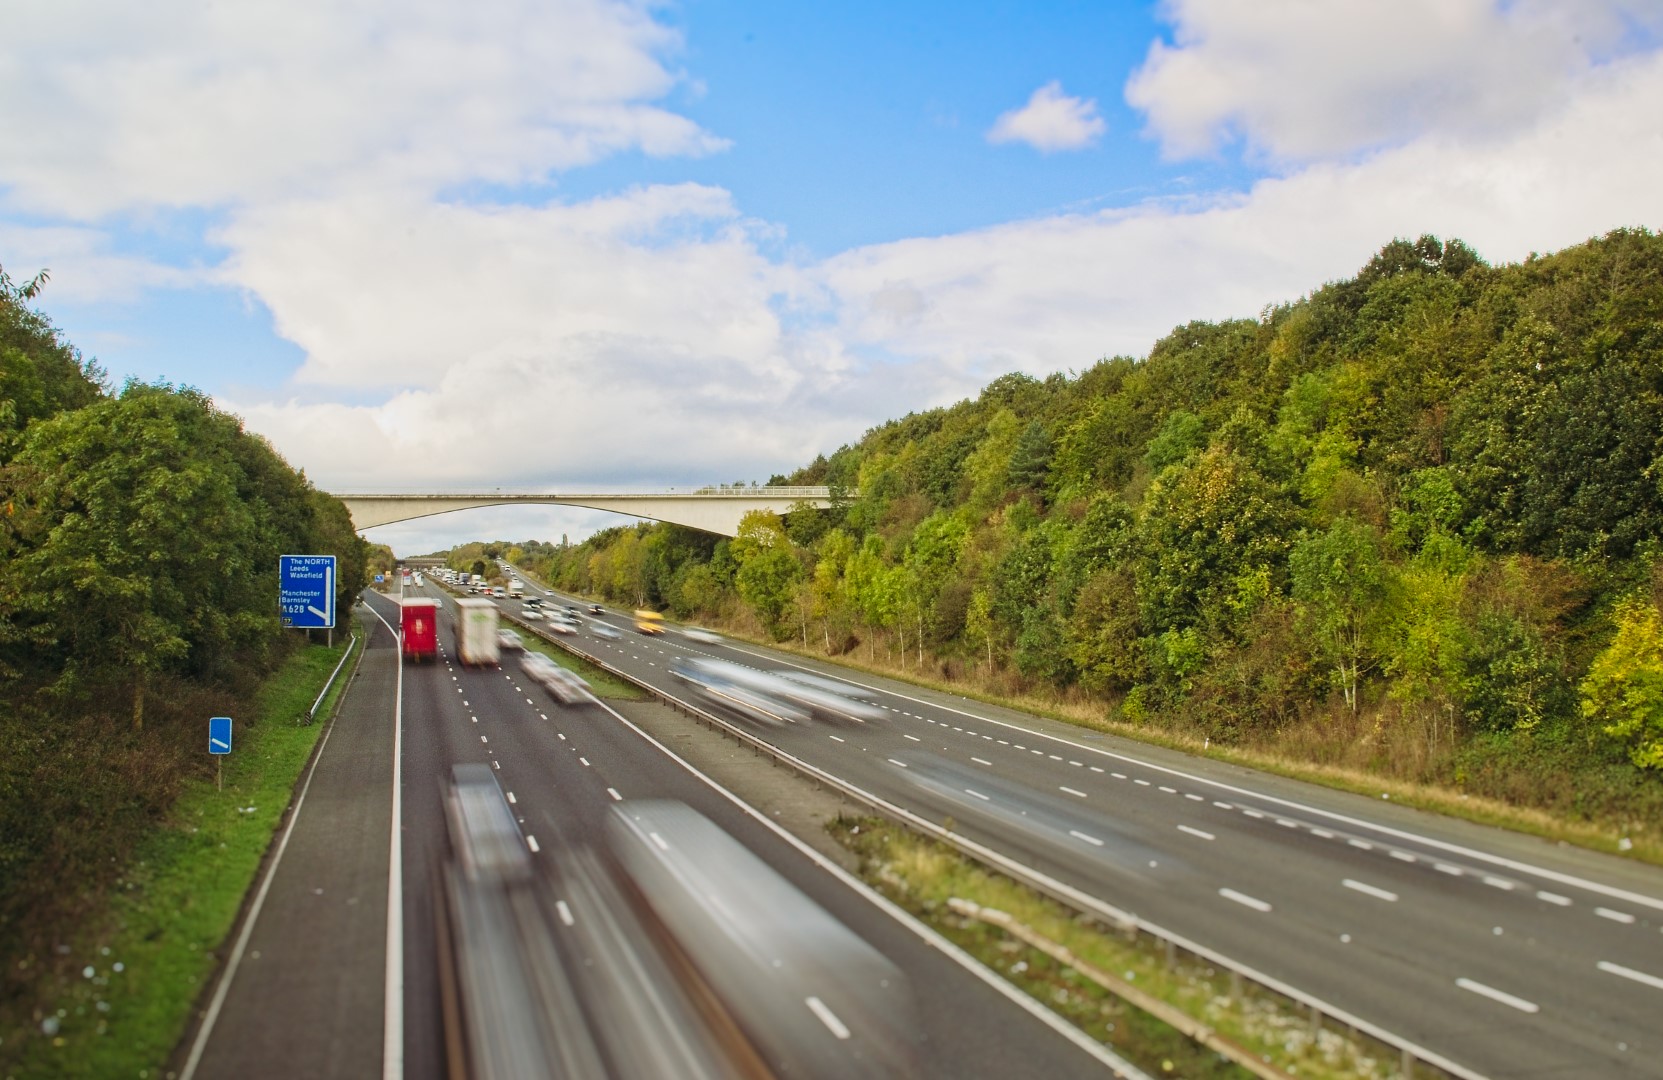
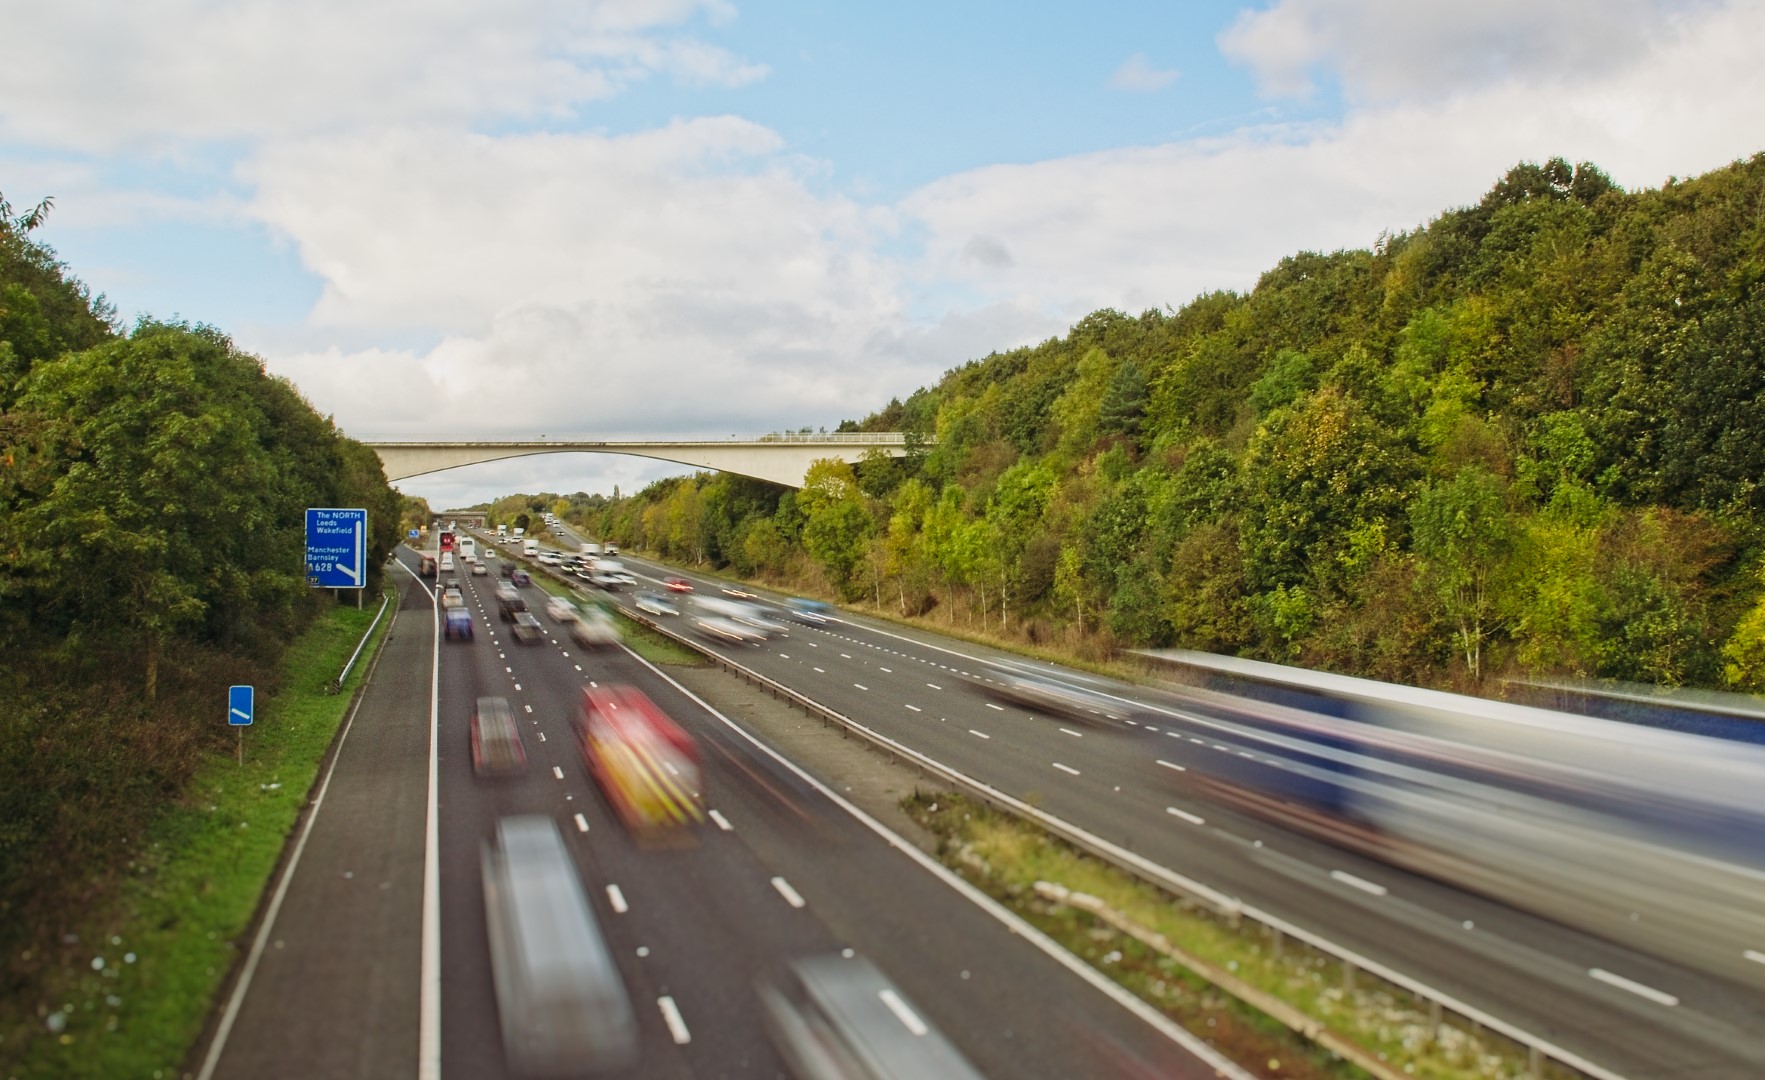
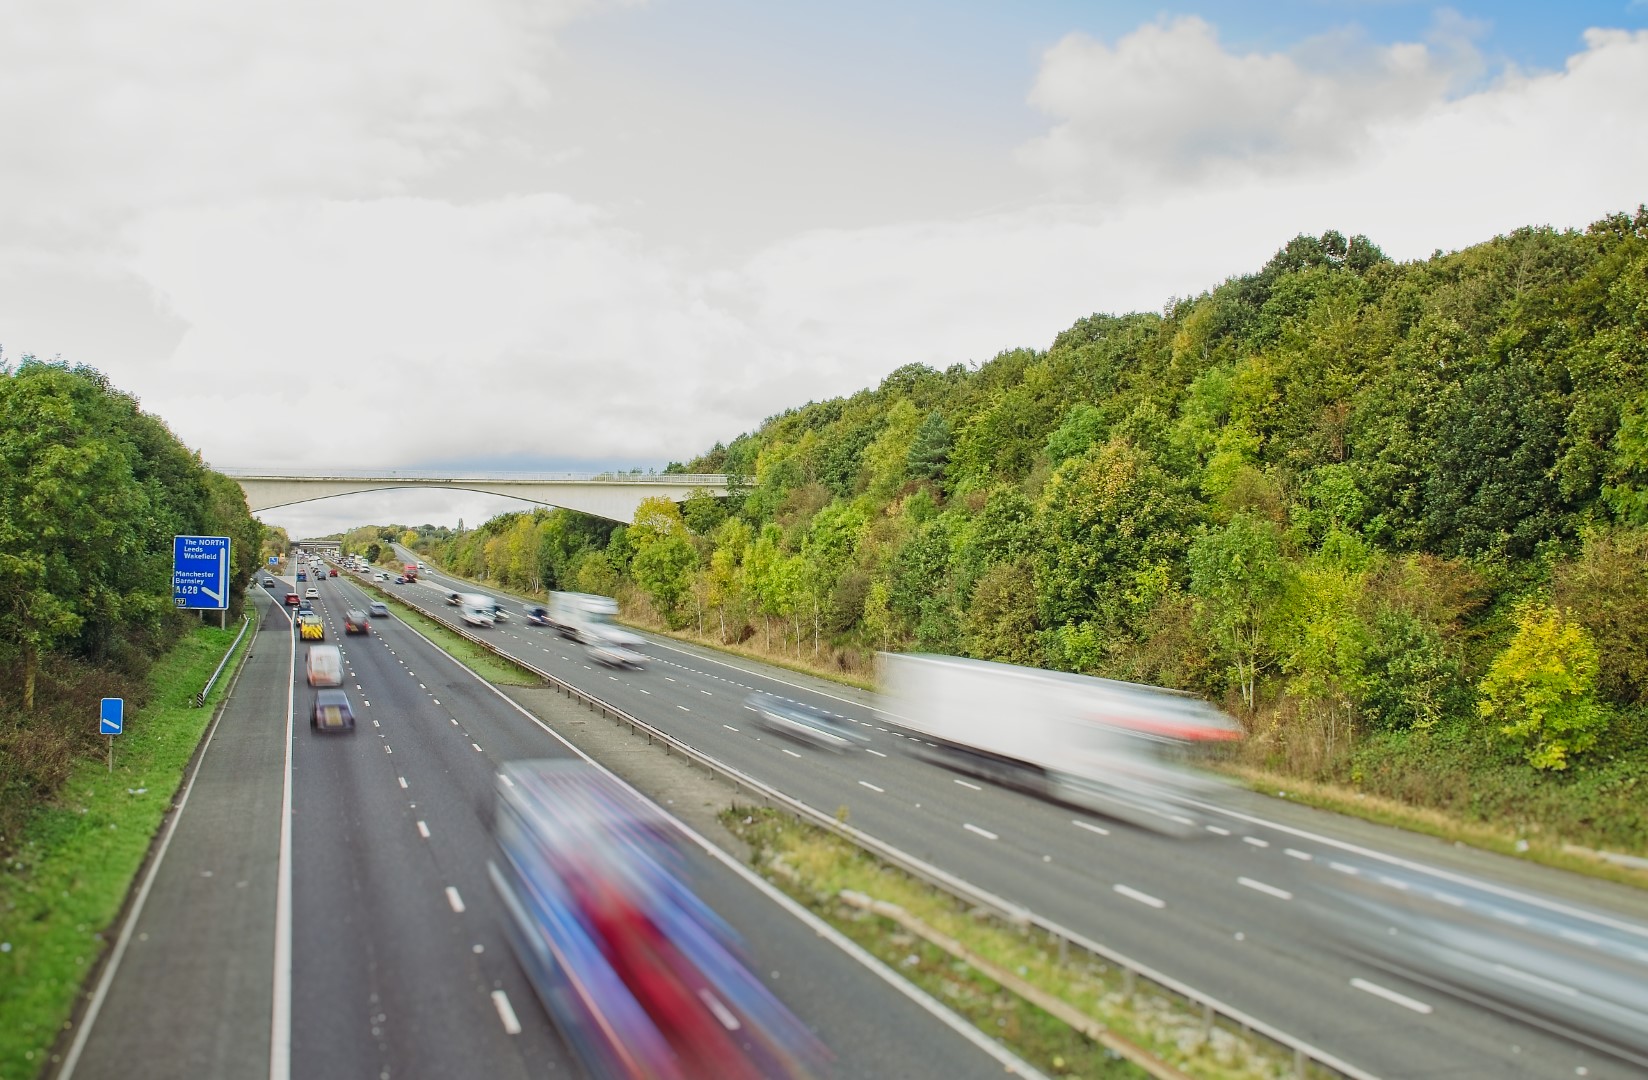
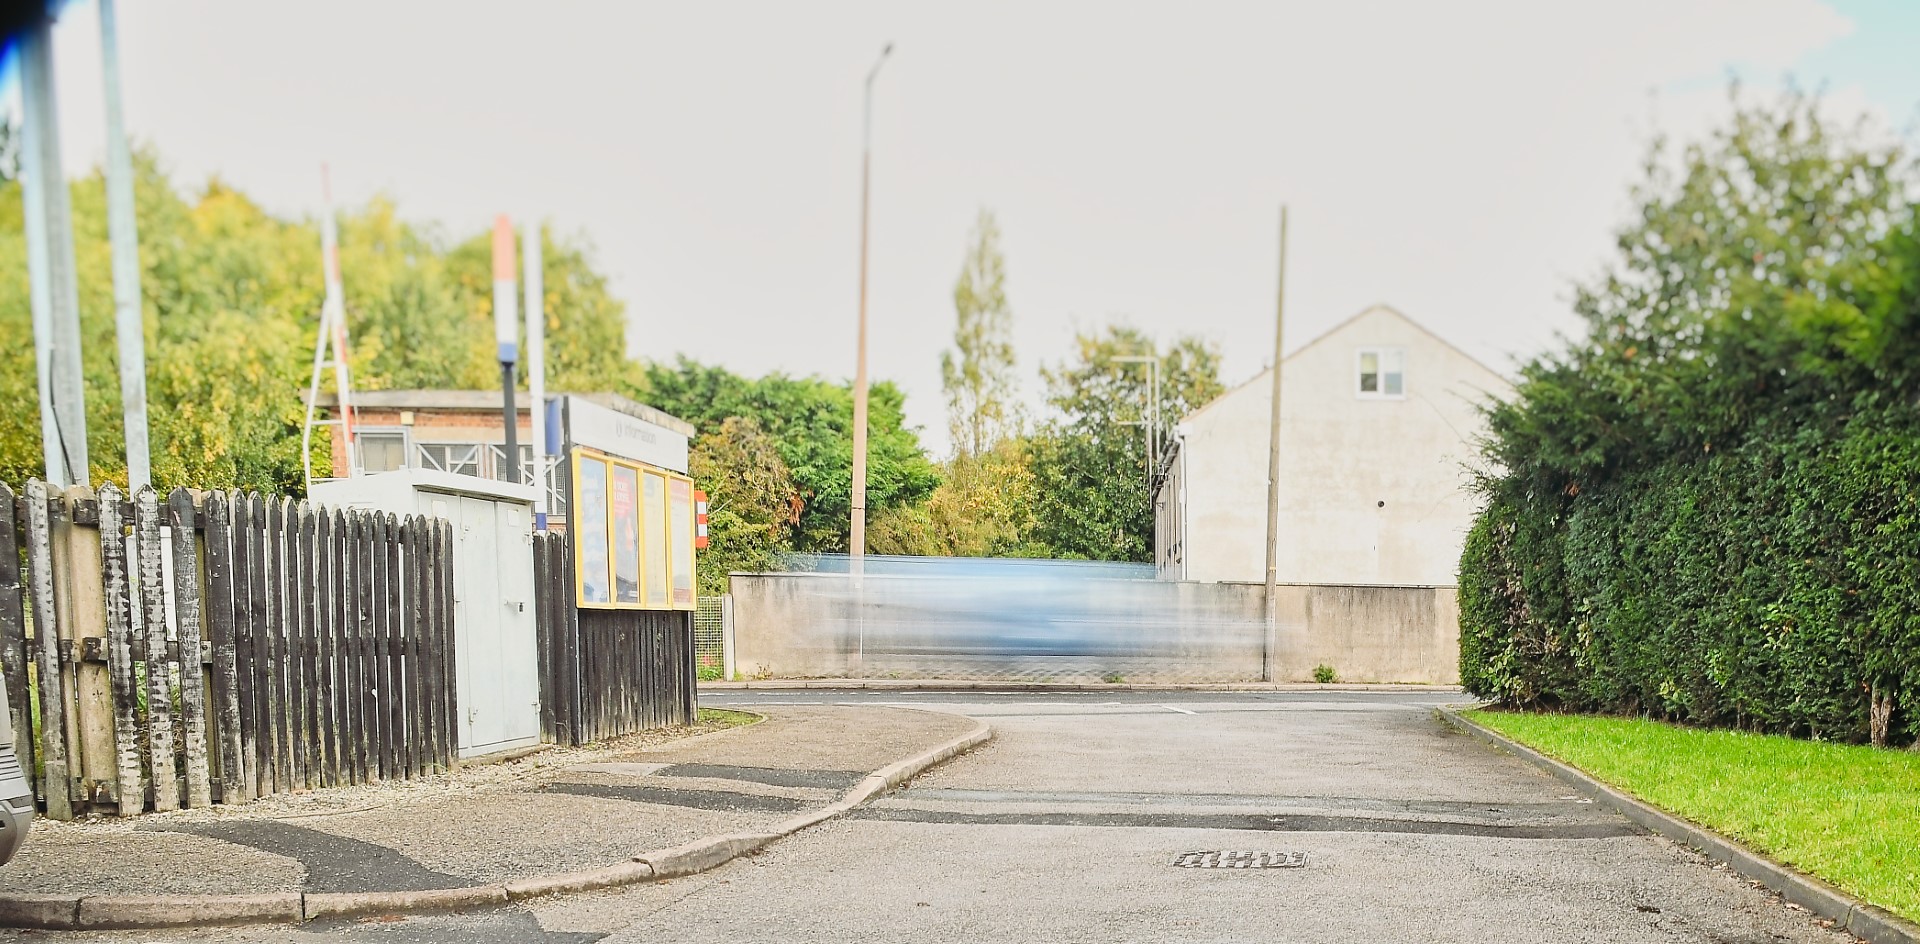
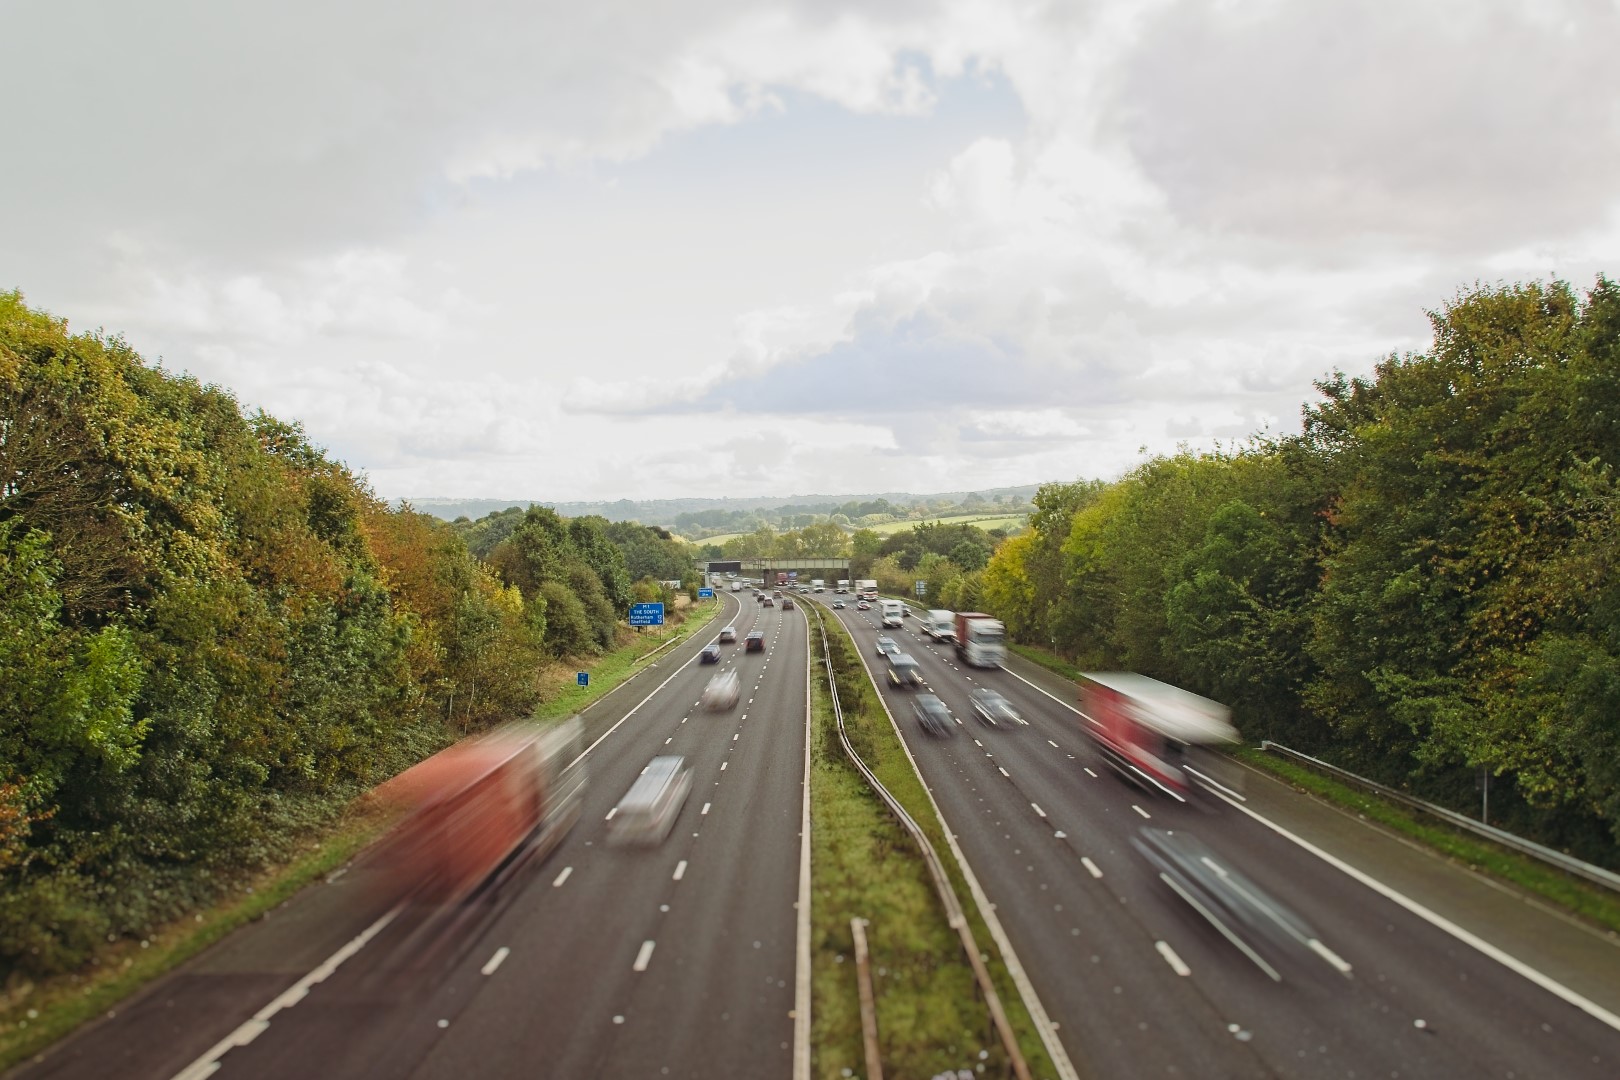
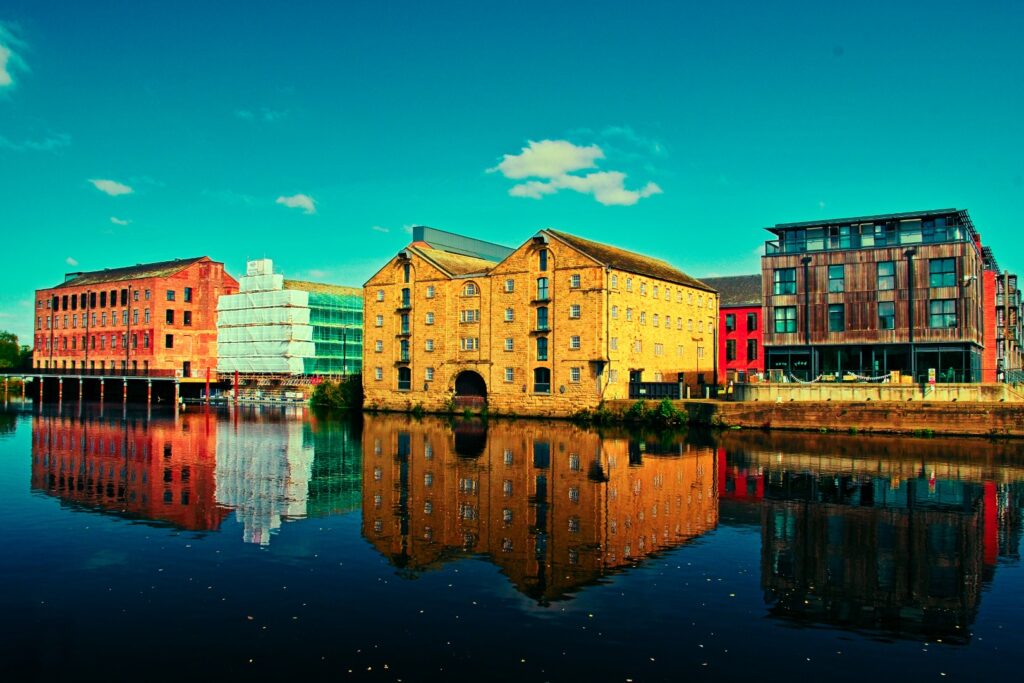
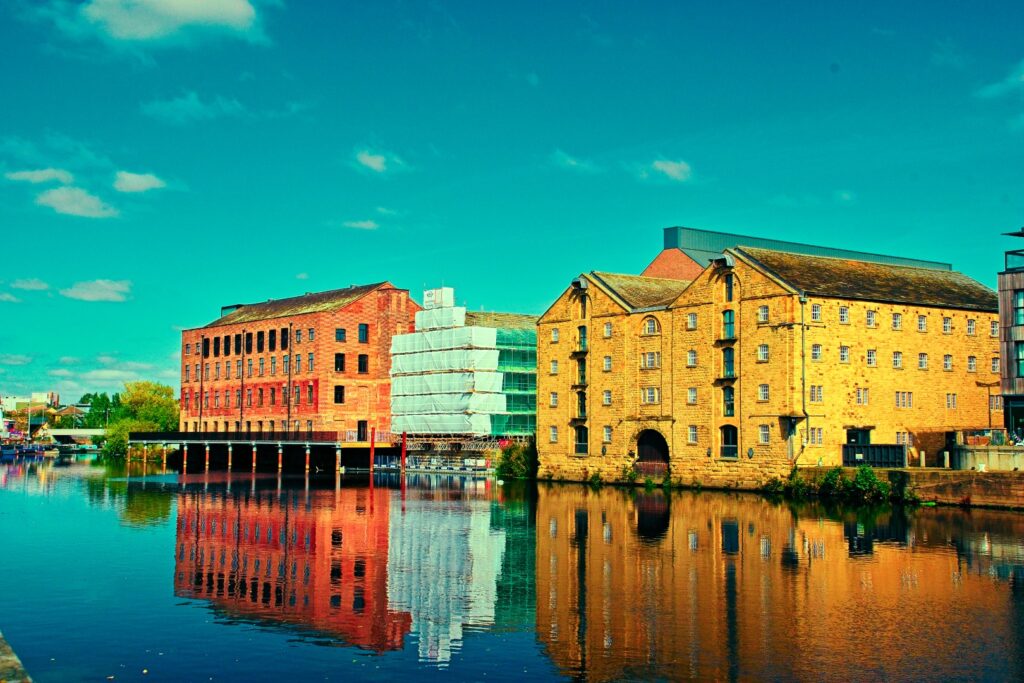
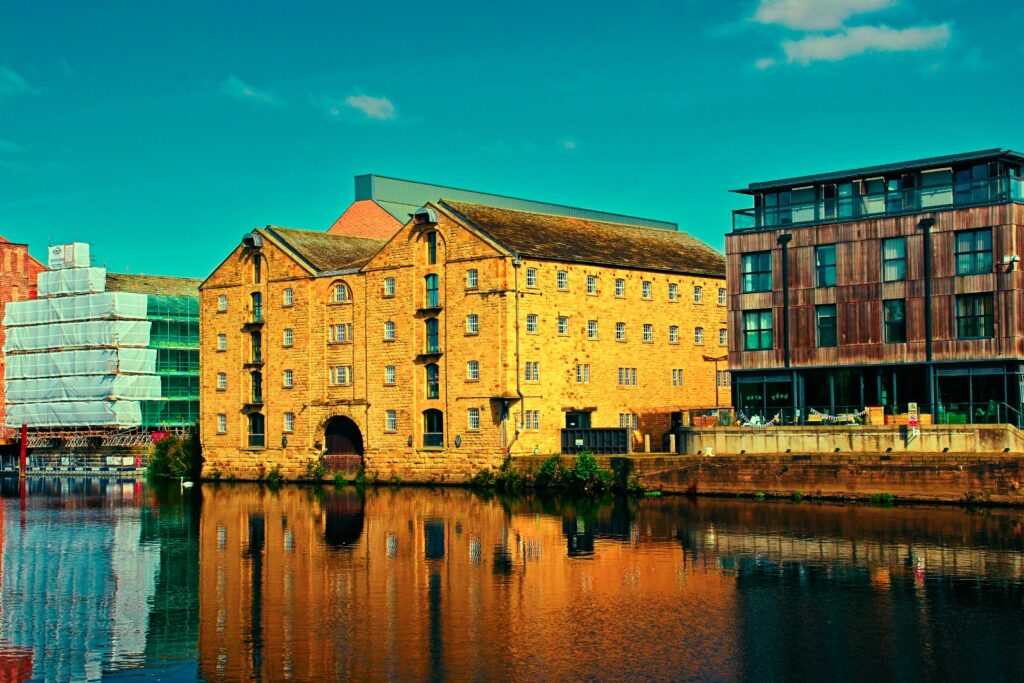
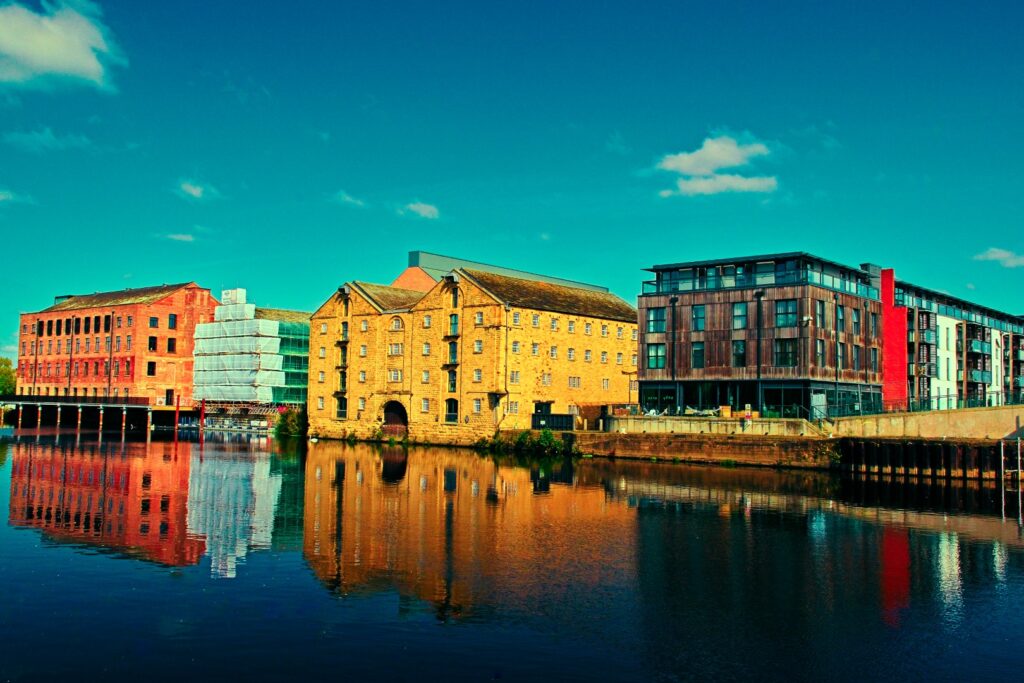
So, I’ve finally pulled myself together and on the back of an eMail I received – which I actually read – I plucked long exposures from my long list of topics and tried a few things out. This is something I’ve tried before but mostly at night – where its relatively easy to produce great pictures from light trails in various places – city centre, a bridge looking down to a motorway, etc. What I though I’d do this time was try it during the day to make it much more challenging for myself.

Taking long exposure photographs during the day can create stunning images, like smooth water surfaces, motion-blurred clouds, or bustling cityscapes that appear almost deserted. To do this, you’ll need a Neutral Density (ND) filter, which reduces the amount of light entering the camera, allowing for longer exposure times even in bright daylight.
Here’s a step-by-step guide to help you get started with daytime long exposures using an ND filter.
Choose the Right ND Filter
Set Up Your Camera on a Tripod
Compose and Focus
Calculate Your Exposure Time
Switch to Manual Mode and Apply the ND Filter
Take the Shot
Experiment with Exposure Times
Additional Tips


Daytime long exposures with an ND filter open up a lot of creative possibilities, so experiment with different filters and subjects to see what effects you like best. Enjoy capturing those dreamlike, silky smooth scenes!


This hyperlapse was taken using my DSLR – a Nikon D7100 and to ensure stability and consistency of shots, etc. was mounted on a tripod. I used an external remote to time each shot and control the overall number of shots for the length of video I wanted.
There’s nothing that exciting about this video clip – no big reveals, no UFOs flashing across the sky or anything like that. What I was trying to capture was a simple scene from home (this is from the dormer window in my attic) and show the graceful movement of the clouds on a reasonably well lit day over a long period of time. Hopefully I managed that.
When I came to working out how many shots I needed, I was working on the following:
This clip is 4 mins and 24 seconds long so the actual number of images =
There was 3 seconds between each frame which makes the elapsed time something like 5 1/2 hours condensed into those 4 1/2 minutes (or thereabouts) if my maths is correct.
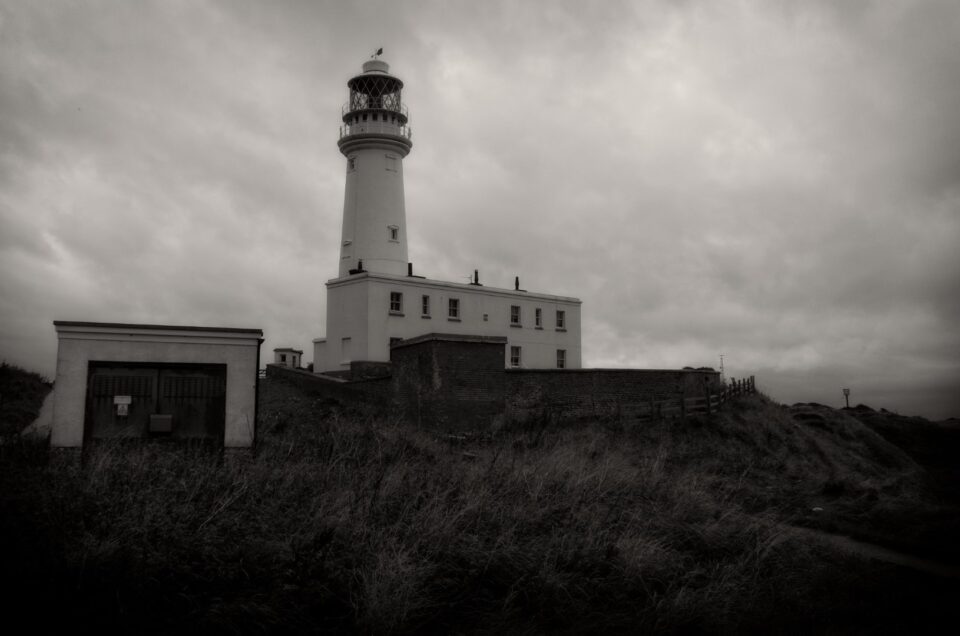
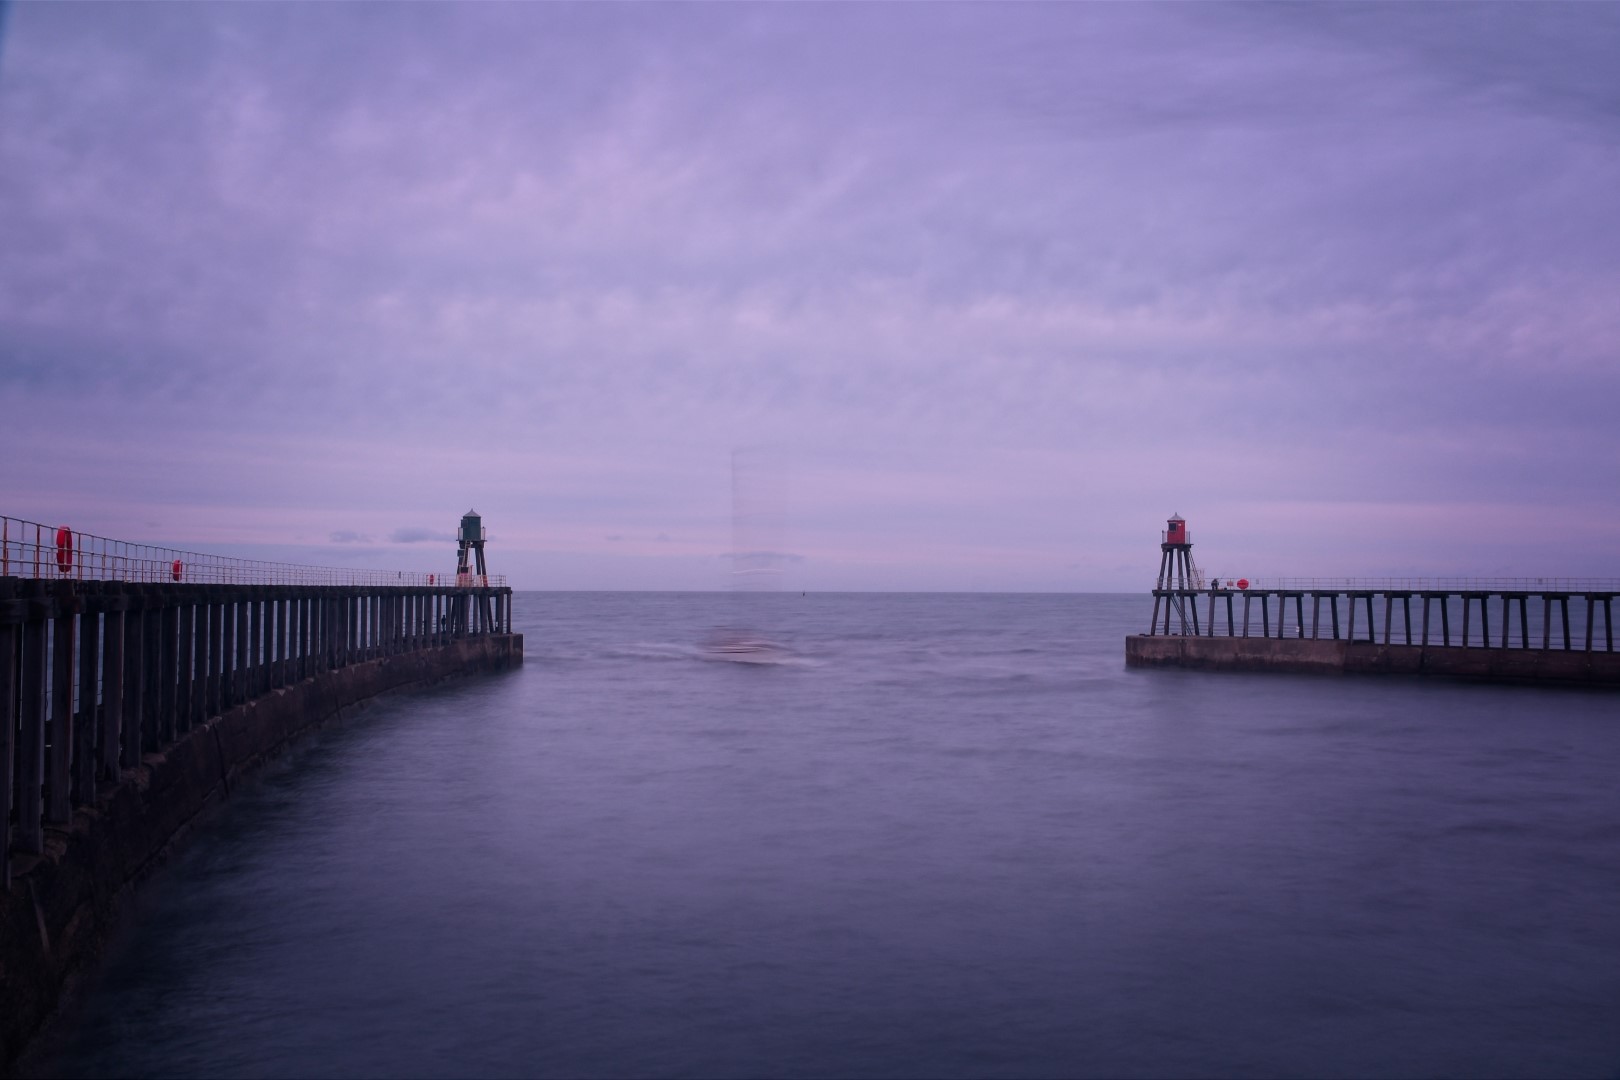


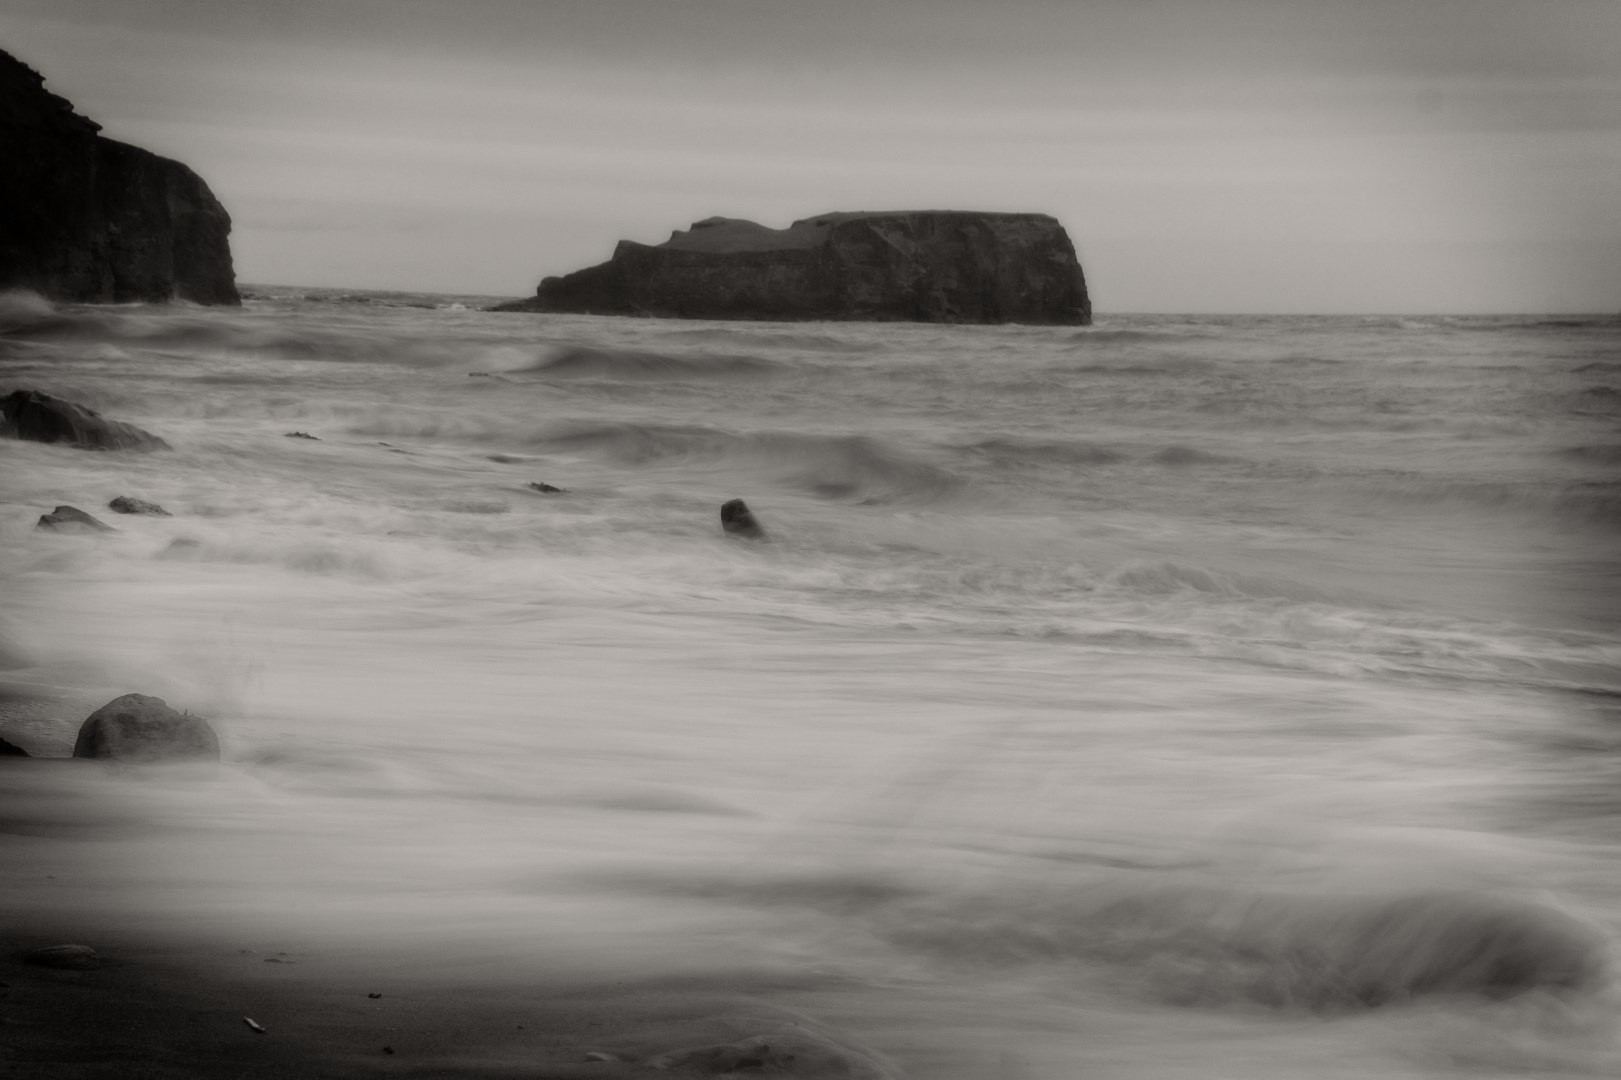
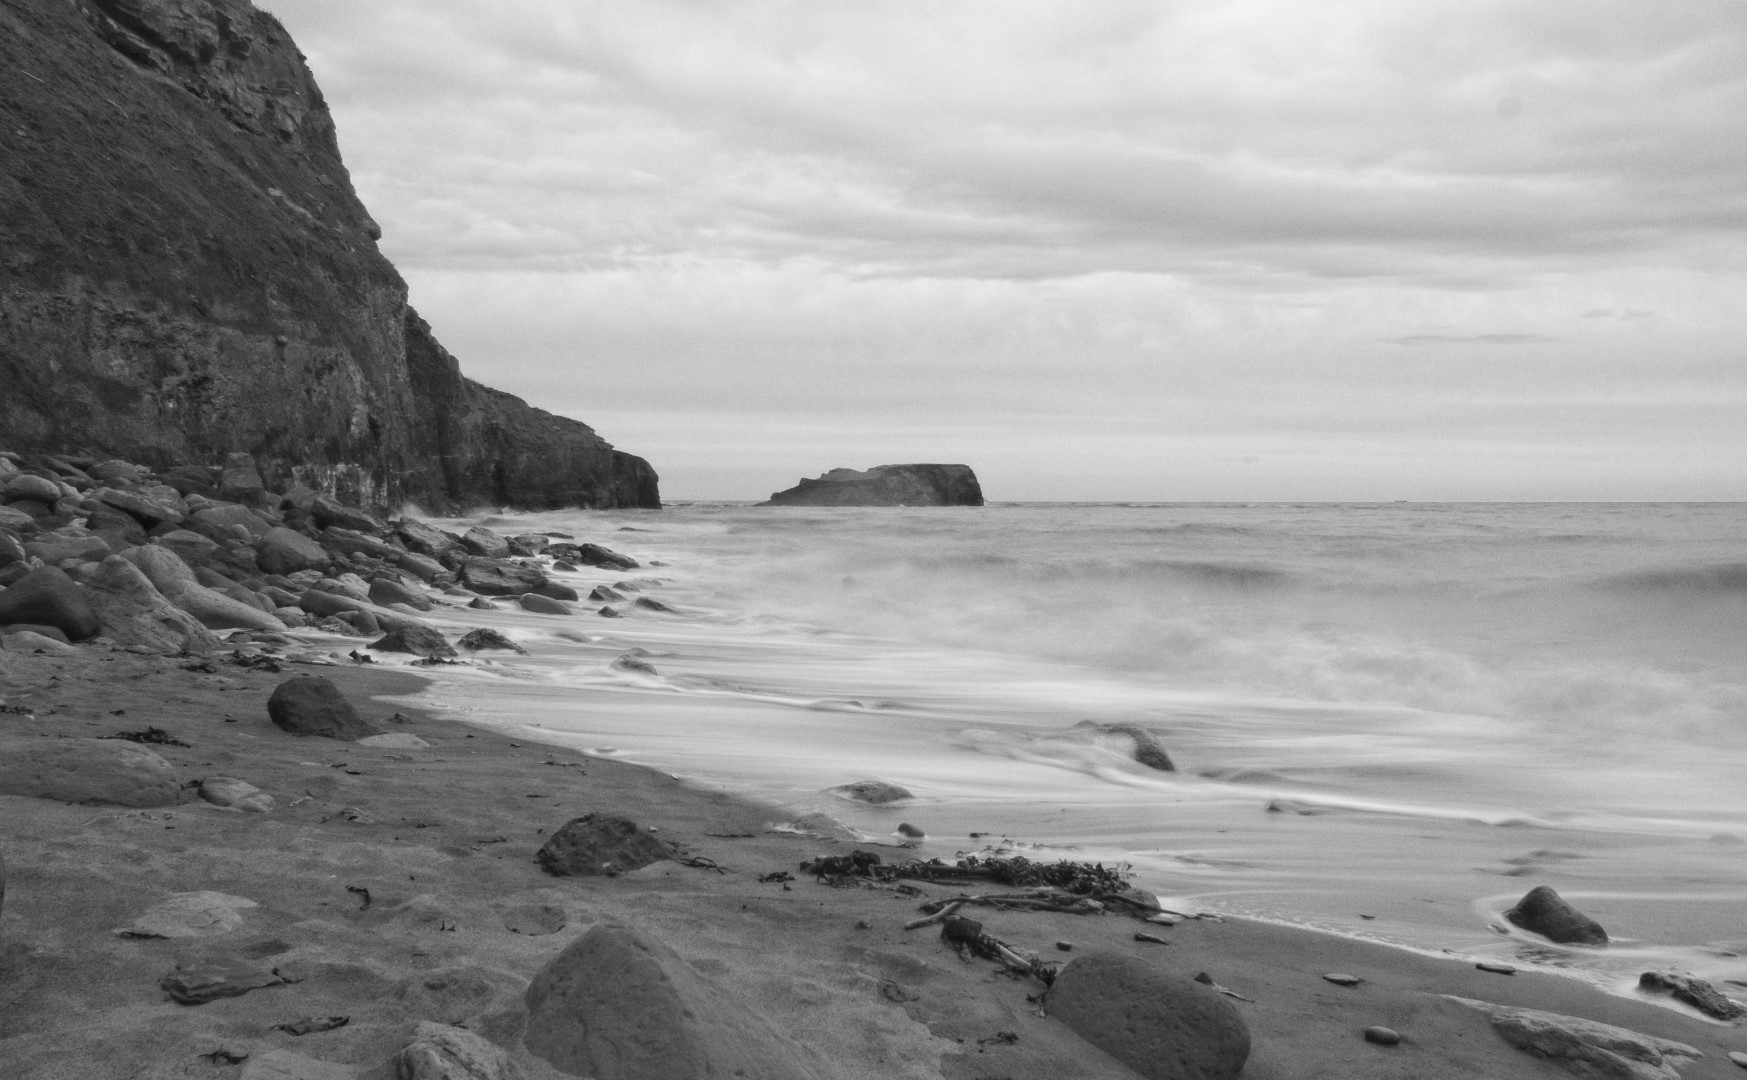

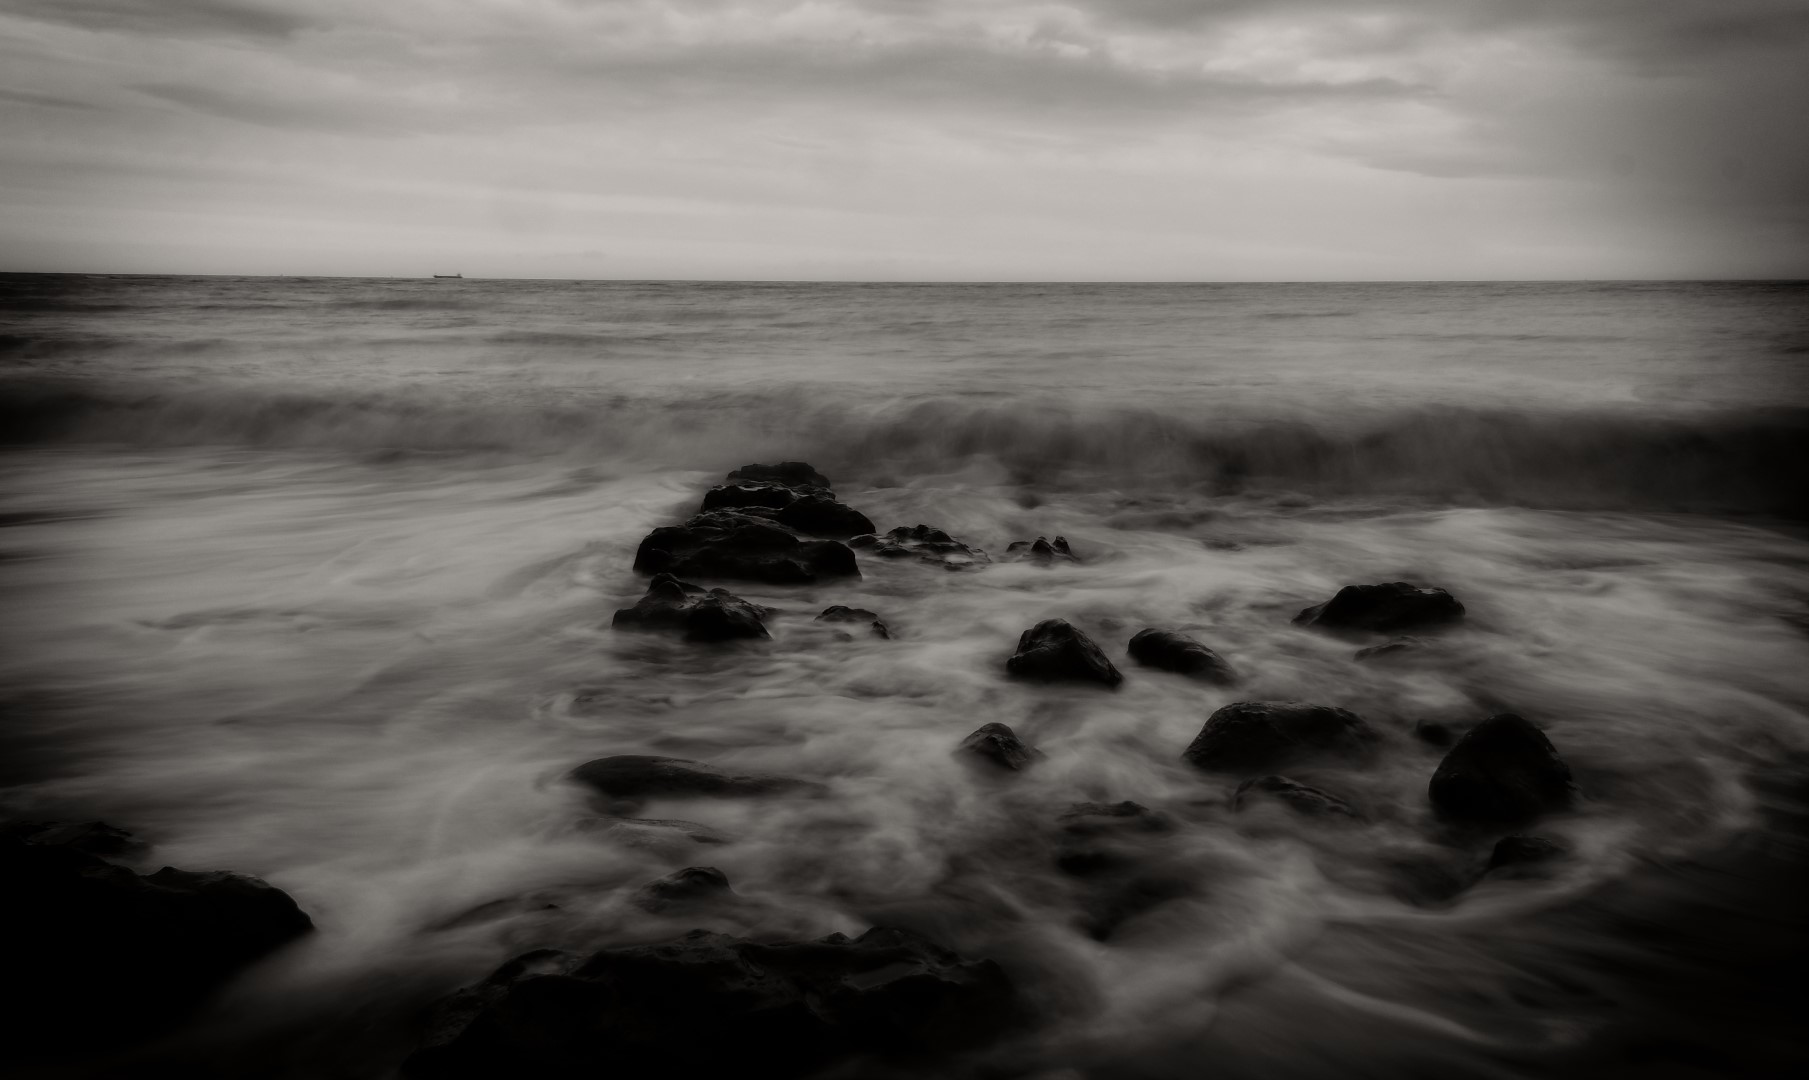
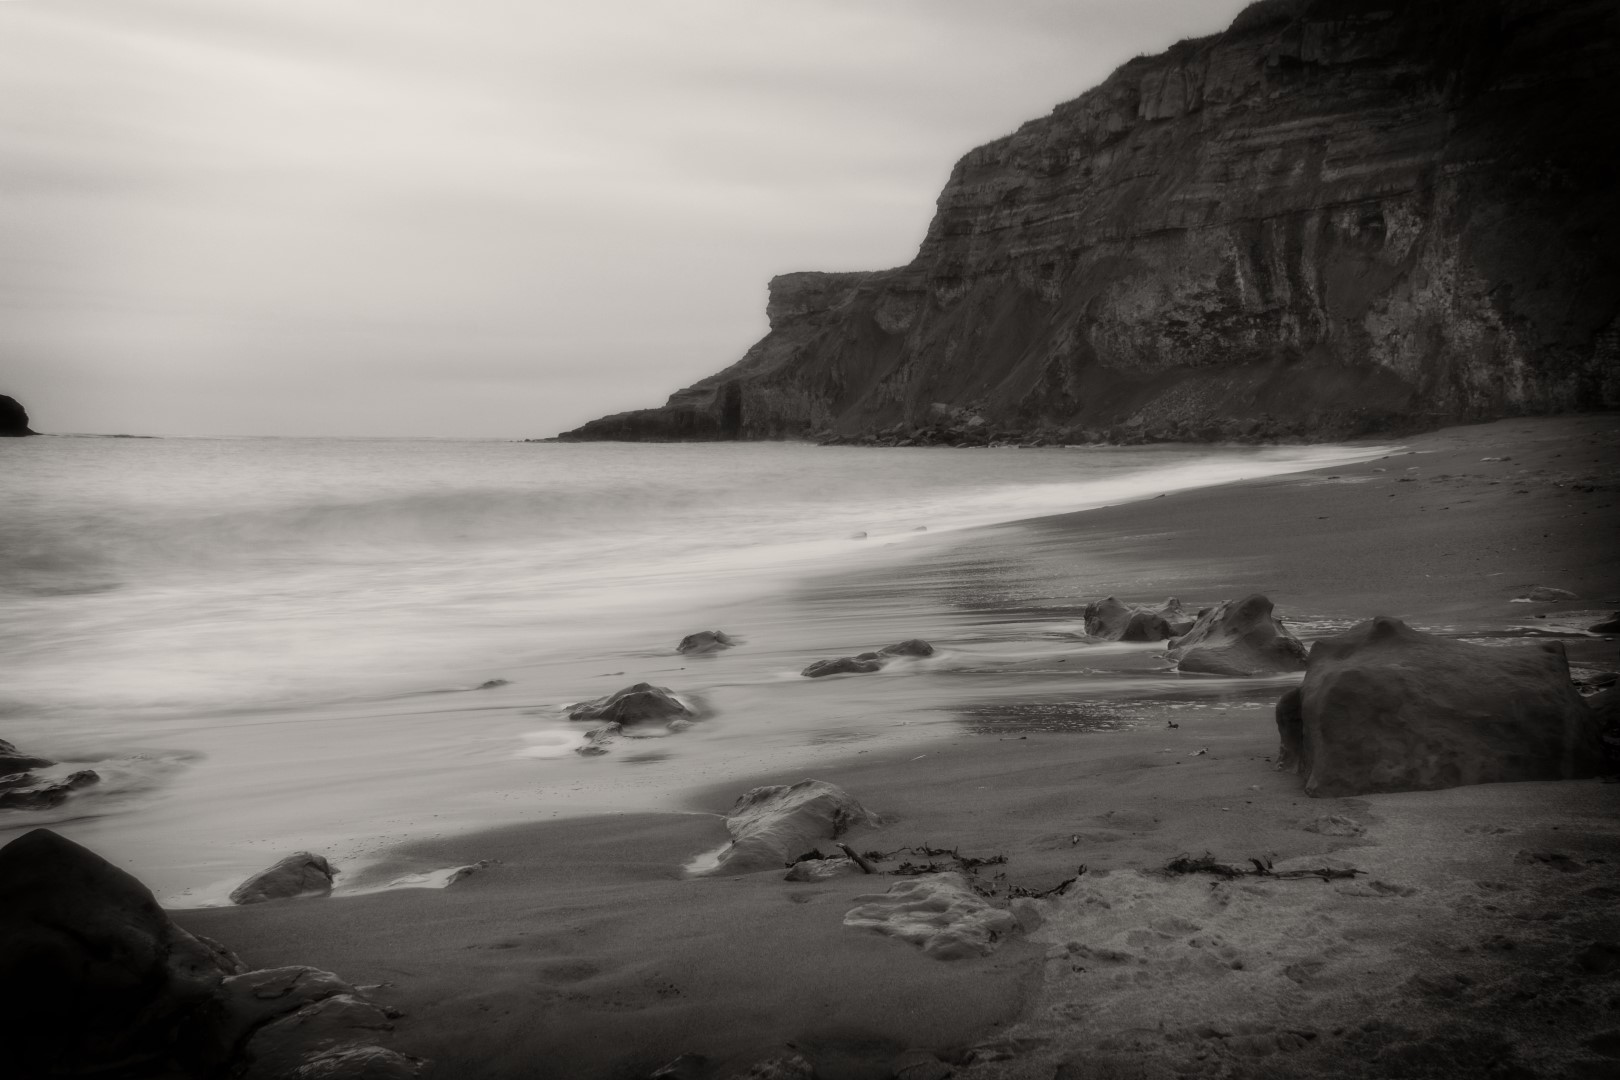


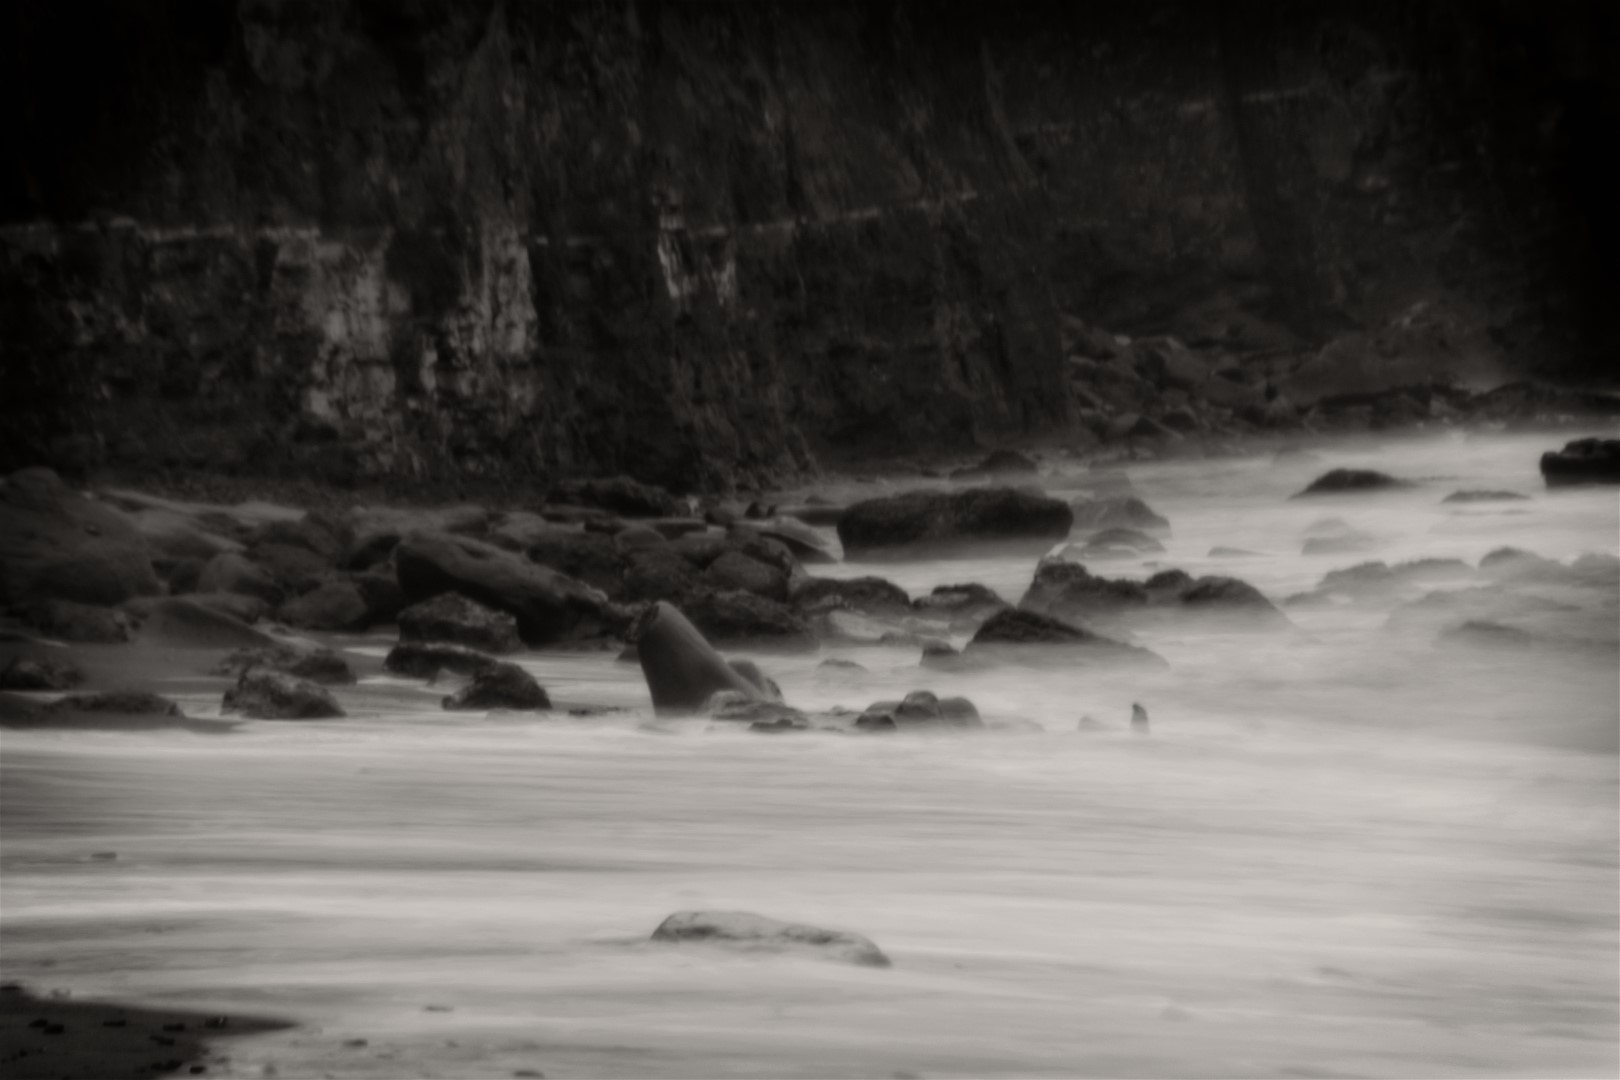
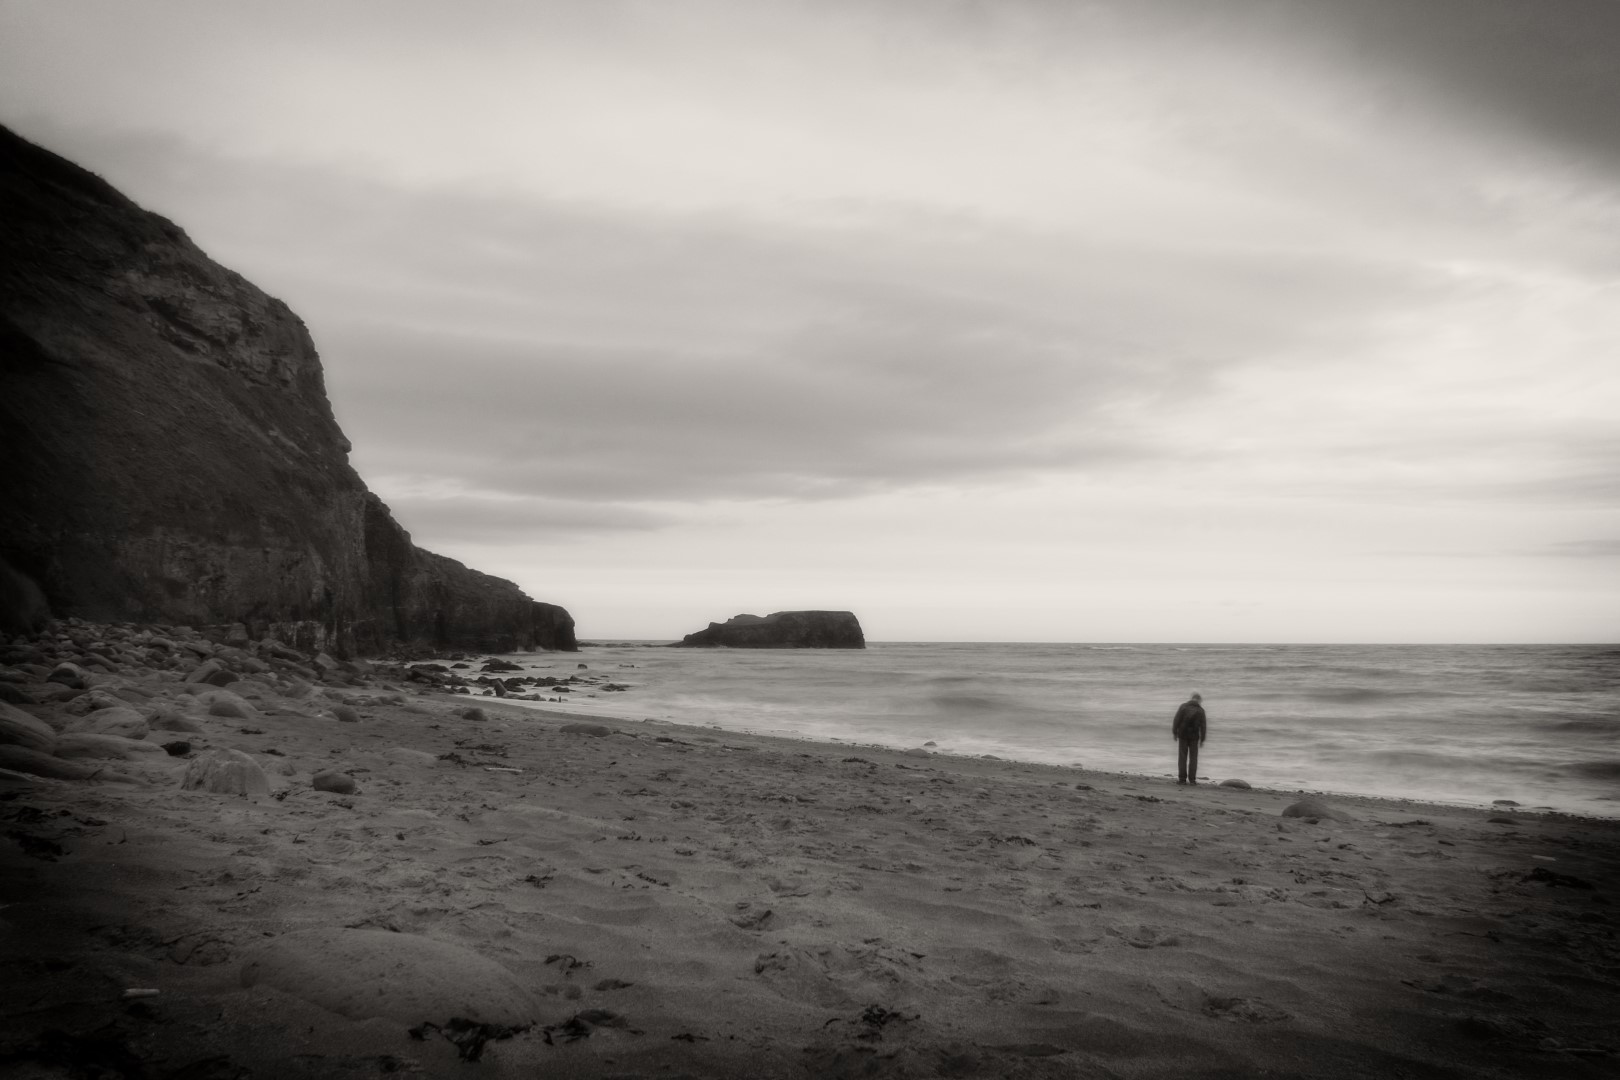
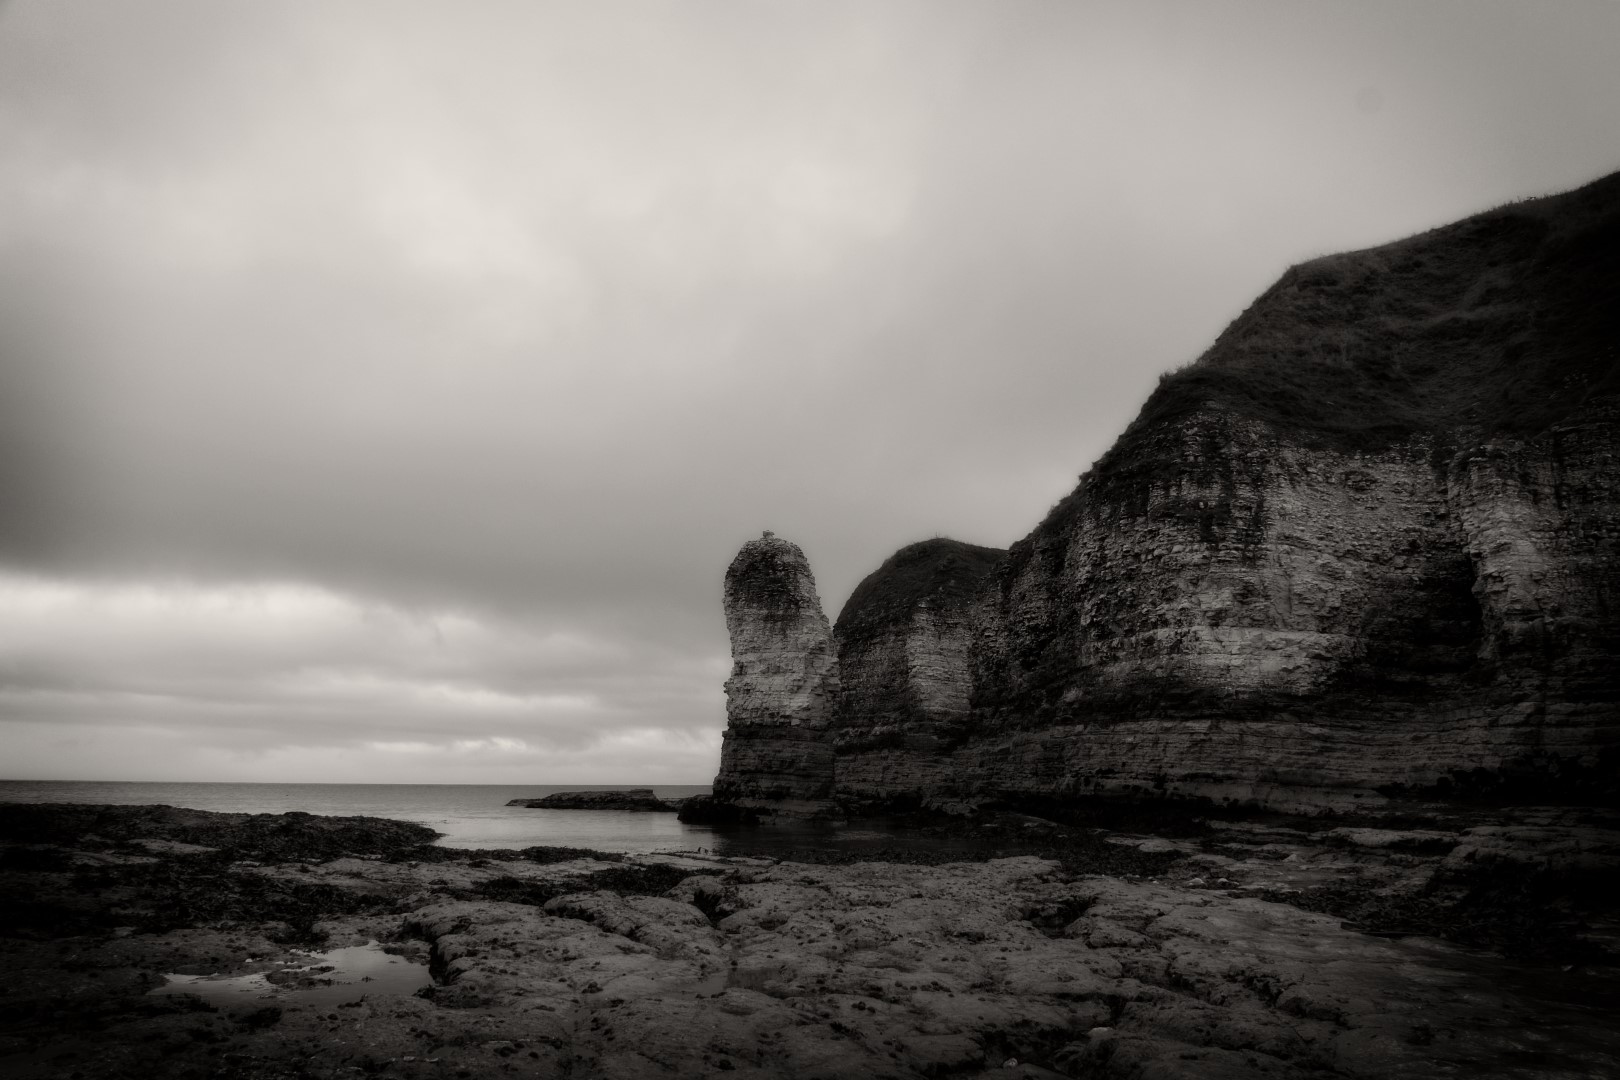

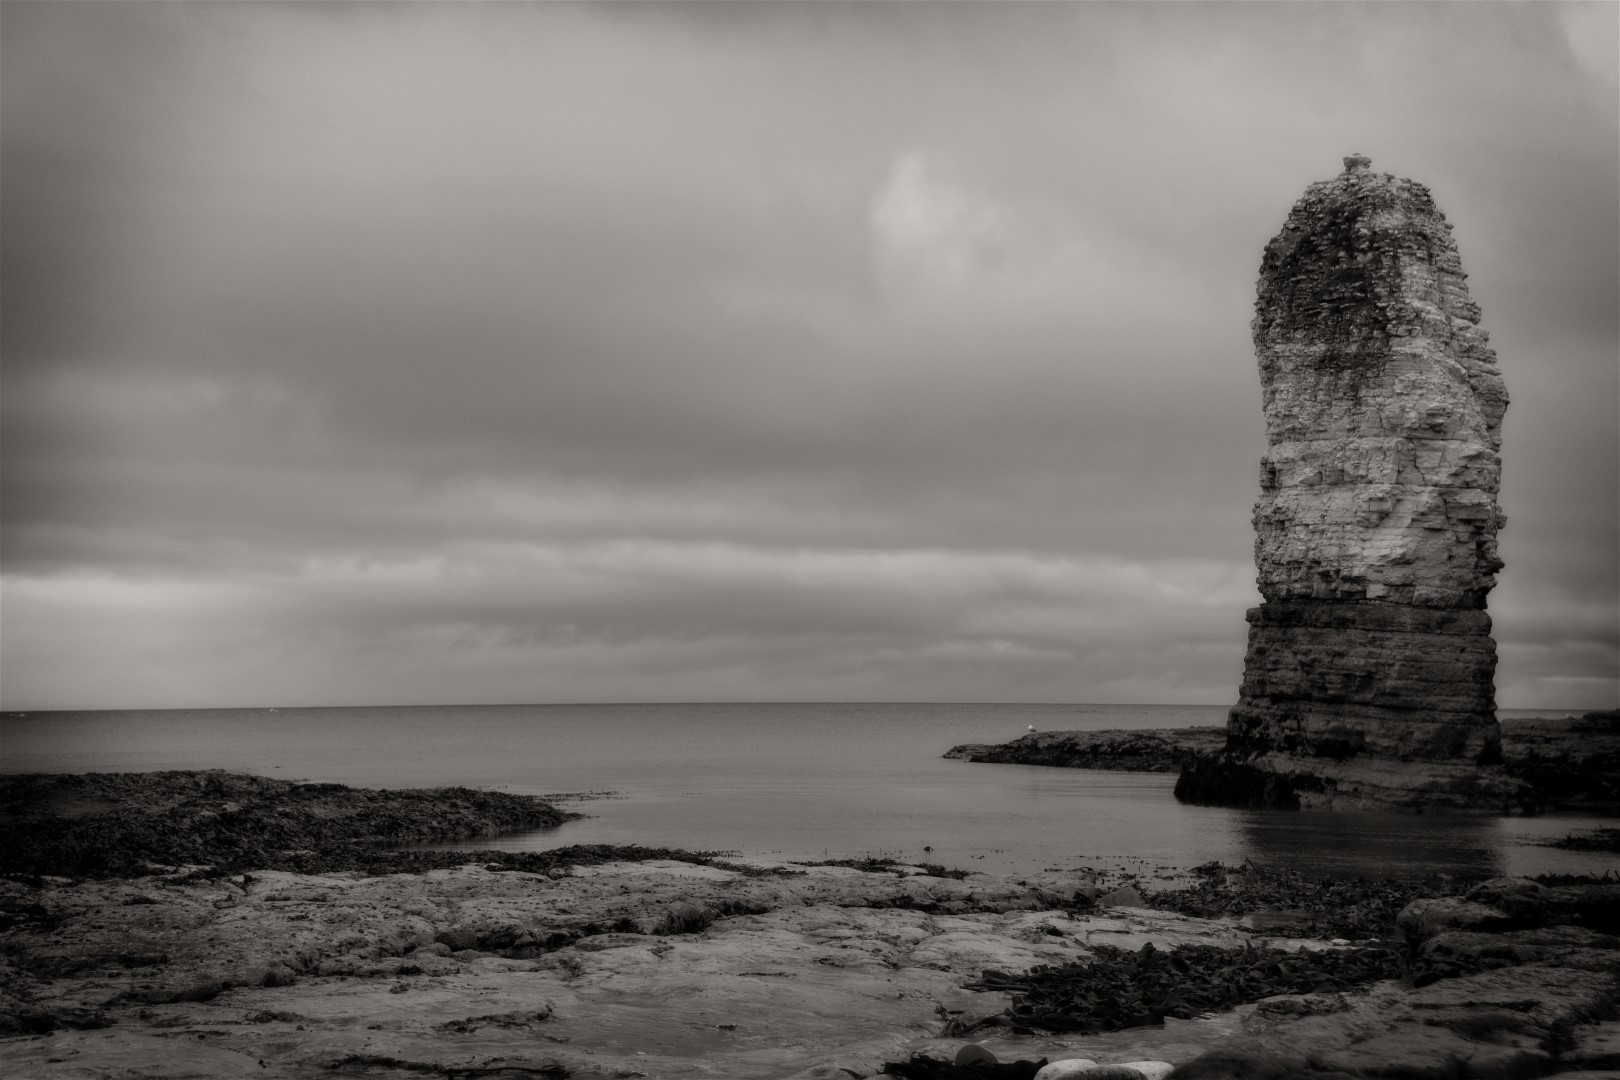
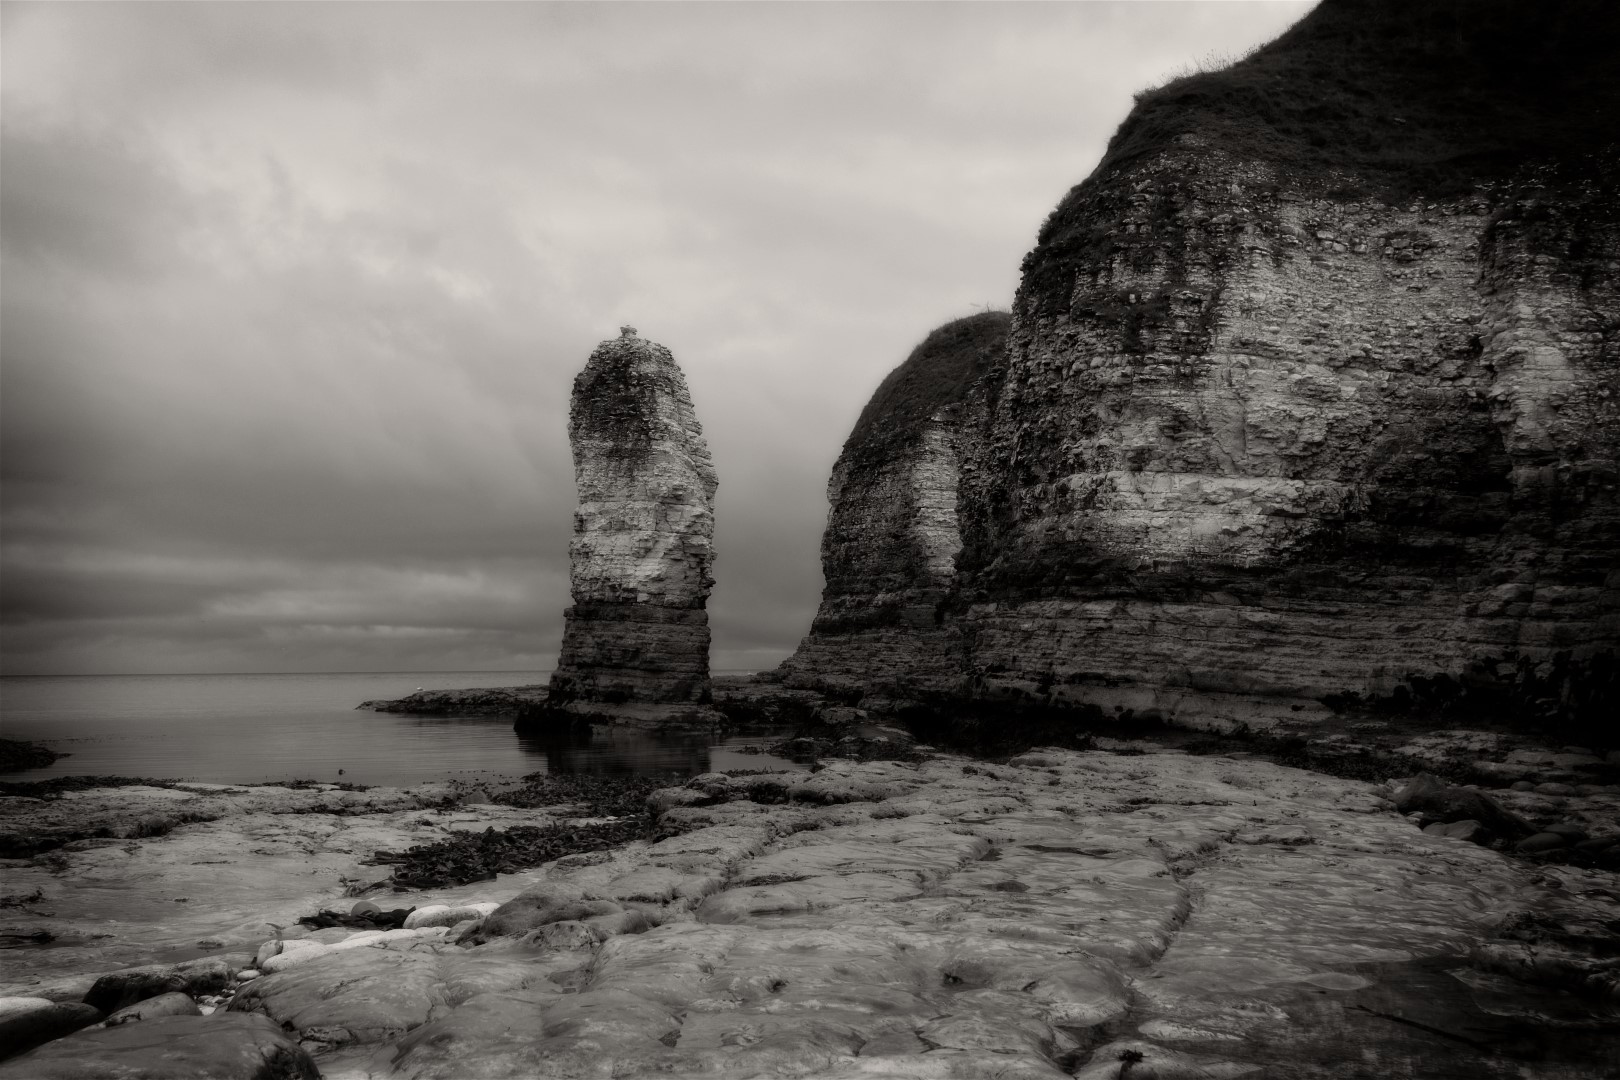

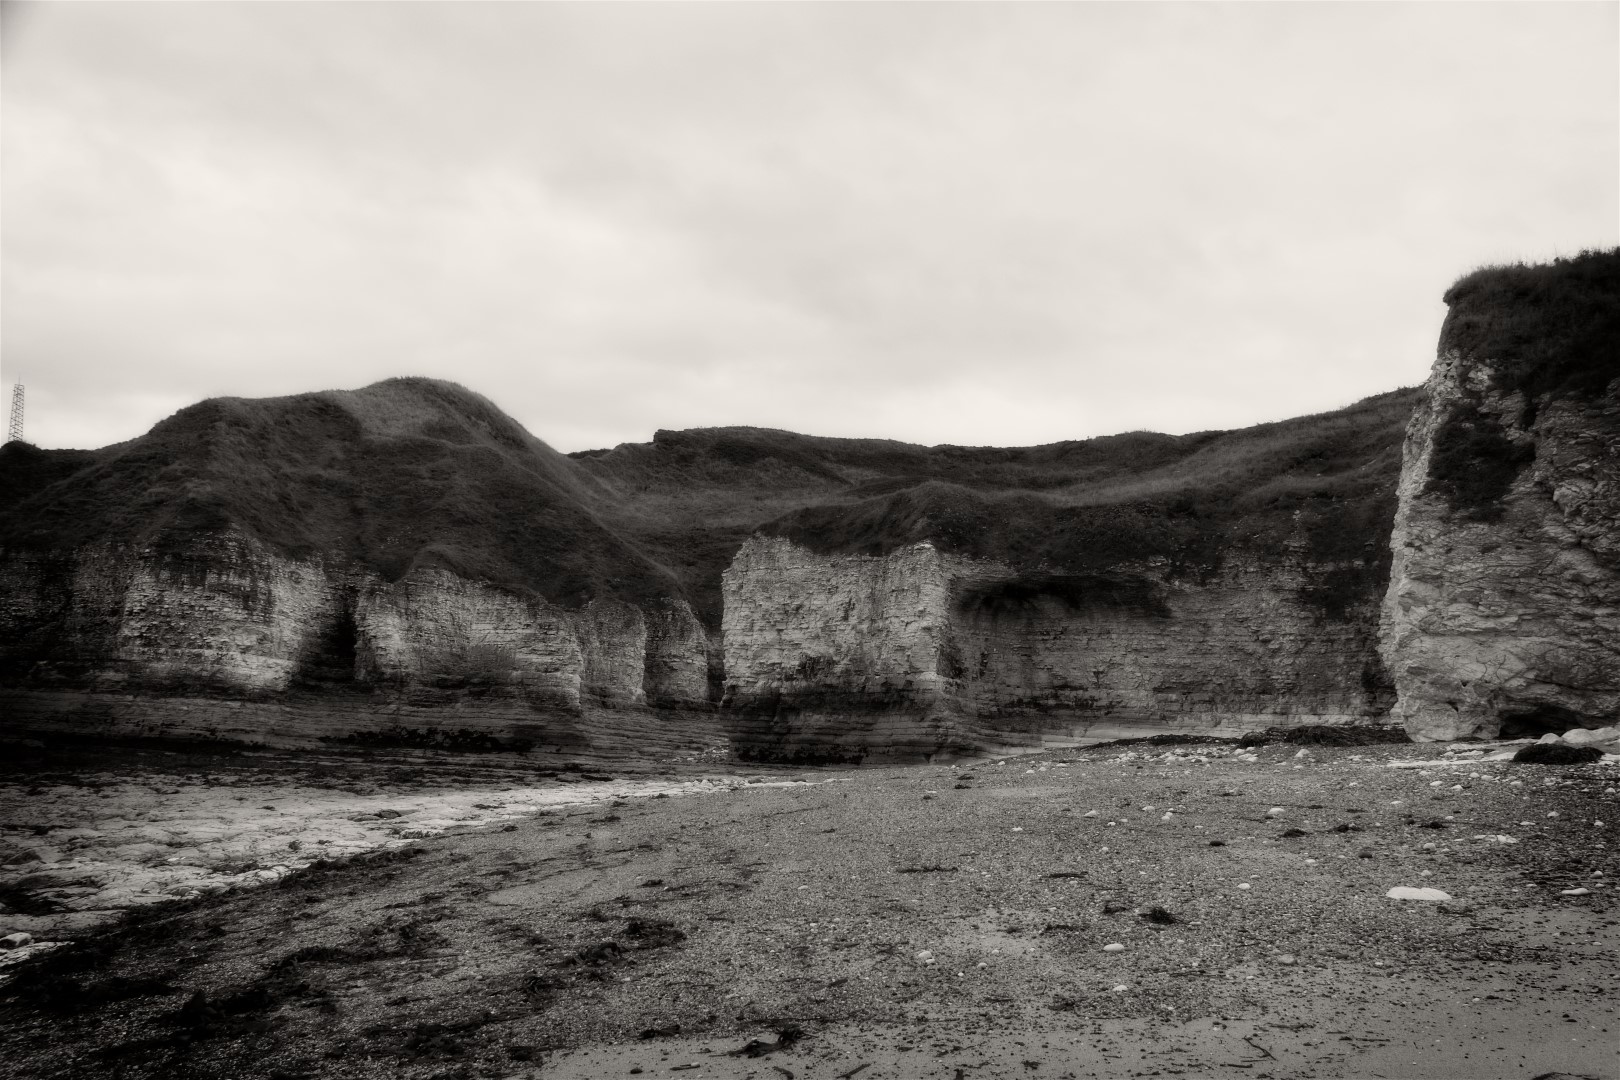
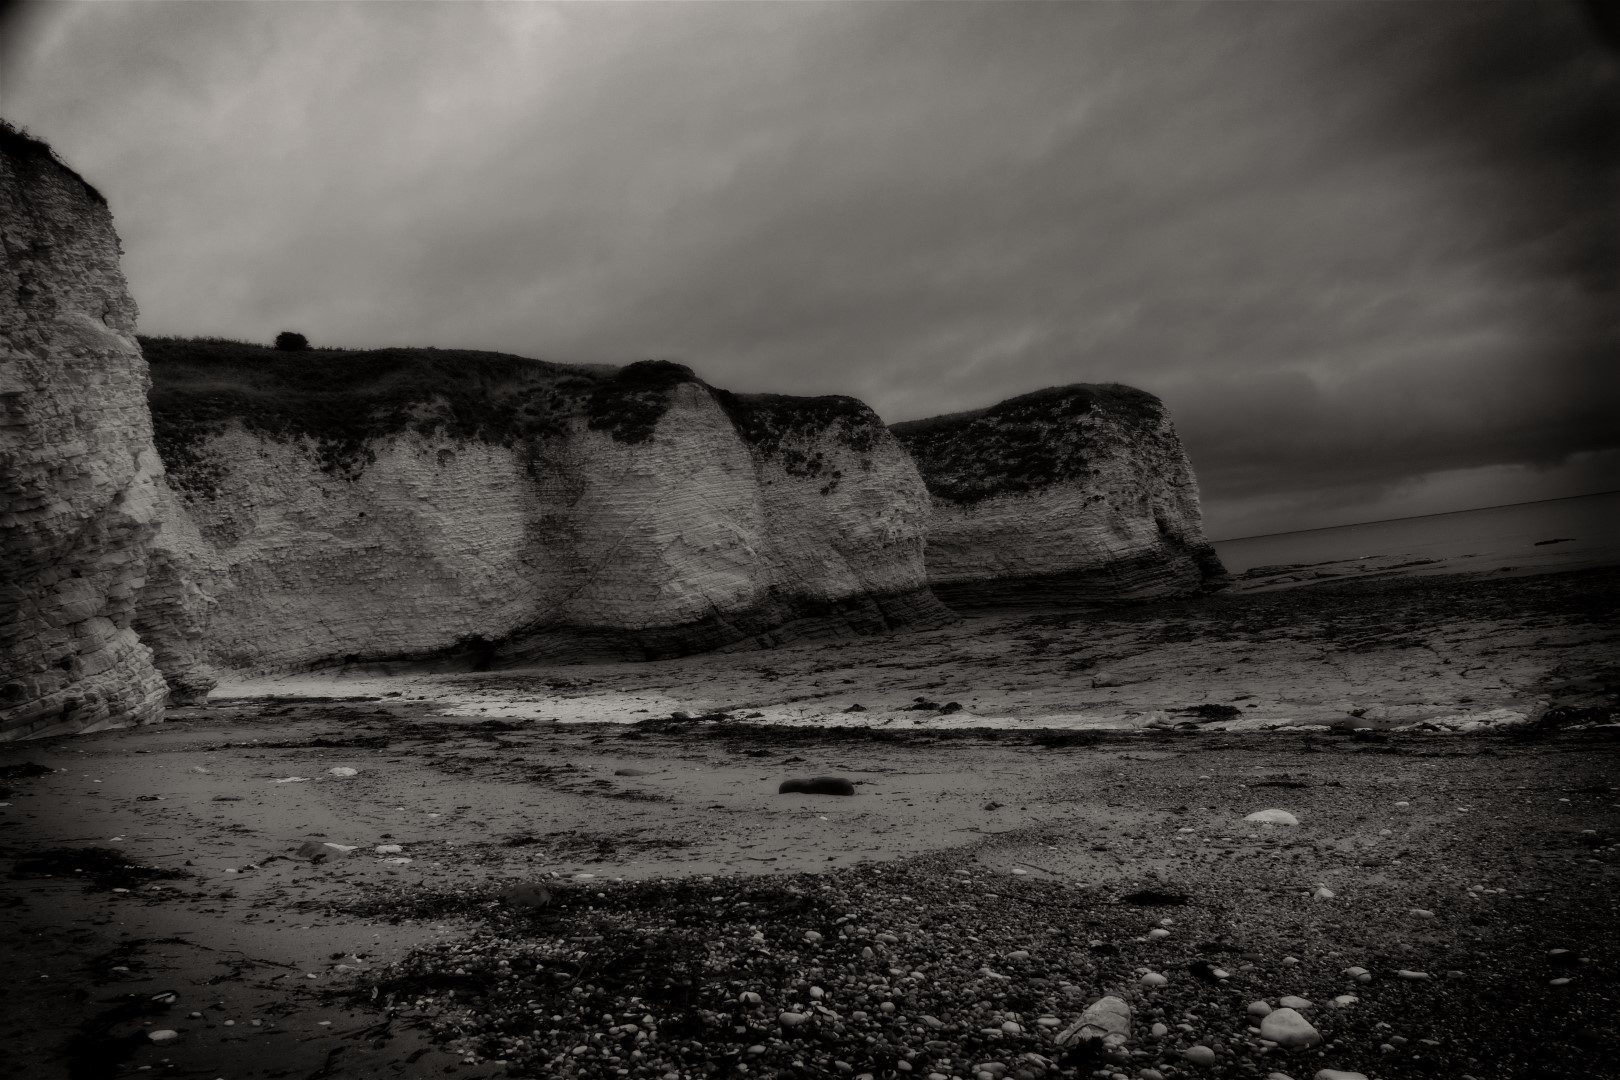
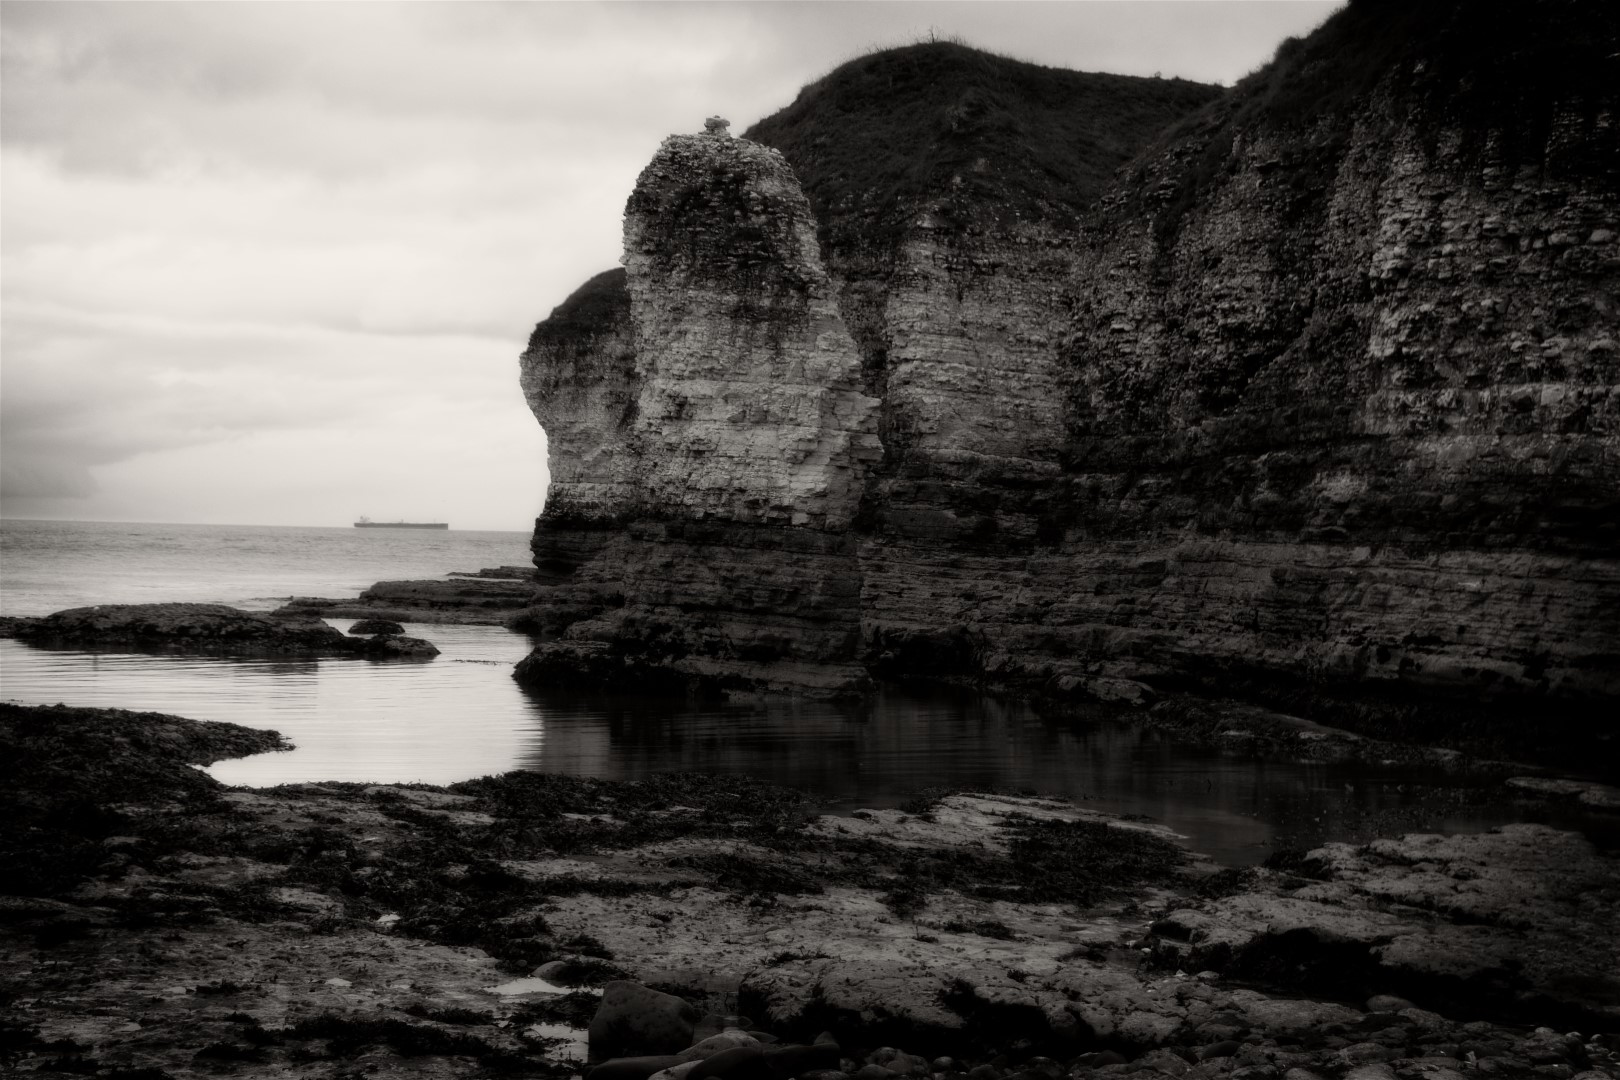
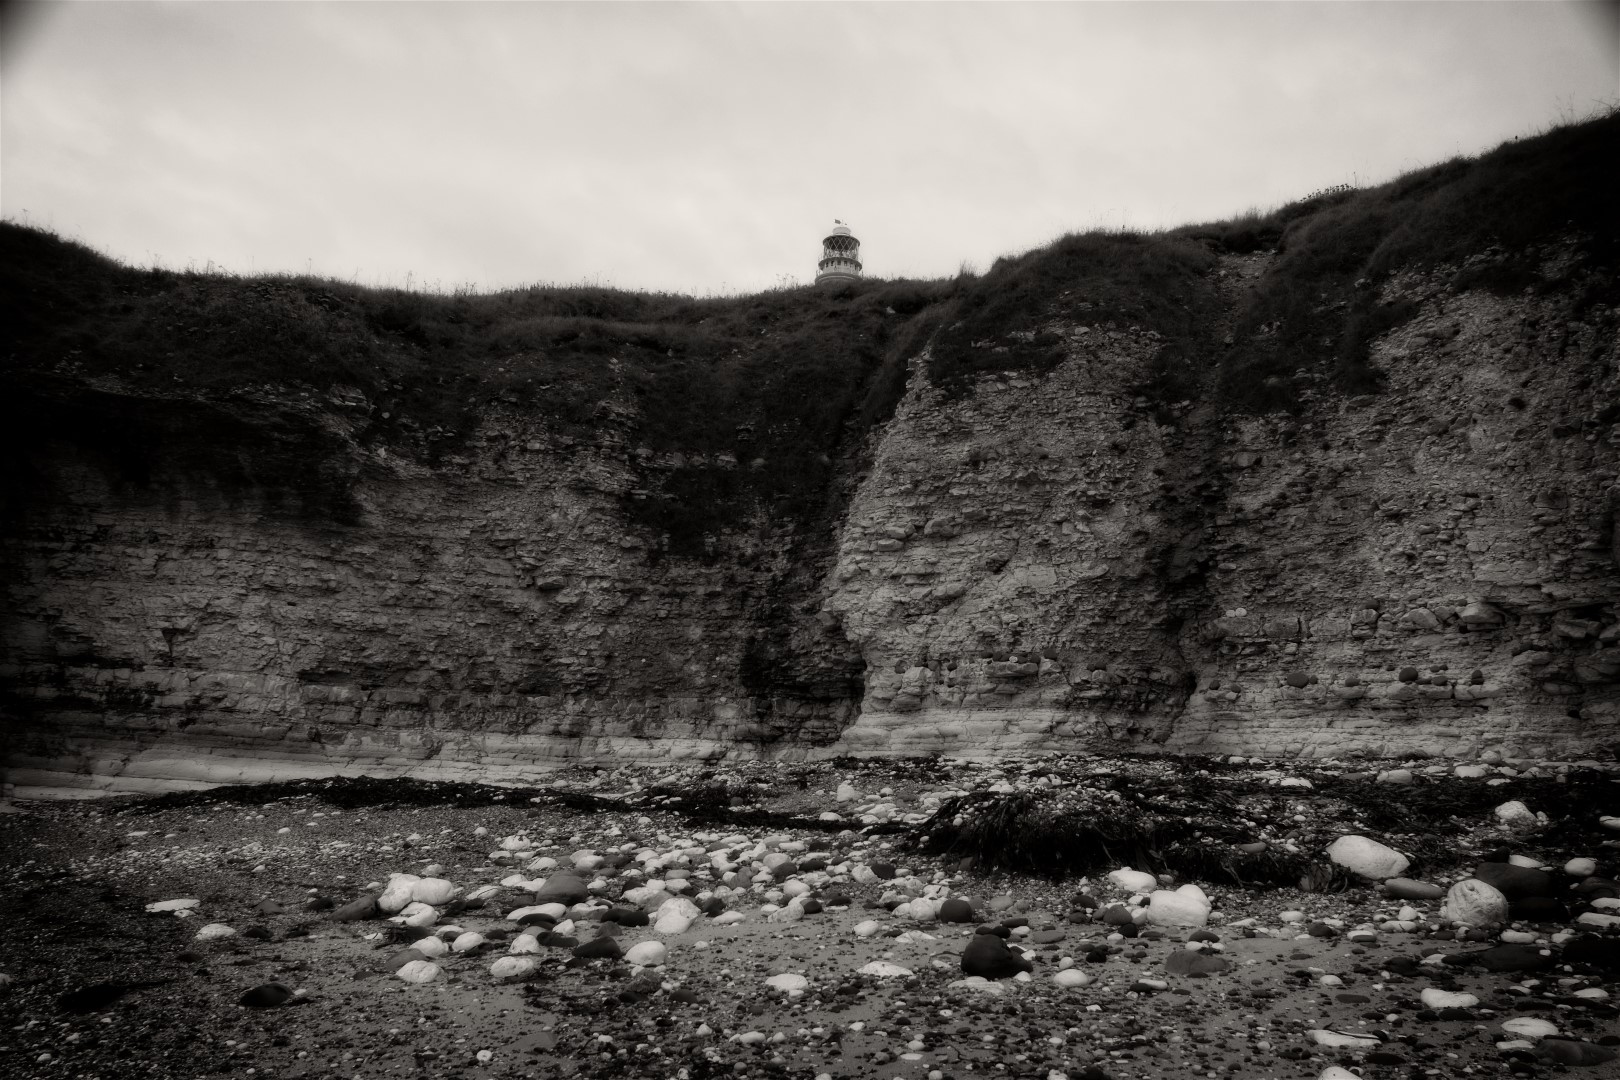

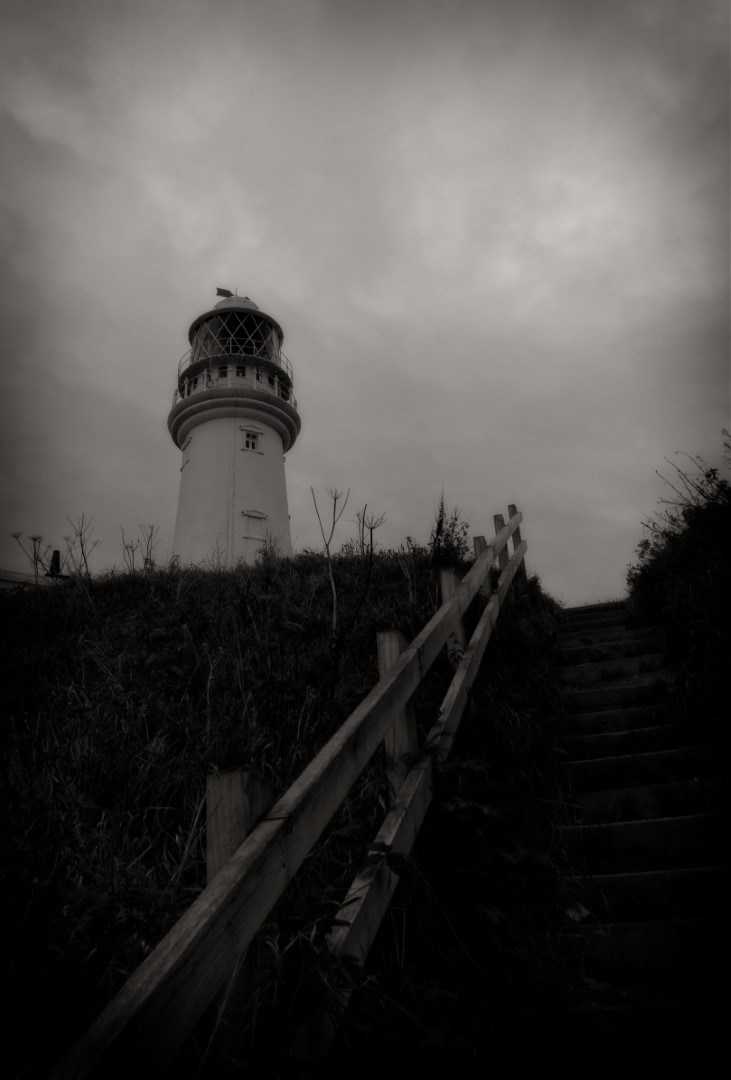
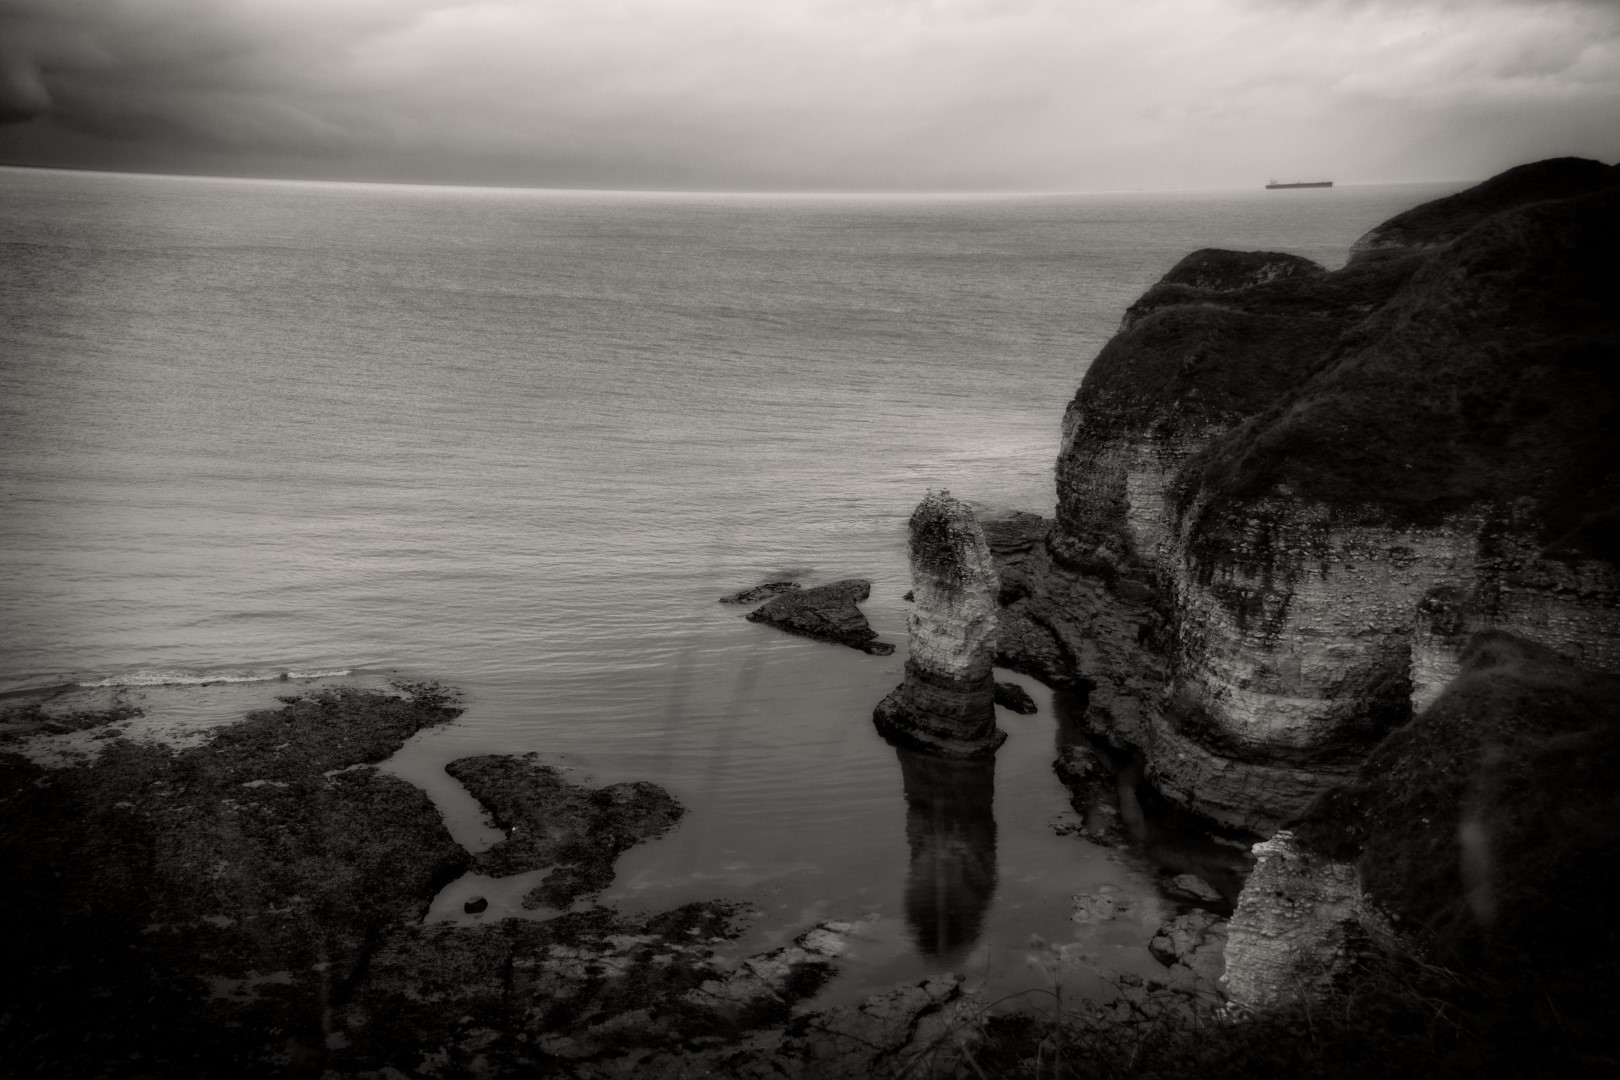
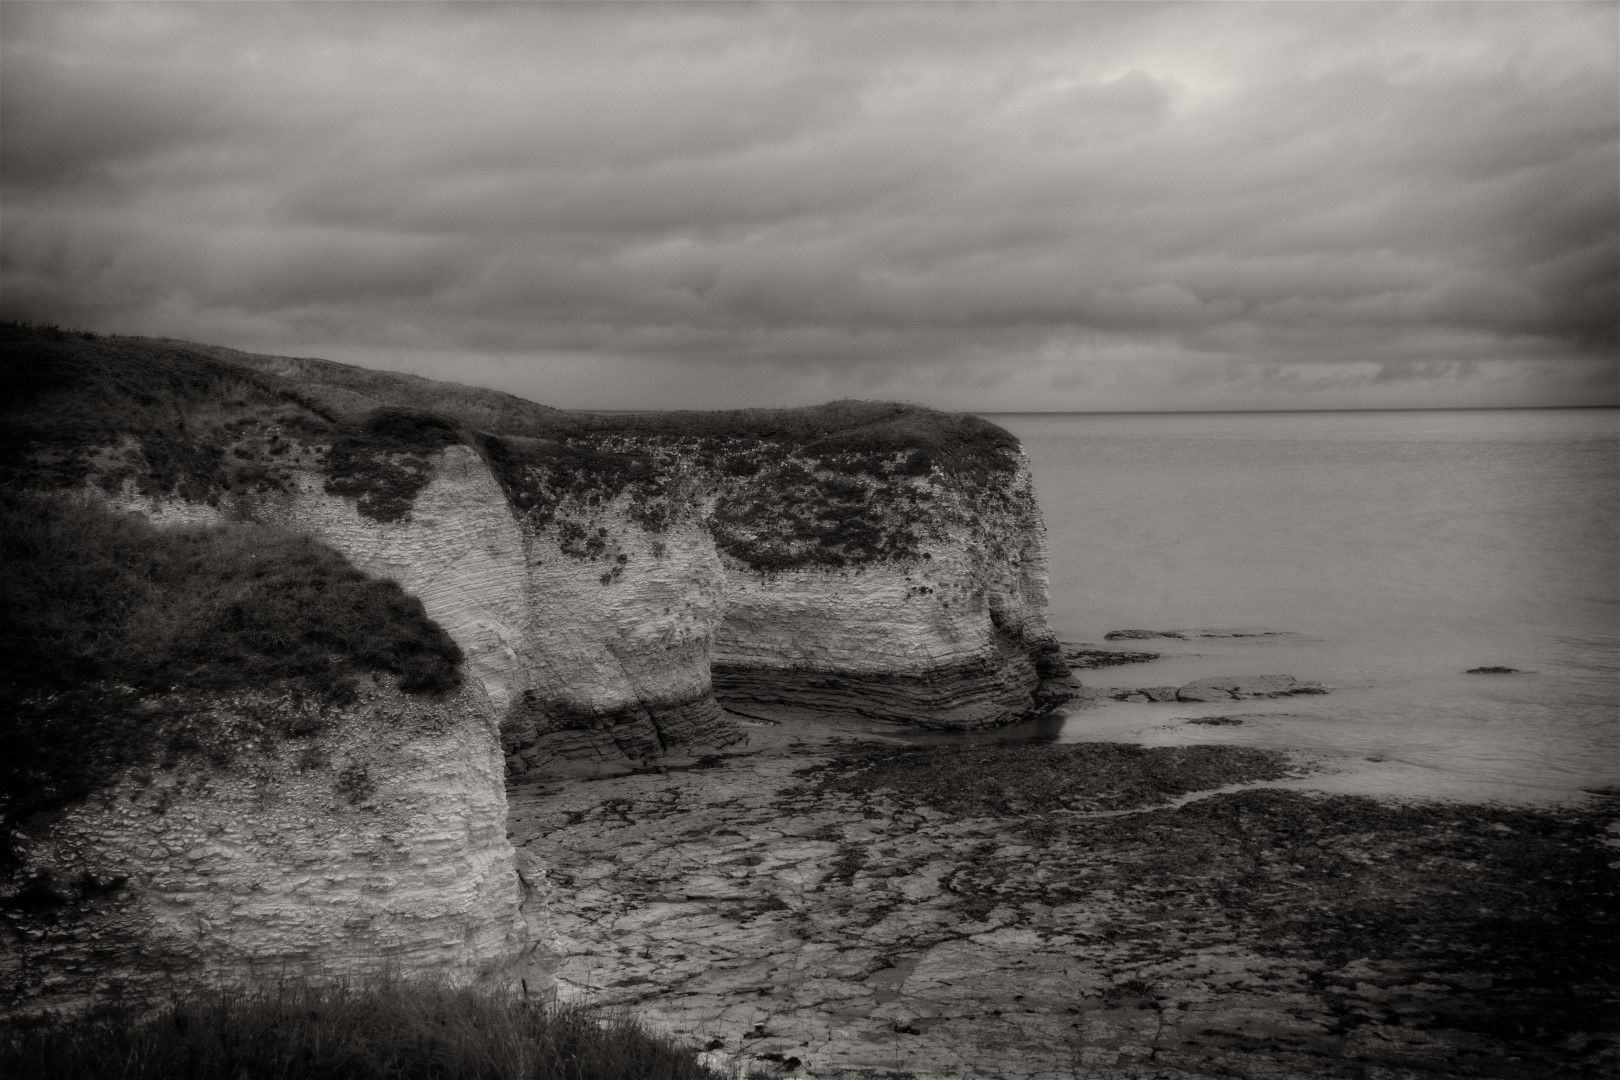

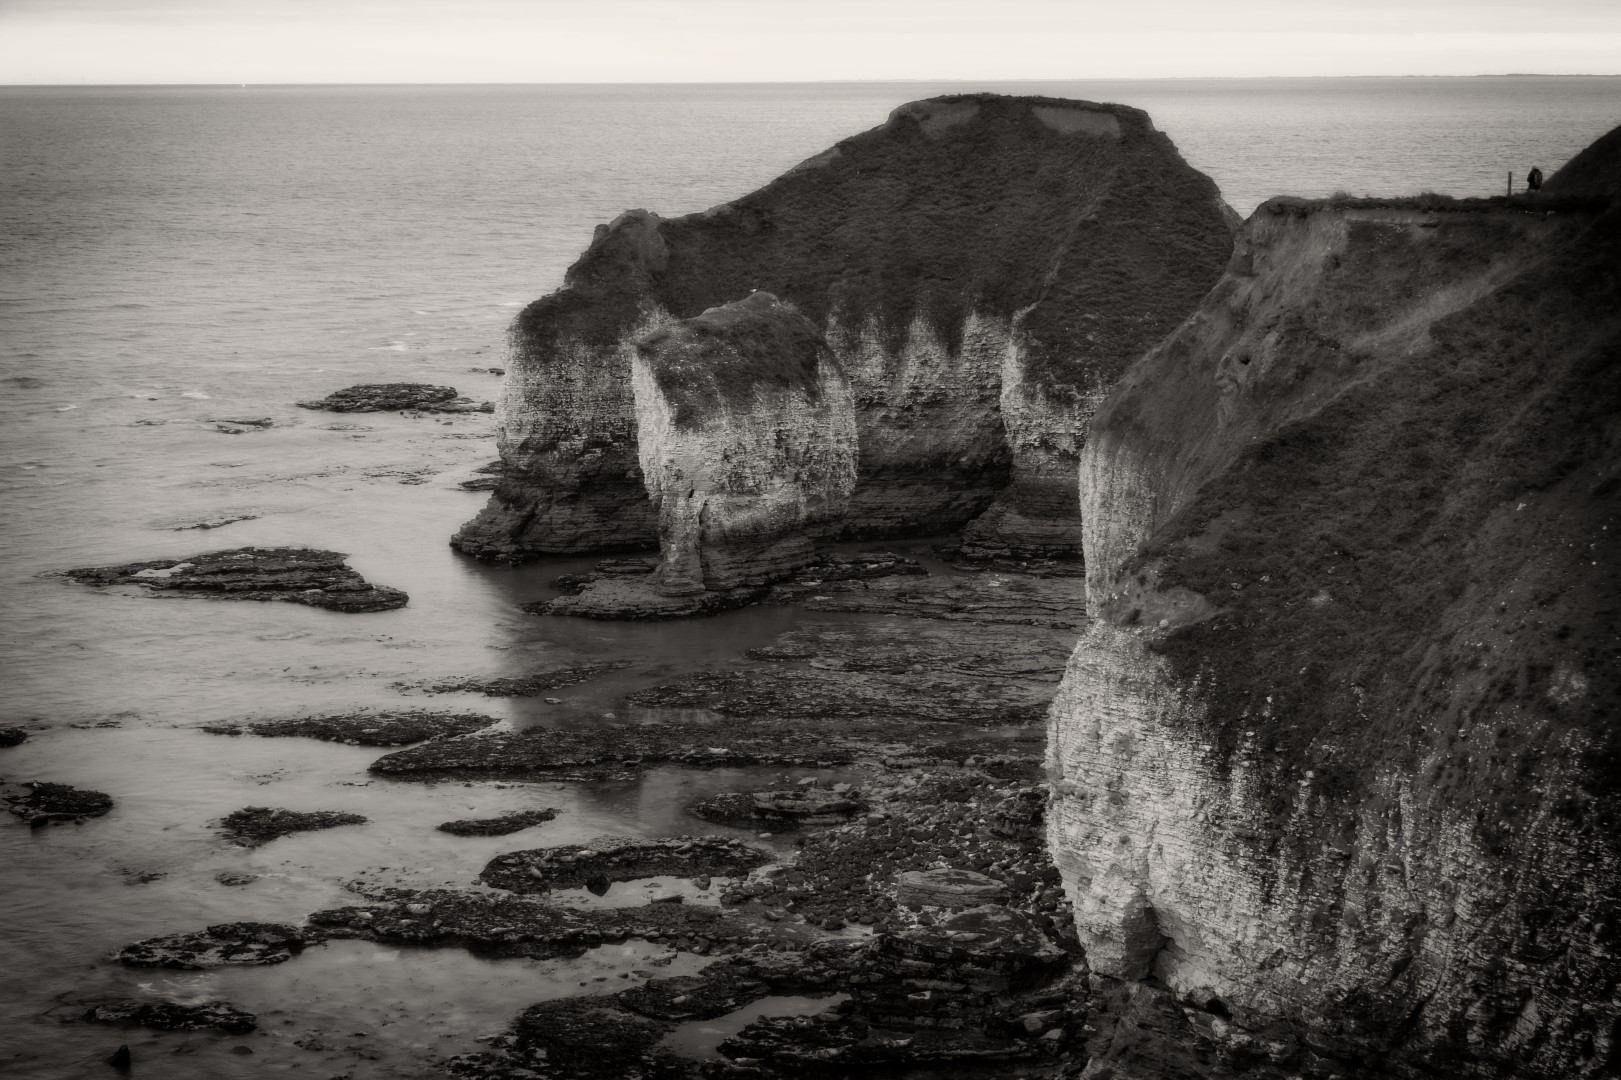

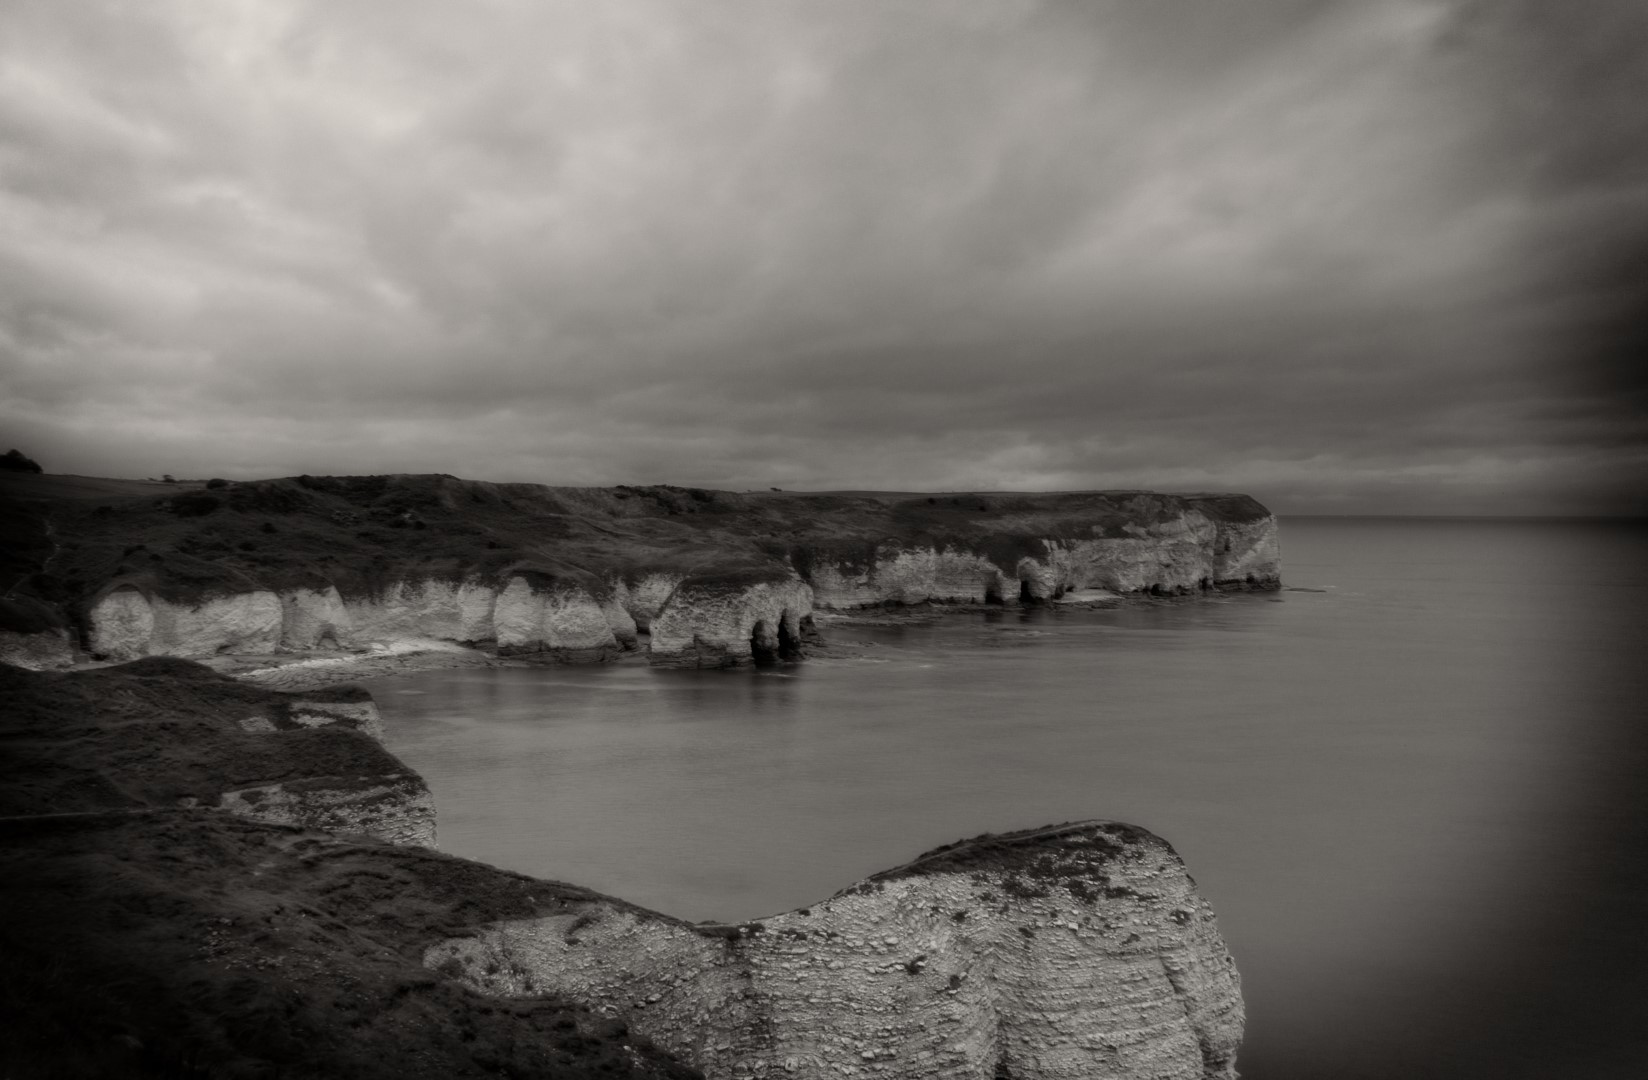
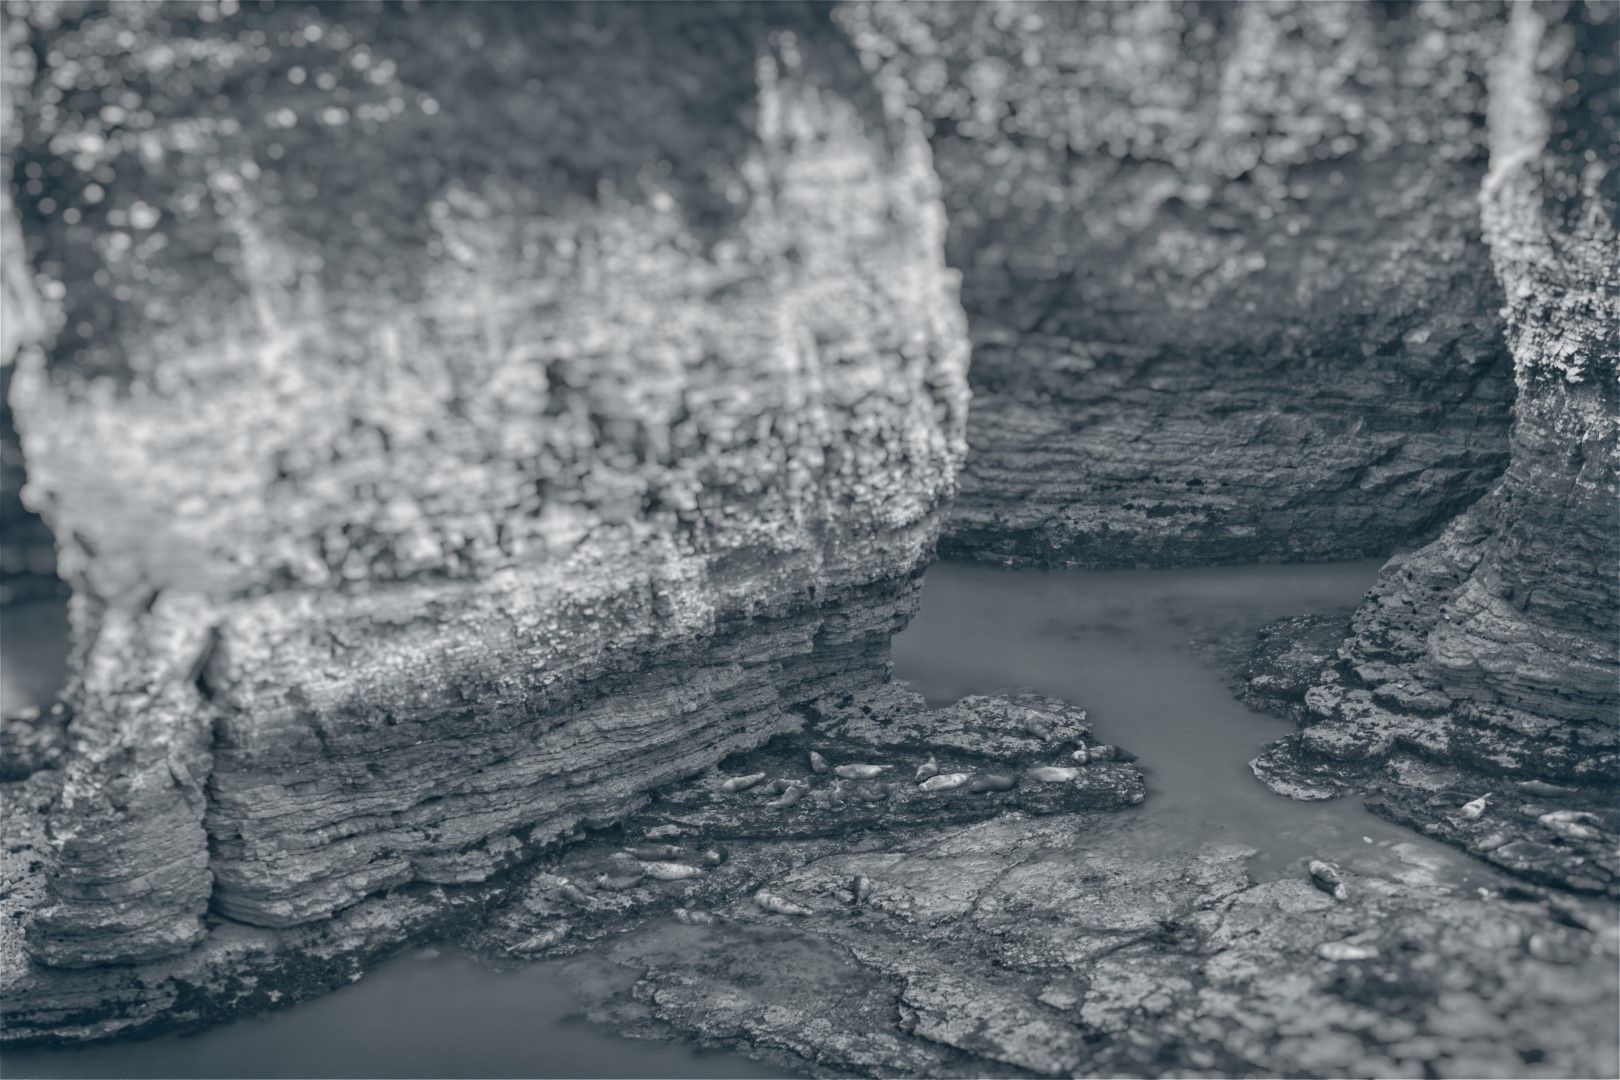

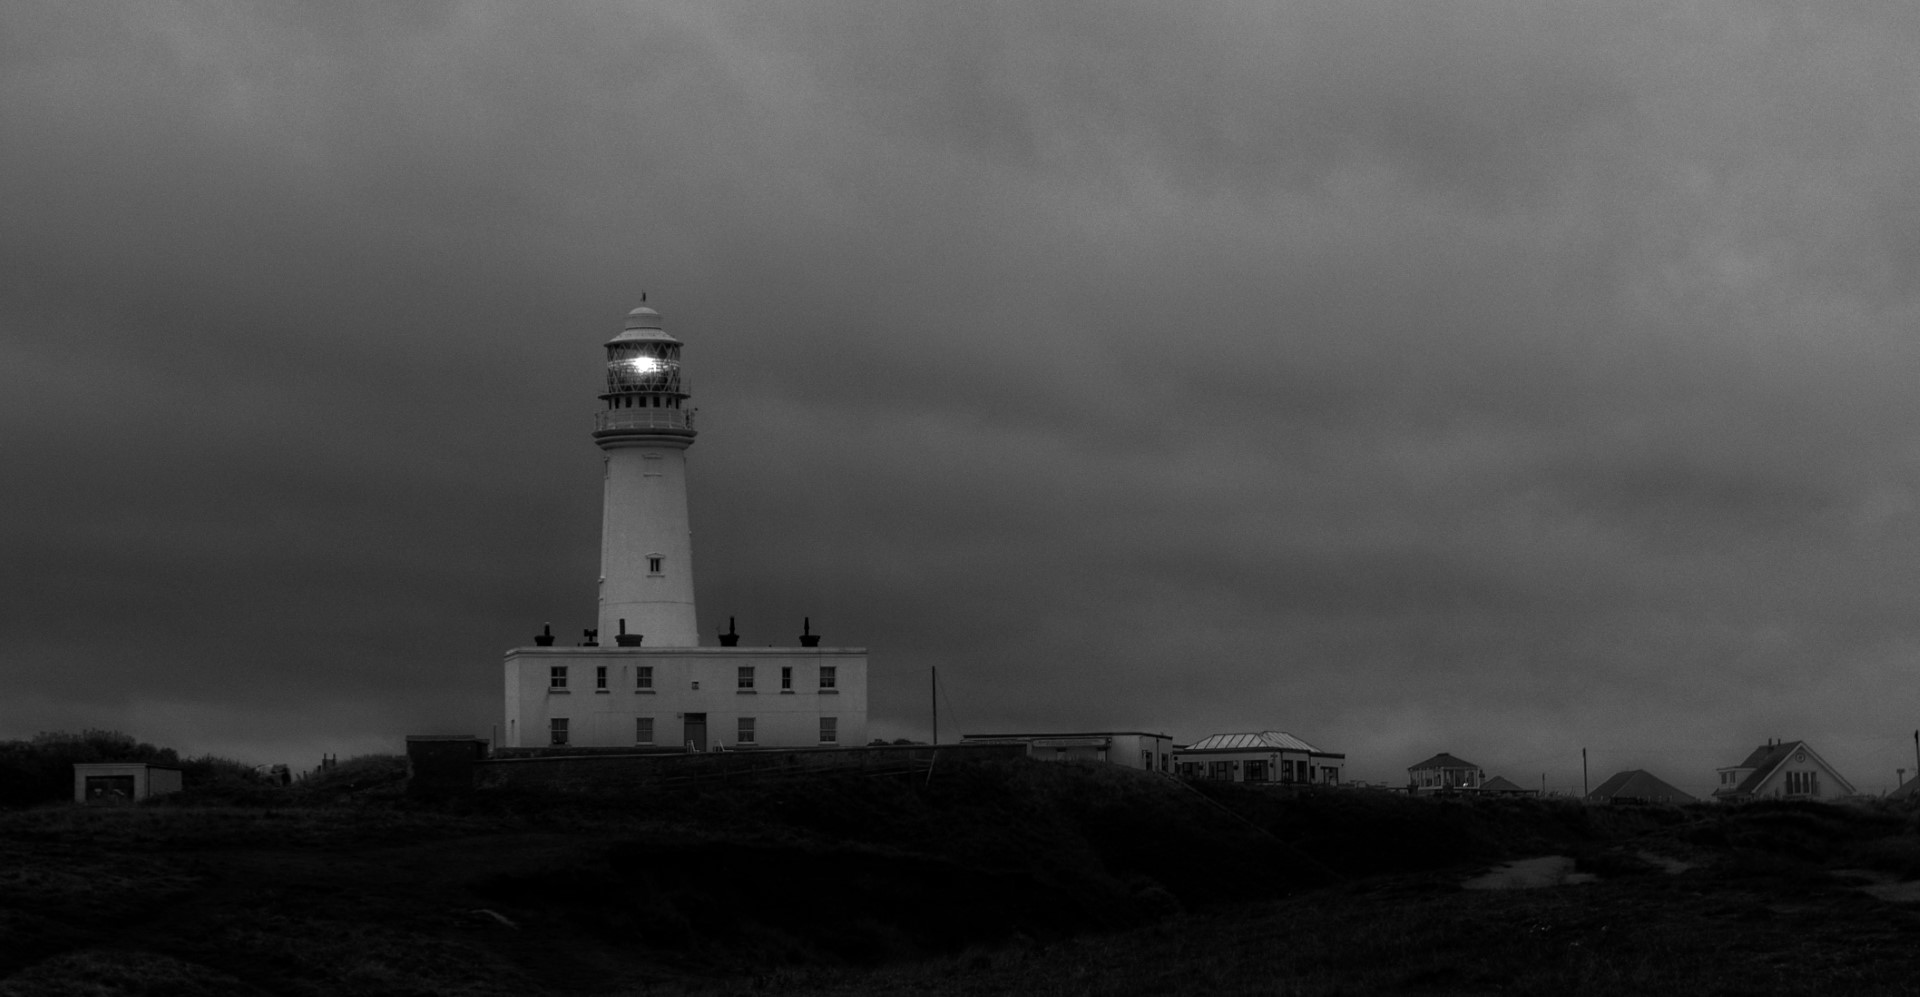
I recently took a day out and travelled up the Yorkshire coastline, starting at Flamborough for sunrise, finishing at Whitby at the end of the day and calling at Scarborough and Saltwick Bay. My aim was to capture some some black and white coastlines / seascapes that I felt weren’t half bad for a first attempt. See how they turned out….
Amazingly there are two in August 2023. This video will show the best methods to capture both. Useful for a watch even after this event has passed for some general tips on photographing the moon.
Video from PhotoPills.
From Nebula Photos – a full introduction video around night sky photography. Courtesy of Nebula Photography
I’ve seen quite a few posts on FB recently of mushroom pictures. Not just snaps of some in a plastic container from the supermarket but some pretty stunning images of wild mushrooms out in the forest / woods with some pretty cool lighting. Some are awesome and they inspired me to go out on a mushroom hunt myself.
There’s a reservoir near where I live and its surrounded by a patch of woods. It had rained quite heavily the day before so I thought I had a good chance of finding some. Now, this is my first outing to capture mushrooms in the wild so I didn’t have any high expectations but I thought I’d see what I can do.
Wandering through the woods I found a few as you can see in the images below. I learned a few lessons here and will take them into my next attempt. I realised beforehand that I would probably need to focus stack when I returned home as I was using my 35mm lens but I made the mistake of thinking that I could handhold the camera whilst shooting. I’m not bothered about getting dirty or messed up whilst out shooting but for most of the shots I was crouching down rather than resting my camera on a solid base. Mistake. A tripod might have been too high as most of them were at ground level (some were on tree trunks so I could have used it then) but I should have found something to rest the camera on and used a cable release / remote trigger.
Another mistake was lighting. Some of the images I’ve seen recently have the inside of the ‘shrooms lit (not sure how that’s done yet) but I could have taken my torch and some coloured gels to create some nice effects and not relied on natural light (lots of shadows in the wood and limited light) or the camera flash (too harsh).
Overall I was disappointed with my efforts but I managed to rescue some. I used Lightroom to post process and focus stacking was done in Photoshop.
How do we see? Admittedly some are better than others (without my glasses I’m as blind as a bat!). But, in order to see our eyes need light. It enters through the pupil, is focussed by the lens (or the other way around with glasses!) then hits the optic nerve where it goes off to be processed by the brain.
Camera’s work on exactly the same principle. It needs light (sometimes not very much) to be able to see the area in front of it to record the image. It is focussed by the glass in the lens, then goes through a hole in the lens (like the pupil), before passing into the camera sensor (optic nerve if you like) to record the scene. There’s a little more to it but that’s the basic.
Grab too much light in the recording and the image will be OVER EXPOSED. Don’t get enough light and the image will be UNDER EXPOSED. Mostly these are bad as you’re looking for a sweet spot somewhere along the line between the two that give a good balance of a few things (bear with me), but sometimes over or under exposing an image is what we want. The important thing is we need to manage and control the exposure and make sure it’s not down to guess work. On auto mode the camera does a lot of work for you and tries its best with the information it reads from the scene to take the most appropriately exposed picture – or so it thinks.
But, three things can be adjusted to control exposure – aperture, shutter speed and ISO. Getting all this right for the type of image you are trying to achieve is what we’re all about over the next few posts. Get them right in connection with each other and you’ll instantly make a massive jump forwards in the quality of your images from ‘point and shoot’ to something more refined, balanced and looking much more professional.
Let’s start with APERTURE.
This refers to a hole or a gap in the camera’s lens – the word simply means ‘opening, hole or gap’. It is closed by default and how wide it opens can be controlled in manual mode to determine how much light enters the lens and the camera sensor is exposed to. Open the hole really wide and a lot of light comes in, open it only a little bit and not so much. Change the aperture setting and you control the size of the hole.
The size of the hole is referred to as the ‘f stop’ and if you’ve seen ‘f2’ or ‘f13’ or similar then this is what it is referring to. There will be more on f-stops and how they relate to lenses in a later section.
What I find really confusing is that smaller f-numbers give a bigger hole. See the following image:
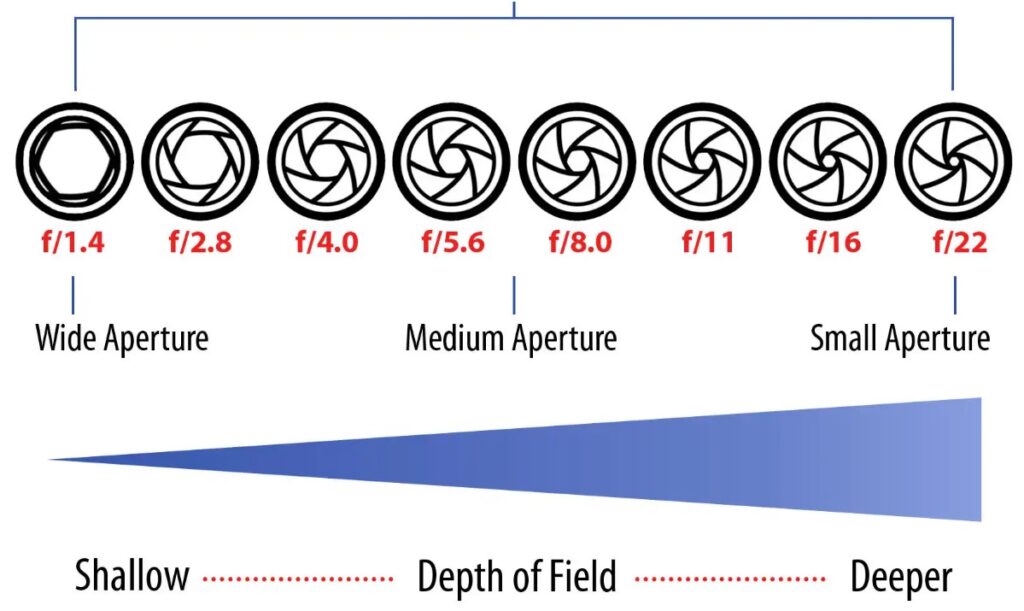
F2.8 gives a massive (relative) hole to let in lots of light, often used in low light situations, and f11is a much smaller hole that lets in hardly any light at all – much less than f1.4 and there is a sliding scale in between.
This is just an introduction to the concepts of aperture and I’ll write more on it in a separate post. This simple understanding should suffice for now. Hopefully.
Select Date & Time
Your Reservation
Location
{location_name}Clients
Photographer
{employee_name}Price
{reservation_price}Total: €0