Modern cameras have plenty of modes that you can use to try and get the best shot for any given situation. They range from fully automatic where the camera makes all the decisions for you and guesses at the type of shot you are wanting to achieve, right through to fully manual where all the decisions are down to you. There are of course, combinations of modes in between where you make some decisions and the camera does the rest depending on your choices.

This section will describe the most common modes – note that some of these might have slightly different names depending on the camera make and model.
Shutter Mode
In shutter mode you have total control over the speed of the shutter. You set the speed depending on what you are trying to achieve and the camera makes decisions for the other parts of the exposure triangle – ISO and APERTURE.
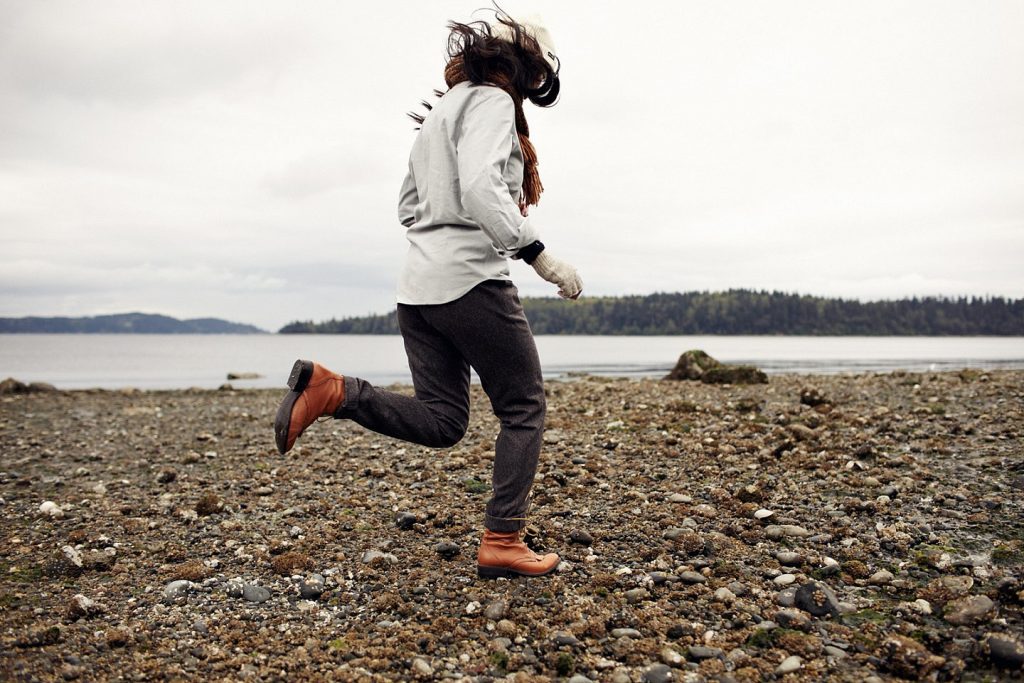
If you want to capture something static select a fast shutter speed and the moving object should be caught nice and still – if you’ve set it fast enough.
If you want to portray movement then slow the shutter speed down and you get motion blur of moving objects in the image.
Depending on what you select the camera will choose the aperture and ISO to suit the available light in order to attempt to capture a balanced, well-lit image. It can’t always do it right but it tries to do a good job using the information it has by sampling the scene.
Other factors will come in to play too and if you’re looking for a pin sharp image you should always be using a tripod and perhaps a remote to minimise camera shake. But that’s for another day.
To use this setting, turn the mode wheel of your camera to ‘S’ and then there is another wheel (usually near the picture trigger) to rotate to change the speed of the shutter. Remember it is shown on the camera display as either a number in seconds – 1″ is 1 second, 5″ is 5 seconds, etc. Alternatively for speeds of less than a second it is shown as a fraction – 1/2 is half a second, 1/8 is an eighth of a second, etc.
This image from the centre of Bangkok, Thailand had the shutter speed dialled in (2 seconds) and the camera decided that the aperture should be f6.3.
Depending on the camera make and model you can range from something like 1/10,000 of a second right up to 30 seconds. Beyond that there is something called ‘BULB’ mode where the shutter stays open for as long as you keep the picture trigger button pressed.
More on that in a separate section but essentially BULB mode takes exposures and shutter lengths to extreme times – above 30 seconds into minutes and in some cases hours. In this mode the shutter stays open for as long as the shutter button (or remote release) is depressed but be wary – this can dramatically drain the camera’s battery as these long exposures can demand a lot of juice!
Aperture Mode
This mode is the opposite of shutter mode (S). Here you select an aperture (the size of the hole in the lens when taking the image and the camera determines and appropriate shutter speed by sampling the light available in the scene.
The most important effect that changing the aperture can have on an image is to vary the DEPTH OF FIELD. This is the amount of the image that is in focus from the nearest element in the image right through to that part that is furthest away. Landscape and portrait images demonstrate this the most by having the main subject of an image in pin-sharp focus whilst anything in front or behind blurs as they are not the main element.
In fact, this mode is most used by these two types of photographers as it gives them excellent control of how their images are represented.
Consider the image below:

Your eye should be drawn to the centre of the main flower with the stamen (the bits that have the pollen) in good, clear focus – the focal point – and as you move outwards towards the edge of the image it blurs, with those elements farthest away from the focal point subject to the most blur. To make more of the image in pin-sharp focus, change the aperture so that the hole is smaller – i.e. step up and increase the f-number.
Auto Mode (A) and Programmed Auto Mode (P)
When most people purchase their first DSLR camera they may feel overwhelmed with all the buttons, dials and settings so most will start on the AUTO mode – and there is absolutely nothing wrong with that. I still use it – sometimes I want to see what settings the camera will use for an image. Other times something might be happening really fast and I want to make sure I capture a half decent image before the moment passes. This stops me messing up and losing the opportunity for ever.
I might say that this way, effects that are created using other modes might possibly be created afterwards using software such as LIGHTROOM, LUMINAR or PHOTOSHOP… but I’ll never admit it …
With this mode the camera takes care of everything. All you have to do is point and press – well press half-way to allow the camera to focus and then all the way to take the image. The image below was captured on full AUTO mode (camera derived settings shown underneath:
Aperture and shutter speed are calculated and depending on the focus mode the camera will work out some depth of field details.
With PROGRAMMED AUTO (P) mode the camera will work in exactly the same manner and choose (what it thinks is) the best aperture and shutter settings. However, different combinations of these can be selected to give a different effect to the final image – alter the depth of field for example and all combinations will produce the same exposure.
Manual Mode
Your road to professional quality pictures starts here! MANUAL mode is where all the big guns live – you have complete control over every setting of your camera and can use them all independently of each other to produce exactly the image you were intending.
Set the aperture and shutter speed and as you become more confident in your craft this will start to become easier and easier. It’s not like the old days when you had to wait for film to be processed to see the results! Check your image in the preview window and if you don’t like it, change those settings and try again!
Normally, as you look through the viewfinder you will see somewhere (normally at the bottom) some indication of whether the current settings will result in a good or bad exposure, displayed as a scale of exposure (under or over). Change the settings whilst you look through this and you can see this slide-scale change to what the camera thinks is the correct setting. But remember – this is your image and you are attempting to create a particular look so don’t always rely on this in just the same manner as you don’t always trust the settings on the full AUTO mode. This is your image after all!
Manual mode gives access to super-long exposures for night time photography (or astro photography). The image below was taken in Bangkok using fully Manual mode. Note how most of the image is static (buildings, road, etc.) but the moving traffic is caught as a blur with their lights being the predominant element captured but you can see some ‘ghost’ parts of the car bodies. This type of night image is known as a ‘light trail’ image: